Saltar al contenido principal
Únete a la Comunidad de Reparación - Crear Cuenta

How to Fix iPad Touch Jumping/Glitching - Touch IC Replacement

Resumen del Video

    1. How to Fix iPad Touch Jumping/Glitching - Touch IC Replacement, Touch ID: paso 1, imagen 1 de 3 How to Fix iPad Touch Jumping/Glitching - Touch IC Replacement, Touch ID: paso 1, imagen 2 de 3 How to Fix iPad Touch Jumping/Glitching - Touch IC Replacement, Touch ID: paso 1, imagen 3 de 3
      • Today, we will share how to repair iPad touch jumping. The touch screen of the iPad is still jumping after the touch screen replacement.

      • It can be preliminarily judged that the problem is caused by a motherboard fault. Next, we need to check the motherboard. Detach the touch screen and display.

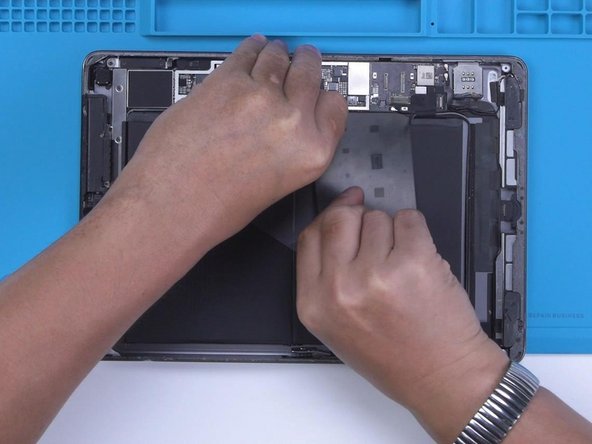
      • Remove the screw on the motherboard and insert a Pry Piece to disconnect the battery.

      Pregunta a FixBot

      Agregar Comentario

    2. How to Fix iPad Touch Jumping/Glitching - Touch IC Replacement: paso 2, imagen 1 de 2 How to Fix iPad Touch Jumping/Glitching - Touch IC Replacement: paso 2, imagen 2 de 2
      • Remove the screw on the motherboard and insert a Pry Piece to disconnect the battery. Measure the diode values of the two connectors with diode mode of the multimeter. The diode values are normal. It indicates that the circuit connecting the touch connectors to the touch IC is normal.

      Pregunta a FixBot

      Agregar Comentario

    3. How to Fix iPad Touch Jumping/Glitching - Touch IC Replacement: paso 3, imagen 1 de 3 How to Fix iPad Touch Jumping/Glitching - Touch IC Replacement: paso 3, imagen 2 de 3 How to Fix iPad Touch Jumping/Glitching - Touch IC Replacement: paso 3, imagen 3 de 3
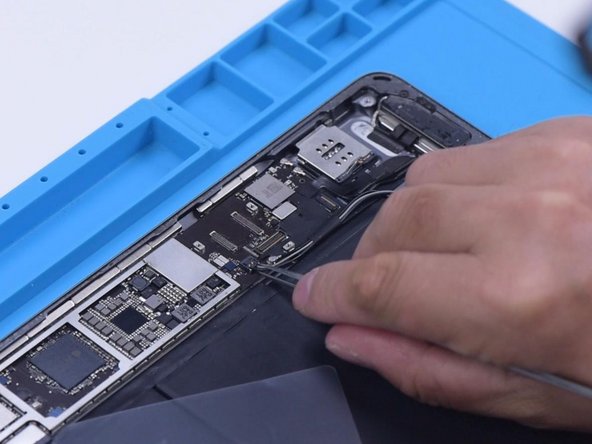
      • Then we try to replace the touch IC. Remove the shielding cover on the motherboard. Since there is another soldered shielding cover on the touch IC, we need to grind the shielding cover and then heat to remove. Grind the shielding cover with a Grinding Pen. Please pay attention not to damage the surrounding components while grinding.

      • Tear off the tape after grinding. Disconnect the flex cable. To prevent hard desoldering due to fast heat dissipation, pry up the motherboard with a metal blade.

      Pregunta a FixBot

      Agregar Comentario

    4. How to Fix iPad Touch Jumping/Glitching - Touch IC Replacement: paso 4, imagen 1 de 2 How to Fix iPad Touch Jumping/Glitching - Touch IC Replacement: paso 4, imagen 2 de 2
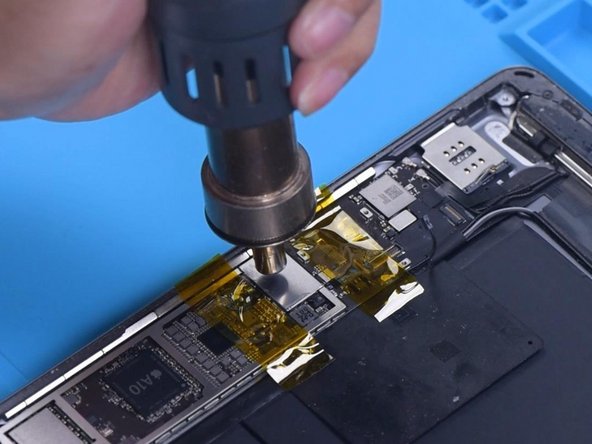
      • Protect nearby components with high-temperature tape. Apply some Paste Flux. Remove the shielding cover with the QUICK 861D Hot Air Gun at 400 °C and airflow 45.

      Pregunta a FixBot

      Agregar Comentario

    5. How to Fix iPad Touch Jumping/Glitching - Touch IC Replacement: paso 5, imagen 1 de 3 How to Fix iPad Touch Jumping/Glitching - Touch IC Replacement: paso 5, imagen 2 de 3 How to Fix iPad Touch Jumping/Glitching - Touch IC Replacement: paso 5, imagen 3 de 3
      • Apply some Paste Flux around the touch IC. Keep heating to remove the Touch IC. Apply some middle-temperature Solder Paste to the bonding pads with the Soldering Iron at 365 °C.

      Pregunta a FixBot

      Agregar Comentario

    6. How to Fix iPad Touch Jumping/Glitching - Touch IC Replacement: paso 6, imagen 1 de 1
      • Add heat with Hot Air Gun to clean the bonding pads. Keep cleaning the bonding pads with Solder Wick. Clean the bonding pads with PCB Cleaner.

      Pregunta a FixBot

      Agregar Comentario

    7. How to Fix iPad Touch Jumping/Glitching - Touch IC Replacement: paso 7, imagen 1 de 2 How to Fix iPad Touch Jumping/Glitching - Touch IC Replacement: paso 7, imagen 2 de 2
      • Apply some Paste Flux. Put a new touch IC in position. Heat with a hot air gun to solder.

      • After the motherboard has cooled, remove the high-temperature tape. Connect the flex cable. Install the screw. Then install the touch screen and display. Turn on the iPad. The touch screen has returned to normal. The touch jumping problem has disappeared.

      Pregunta a FixBot

      Agregar Comentario

Conclusión

To reassemble your device, follow these instructions in reverse order.

Cancelar: No complete esta guía.

3 personas más completaron esta guía.

REWA

Miembro Desde 11/24/20

19,537 Reputación

55 Guías creadas

0Guía Comentarios

Agregar Comentario

Ver Estadísticas:

Ultimas 24 horas: 5

Ultimos 7 días: 70

Ultimos 30 días: 268

Todo El Tiempo: 5,595