Introducción
Sigue esta guía para desconectar la batería de un iPad con una tarjeta de juego.
Si tienes problemas para colocar un bloqueador de batería debajo del conector de la batería en la placa base del iPad, puedes intentar usar una tarjeta de juego para desconectar la batería. Este procedimiento requiere cortar una tarjeta de juego a la medida.
Qué necesitas
-
-
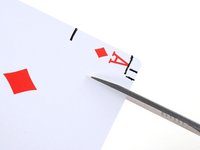
Alinee el borde izquierdo de una tarjeta de juego con el borde izquierdo del conector de la batería.
-
Utilice un bolígrafo para marcar ambos lados del orificio del tornillo y el extremo del conector de la batería como se muestra.
-
-
-
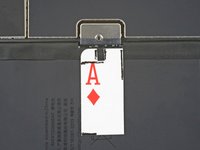
Alinee el borde superior de la tarjeta con el borde superior del orificio del tornillo.
-
Utilice un bolígrafo para marcar el borde inferior del conector de la batería.
-
-
-
-
Utilice un par de tijeras para cortar el bloqueador de batería de la carta de juego como se muestra.
-
-
-
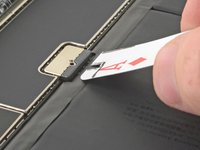
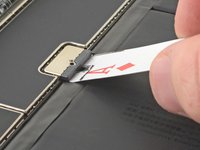
Inserte el bloqueador de batería en un ángulo de 35 grados para desconectar la batería.
-
Deje el bloqueador de batería en su lugar mientras trabaja.
-


Para volver a ensamblar el dispositivo, siga estas instrucciones en orden inverso.
Cancelar: No complete esta guía.
16 personas más completaron esta guía.
Un agradecimiento especial a estos traductores:
100%

¡ Angel nos está ayudando a reparar el mundo! ¿Quieres contribuir?
Empezar a traducir ›

3Guía Comentarios
Thanks Robert. Great easy to create tool and excellent explanation.
Hello Robert,
thank you for this useful tip.
Let me ask you this question:
I need to rectify a bent 9th gen iPad but after dismantling both the digitizer and the screen, I don't want to go further. The bent is located exactly aside the logic board screen connector.
All I want to do is try to fix the bent, therefore I need the iPad be free of movements. Since this article says the card needs to be kept in place, my question is is really mandatory that the card stays at 15 degrees or may I tape the card to the battery to avoid the card being accidentally removed?
I hope you can reply to my question.
Thank you