Saltar al contenido principal

How to Clean the HP DeskJet 3524 Printhead

Qué necesitas

  1. How to Clean the HP DeskJet 3524 Printhead, How to Clean the HP DeskJet 3524 Printhead: paso 1, imagen 1 de 3 How to Clean the HP DeskJet 3524 Printhead, How to Clean the HP DeskJet 3524 Printhead: paso 1, imagen 2 de 3 How to Clean the HP DeskJet 3524 Printhead, How to Clean the HP DeskJet 3524 Printhead: paso 1, imagen 3 de 3
    • Power on the printer.

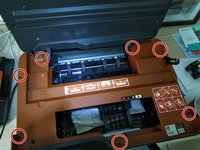
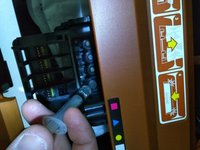
    • To access the cartridge door, locate the two tabs on the left and right side of the printer. Lift up on the tabs and the print wagon will move into the access area.

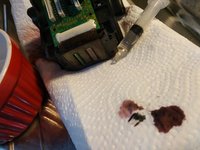
    • After the wagon is accessible, the print-head will center itself in the printer. Once it is centered, remove the ink cartridges. To do this, press on the front tab of each cartridge. After the cartridges are removed, wrap them in a paper towel and set them to the side.

    • With the print-head still accessible in the center, power off the printer and unplug the machine.

  2. How to Clean the HP DeskJet 3524 Printhead: paso 2, imagen 1 de 2 How to Clean the HP DeskJet 3524 Printhead: paso 2, imagen 2 de 2
    • Next, apply pressure on the "clean out door." The door will loosen and allow removal.

  3. How to Clean the HP DeskJet 3524 Printhead: paso 3, imagen 1 de 2 How to Clean the HP DeskJet 3524 Printhead: paso 3, imagen 2 de 2
    • Next, locate the seven torx screws (highlighted in red circles). To avoid confusion when reassembling later, we suggest drawing a picture of the printer and taping the screws to the image.

    • After removing the seven screws, loosen the lever from the scanner compartment.

  4. How to Clean the HP DeskJet 3524 Printhead: paso 4, imagen 1 de 3 How to Clean the HP DeskJet 3524 Printhead: paso 4, imagen 2 de 3 How to Clean the HP DeskJet 3524 Printhead: paso 4, imagen 3 de 3
    • Next, remove the orange cover. Use caution as the display unit is still attached to the cover. If you pull the cover off too quickly, you could tear the flat cable.

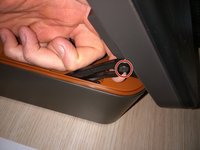
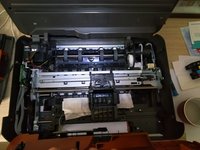
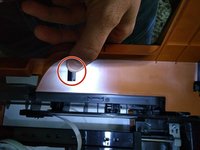
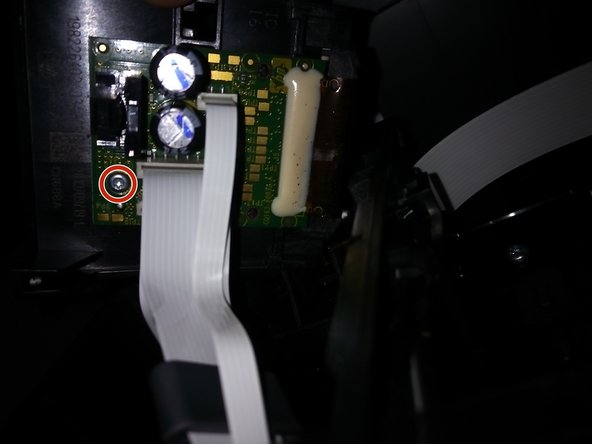
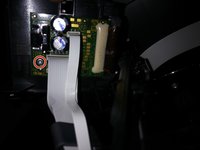
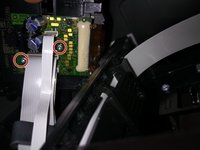
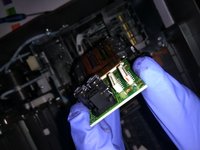
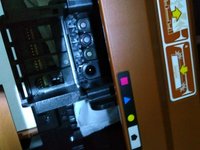
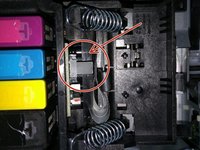
    • In the second and third pictures, you will see 2 black plastic buttons. Push on the buttons and the display unit will separate from the orange cover.

    • When reassembling, ensure the white flat ribbon cable is correctly attached. If it is not attached correctly, you will be unable to push the orange cover closed.

  5. How to Clean the HP DeskJet 3524 Printhead: paso 5, imagen 1 de 1
    • Next, locate the 2 iron springs and remove with pliers.

    • After removing the springs, gently remove the print-head, but not completely as the print-head is still attached to the printed circuit board (PCB).

  6. How to Clean the HP DeskJet 3524 Printhead: paso 6, imagen 1 de 3 How to Clean the HP DeskJet 3524 Printhead: paso 6, imagen 2 de 3 How to Clean the HP DeskJet 3524 Printhead: paso 6, imagen 3 de 3
    • The printed circuit board (PCB) is the flat green object perpendicular to the printer.

    • Gently remove the PCB by unscrewing the two torx screws (highlighted in red circles).

    • Prepare to remove the flat cables attached to the PCB. They are also connected to the print-head.

  7. How to Clean the HP DeskJet 3524 Printhead: paso 7, imagen 1 de 2 How to Clean the HP DeskJet 3524 Printhead: paso 7, imagen 2 de 2
    • There are 2 flat cables. To avoid confusion when reassembling, mark one to ensure the cables are correctly matched to the socket.

    • After making the necessary markers, gently pull the flat cables away from the socket.

  8. How to Clean the HP DeskJet 3524 Printhead: paso 8, imagen 1 de 3 How to Clean the HP DeskJet 3524 Printhead: paso 8, imagen 2 de 3 How to Clean the HP DeskJet 3524 Printhead: paso 8, imagen 3 de 3
    • Because the next steps involve water, we suggest cleaning the print-head over the sink. Before you begin, gather the following: 2 bowls of water (one with distilled water and one with regular water), cotton swabs, syringe, and paper towels.

    • Fill the syringe with distilled water and spray the small holes on the print-head. Use the cotton swabs to scrub and clean the crevices.

    • Please note: You will only use the distilled water to clean the device. The regular bowl of water is used for cleaning the syringe.

  9. How to Clean the HP DeskJet 3524 Printhead: paso 9, imagen 1 de 3 How to Clean the HP DeskJet 3524 Printhead: paso 9, imagen 2 de 3 How to Clean the HP DeskJet 3524 Printhead: paso 9, imagen 3 de 3
    • Please note: It is important that you do not spill distilled water or regular water on the PCB. Use a cotton swab to clean around the PCB.

    • If you spill any water on the PCB, immediately clean the PCB with isopropyl alcohol.

    • After cleaning the print-head, allow the device to air dry for a few hours.

    • In the last picture, you will see 4 black spots in the water. That is hard, dried ink which caused my printing problem.

  10. How to Clean the HP DeskJet 3524 Printhead: paso 10, imagen 1 de 2 How to Clean the HP DeskJet 3524 Printhead: paso 10, imagen 2 de 2
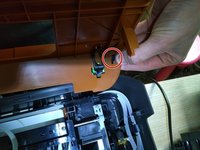
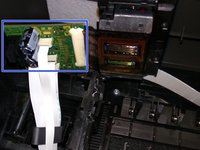
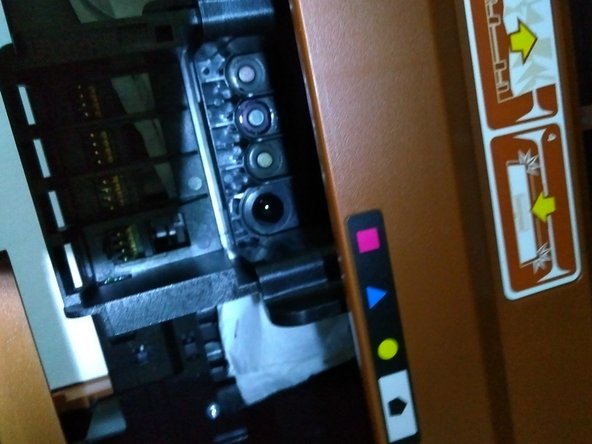
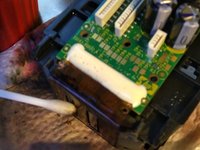
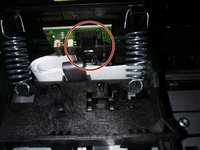
    • When reassembling the print-head, ensure the black lint is under the black connector (see photo). If the blink lint is above the connector, you will receive a "wagon error" code. The wagon will essentially hit the right side of the printer, unable to go tot he left side.

    • After the printer is reassembled, print an "alignment page" and a "cleaning print head page."

Conclusión

To reassemble your device, follow these instructions in reverse order.

10 personas más completaron esta guía.

Kevin D

Miembro Desde 05/02/14

7,276 Reputación

21 Guías creadas

5 comentarios

I put the head back and reassembled correctly , but the carriage goes left and few cms and returned hitting right side , repeats twice and shows carriage jam error.The transparent ribbon is in right slot.The gears roll noisy before stopping.

Bejoy Thomas - Contestar

Had the same issue. Were you able to resolve?

joycecamara888 -

Hi Thomas,

Did you checked the black ribbon/ lint is in the correct place?

did you reset the printer ?

also check this page : https://h30434.www3.hp.com/t5/Inkjet-Pri...

Kevin D - Contestar

This is a great guide. Very clear and easy to follow. You might want to add something about freeing the restraining arm on the cover.

Stephen F - Contestar

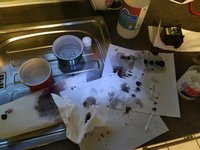
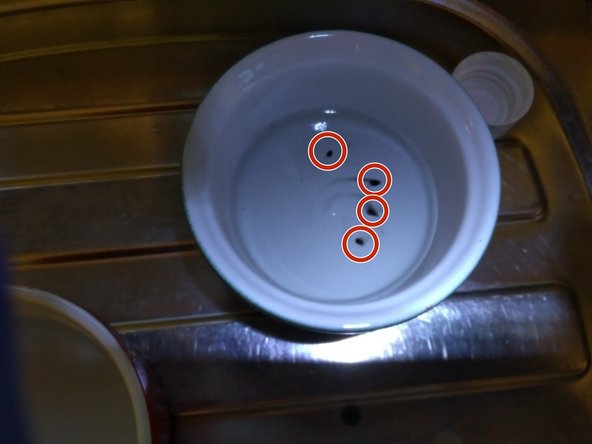
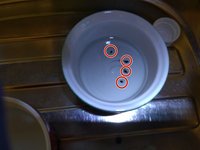
Thanks for this guide. I used it on my HP3525. I added one step which was to put a few millimeters of distilled water in a small dish and stood the printheads in the water for a few minutes then I gently lifted and lowered the printheads. The amount of black ink that came off was amazing. My first print was almost perfect.

Ken Brown - Contestar

Agregar Comentario

Ver Estadísticas:

Ultimas 24 horas: 2

Ultimos 7 días: 14

Ultimos 30 días: 53

Todo El Tiempo: 8,584