Introducción
This guide shows how to apply custom-cut battery adhesive when you replace a battery.
The guide uses a Samsung Galaxy phone for demonstration purposes. If you're following this guide for other phones, the adhesives will look slightly different, but the procedure will be the same.
If you are using double-sided tape instead, use this guide as a general guideline for where to apply the tape.
Qué necesitas
-
-
Remove any remaining adhesive from the phone frame, and clean the glued areas with isopropyl alcohol and a lint-free cloth.
-
-
-
-
If your pre-cut adhesive has pull tabs facing the center hole, the adhesive will attach to the phone's battery well first.
-
If your pre-cut adhesive strip has pull tabs on the outer perimeter, the adhesive will attach to the battery first.
-
Peel the clear plastic liner off of the pre-cut adhesive strip, exposing the adhesive.
-
Line up a long edge of the adhesive with the proper surface, as determined above.
-
Carefully set the adhesive down on the surface.
-
-
-
Once the adhesive is aligned, use your fingers to press the adhesive into place.
-
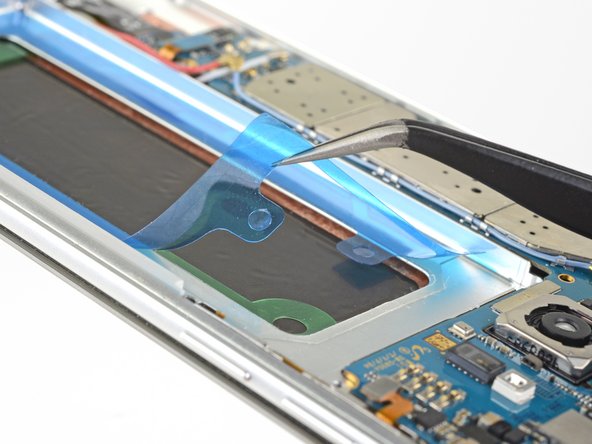
When you are ready to stick the battery onto the frame, carefully peel away the blue plastic liner to expose the adhesive.
-
Set the battery lightly in place.
-
Plug in the battery connector temporarily to ensure that the cable reaches the socket.
-
Press the battery perimeter firmly with your fingers to help the adhesive bond.
-
Disconnect the battery before resuming re-assembly.
-


For optimal performance, after completing this guide, calibrate your newly installed battery.
For optimal performance, after completing this guide, calibrate your newly installed battery.
Cancelar: No complete esta guía.
144 personas más completaron esta guía.


20 comentarios
Fantastic job on the instructions ! I only wish I was able to find a solution, for removing the original glue from the back cover.
That is all I have left to do, and I have been unsuccessful for 6 to 8 hours of trying to find a way to get it off.
Hey Lee,
Your best chance is using high concentration (over 90%) isopropyl alcohol . If you can’t get the surface completely clean, that’s alright. Just try to get all large adhesive residue off, so that the battery and new adhesive will lie flat in the battery well.
I accidentally rubbed off some of the black paste thing under the battery when cleaning it for the new battery adhesive strip. Should I be worried??
Hi Henry,
The black paste is possibly the graphite pad stuck onto the back of the display, which channels heat from the phone to dissipate through the display. There shouldn’t be any damage to your phone!
Hi Arthur,
A big respect & thank you for the instruction to replace the battery. I couldn't be more happier because I did it myself thanks to you & ifixit team. It only took 30 minutes from start to finish. Just waiting on the back glass to arrive other wise excellent job on your side and awesome job to ifixit. I will have to buy higher concentration of isopropyl to wipe those big adhesive before I put the glass.