Saltar al contenido principal

How To Replace Burners on Weber Genesis II Grill

Qué necesitas

  1. How To Replace Burners on Weber Genesis II Grill, Burners: paso 1, imagen 1 de 3 How To Replace Burners on Weber Genesis II Grill, Burners: paso 1, imagen 2 de 3 How To Replace Burners on Weber Genesis II Grill, Burners: paso 1, imagen 3 de 3
    • This is the Weber Genesis II grill. Before replacement of the burner, we will start by cleaning the grates with a grill brush in order to be clean and safe.

    • Make sure that the grill is completely turned off so there is no chance of accidental burn.

  2. How To Replace Burners on Weber Genesis II Grill: paso 2, imagen 1 de 3 How To Replace Burners on Weber Genesis II Grill: paso 2, imagen 2 de 3 How To Replace Burners on Weber Genesis II Grill: paso 2, imagen 3 de 3
    • Remove the grates using your hands.

    • Grab on each side of the grill grate with your hands and lift straight upwards.

    • Set the removed grate off to the side of the grill.

    • Repeat this procedure for all three of the grates on top of the grill.

  3. How To Replace Burners on Weber Genesis II Grill: paso 3, imagen 1 de 3 How To Replace Burners on Weber Genesis II Grill: paso 3, imagen 2 de 3 How To Replace Burners on Weber Genesis II Grill: paso 3, imagen 3 de 3
    • Remove the heat deflector plates from on top of the burners.

    • Grab each deflector plate and pull straight upwards as with the grates.

    • Place the removed heat deflector plates off to the side of the grill.

    • Repeat this procedure for all heat deflector plates until each burner is exposed.

    • Only half of the heat deflectors plates will have burners underneath them. So do not be alarmed when not all plates have a burner.

  4. How To Replace Burners on Weber Genesis II Grill: paso 4, imagen 1 de 3 How To Replace Burners on Weber Genesis II Grill: paso 4, imagen 2 de 3 How To Replace Burners on Weber Genesis II Grill: paso 4, imagen 3 de 3
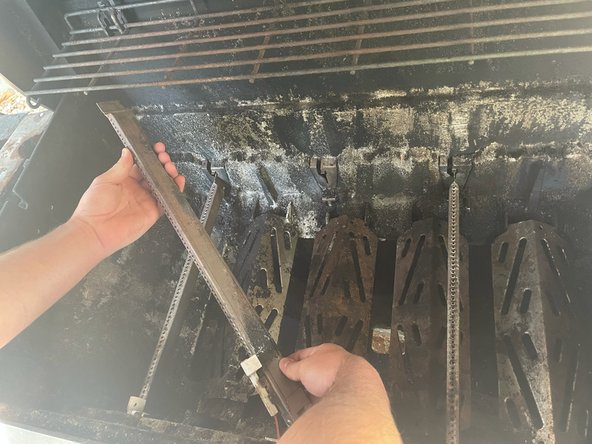
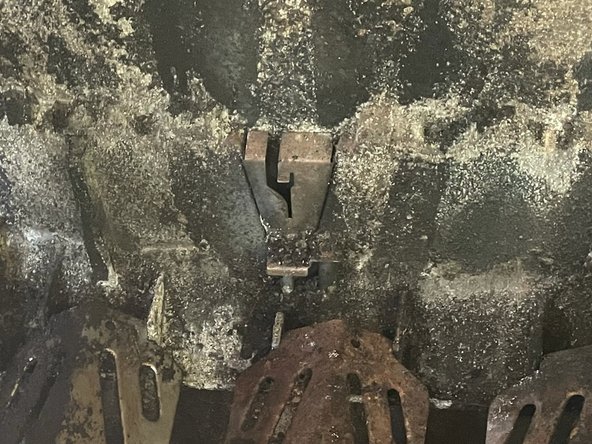
    • Remove the burner from its slot in the back of the grill.

    • With both hands, carefully pull the burner upwards and slightly to the left in order to pull it out of its slot.

    • The burners can become stuck and require a little extra force to pull out, but do not pull too hard and hit the top of the grill or yourself.

    • If replacing all burners, repeat this procedure to remove all burners from their slots.

  5. How To Replace Burners on Weber Genesis II Grill: paso 5, imagen 1 de 3 How To Replace Burners on Weber Genesis II Grill: paso 5, imagen 2 de 3 How To Replace Burners on Weber Genesis II Grill: paso 5, imagen 3 de 3
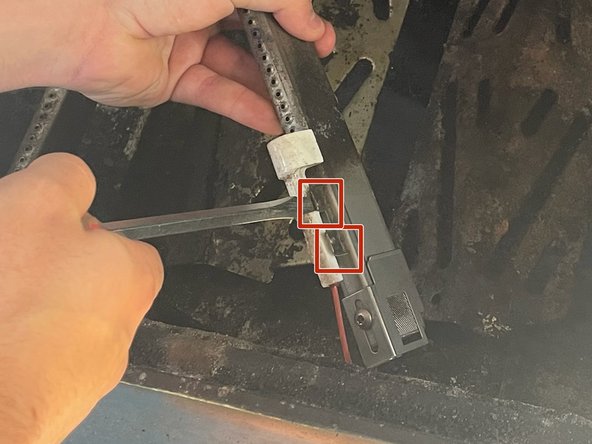
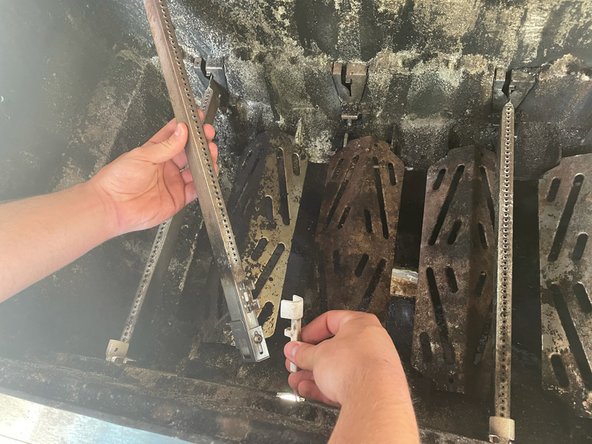
    • Detach the burner from the ignition device.

    • With a small wedge, such as a flat-head screwdriver, unclip the white connector from the burner.

    • With the ignition device removed, you are now all set to replace the burner with a new one.

Conclusión

To reassemble your device, follow these instructions in reverse order.

2 personas más completaron esta guía.

Nicholas Brown

Miembro Desde 03/24/21

175 Reputación

1 Guía escrita

Equipo

0 comentarios

Agregar Comentario

Ver Estadísticas:

Ultimas 24 horas: 10

Ultimos 7 días: 70

Ultimos 30 días: 282

Todo El Tiempo: 8,497