Saltar al contenido principal

Esta guía ha sufrido modificaciones. Revisa la última versión sin revisar.

Hover-1 Ultra Charging Port Replacement

Qué necesitas

  1. Hover-1 Ultra Charging Port Replacement, Charging Port: paso 1, imagen 1 de 3 Hover-1 Ultra Charging Port Replacement, Charging Port: paso 1, imagen 2 de 3 Hover-1 Ultra Charging Port Replacement, Charging Port: paso 1, imagen 3 de 3
    • Orient the hoverboard so that the pads are facing down.

    • With the Phillips #1 screwdriver, remove all 18 of the screws on the underside of the board.

    • Carefully remove the shell, lifting directly up.

  2. Hover-1 Ultra Charging Port Replacement: paso 2, imagen 1 de 2 Hover-1 Ultra Charging Port Replacement: paso 2, imagen 2 de 2
    • Using your hands or a crescent wrench, begin removing the charging port.

    • Turn the charging port counter-clockwise to release it from the shell.

  3. Hover-1 Ultra Charging Port Replacement: paso 3, imagen 1 de 3 Hover-1 Ultra Charging Port Replacement: paso 3, imagen 2 de 3 Hover-1 Ultra Charging Port Replacement: paso 3, imagen 3 de 3
    • Unclip the insulated red and black wires attached to the port from the motherboard

  4. Hover-1 Ultra Charging Port Replacement: paso 4, imagen 1 de 3 Hover-1 Ultra Charging Port Replacement: paso 4, imagen 2 de 3 Hover-1 Ultra Charging Port Replacement: paso 4, imagen 3 de 3
    • Remove the charging port through the assembly.

    • Place new charging port through the assembly.

    • Clip red and black insulated wires into the motherboard.

Conclusión

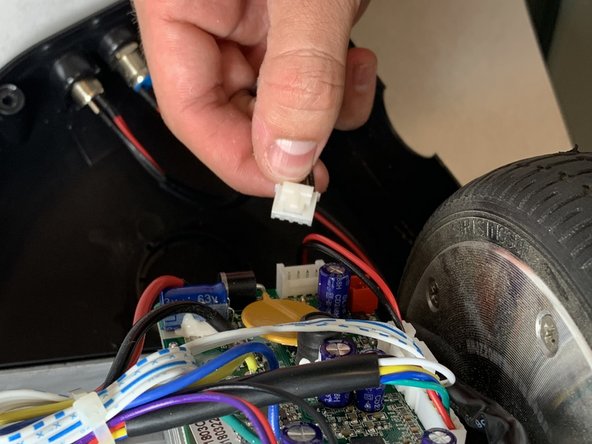
To reassemble your device, follow the instructions for step 1 in reverse order.

3 personas más completaron esta guía.

Camron Clifton

Miembro Desde 10/22/18

409 Reputación

3 Guías creadas

Equipo

UC Davis, Team S7-G5, Lore Fall 2018 Miembro de UC Davis, Team S7-G5, Lore Fall 2018

UCD-LORE-F18S7G5

3 Miembros

3 Guías creadas

0 comentarios

Agregar Comentario

Ver Estadísticas:

Ultimas 24 horas: 0

Ultimos 7 días: 1

Ultimos 30 días: 6

Todo El Tiempo: 727