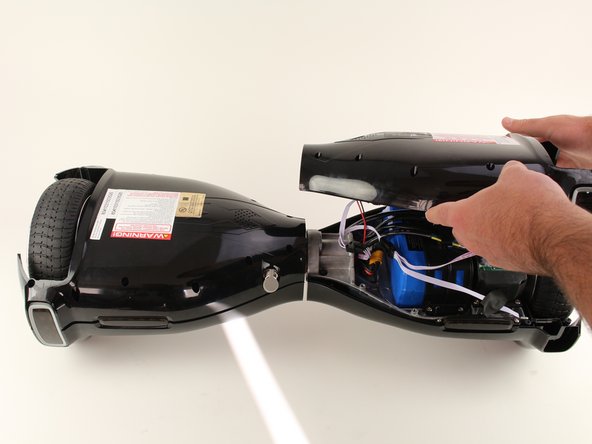
Saltar al contenido principal

Hover-1 H1 Shell Replacement

Qué necesitas

  1. Hover-1 H1 Shell Replacement, Bottom Shell: paso 1, imagen 1 de 1
    • Remove the ten 9mm machine screws by using a long Phillips #2 screwdriver to rotate the screws counterclockwise.

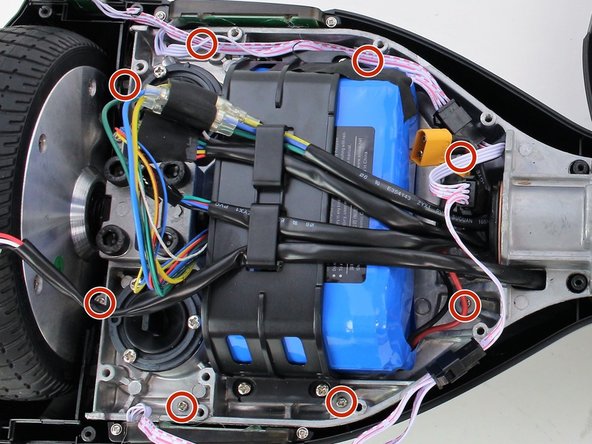
    • Remove the twelve 9mm sheet metal screws by using a long Phillips #2 screwdriver to rotate the screws counterclockwise.

  2. Hover-1 H1 Shell Replacement: paso 2, imagen 1 de 1
    • Puncture the two black stickers by using the tip of a screwdriver.

    • Remove the two 9mm machine screws by using a long Phillips #2 screwdriver to rotate the screws counterclockwise.

  3. Hover-1 H1 Shell Replacement: paso 3, imagen 1 de 2 Hover-1 H1 Shell Replacement: paso 3, imagen 2 de 2
    • Lift each side of the bottom shell by pulling up.

    • When lifting the shell, take care to not tear any cables from their connectors.

  4. Hover-1 H1 Shell Replacement: paso 4, imagen 1 de 1
    • Unplug the battery by pulling gently on both sides of the orange connector.

  5. Hover-1 H1 Shell Replacement, LED Headlights: paso 5, imagen 1 de 1
    • Unplug the lights from the battery by pulling gently on both sides of the black connector attached to the white wires.

  6. Hover-1 H1 Shell Replacement: paso 6, imagen 1 de 1
    • Remove the vertical light from the shell by using your hands to pull it free from the surrounding shell.

  7. Hover-1 H1 Shell Replacement: paso 7, imagen 1 de 1
    • Remove two 8mm screws using a Phillips #0 screwdriver to rotate the screws counterclockwise.

    • Remove the horizontal light by using your fingers to pull the light up out of the shell.

  8. Hover-1 H1 Shell Replacement, Charging Port: paso 8, imagen 1 de 2 Hover-1 H1 Shell Replacement, Charging Port: paso 8, imagen 2 de 2
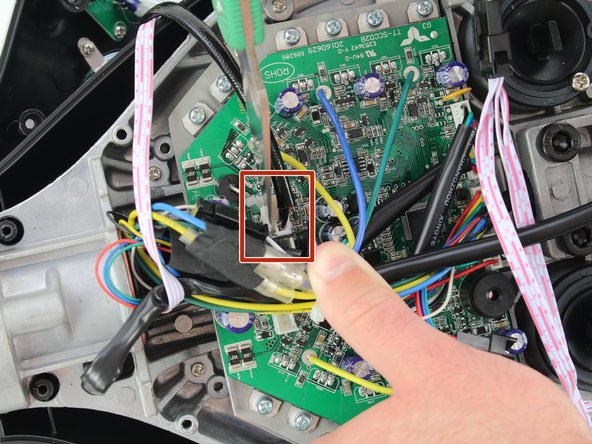
    • Using a utility knife, scratch off the hot glue from the connector attaching the red and black wires to the motherboard.

    • Be careful to not damage the wires or connector when removing the glue.

  9. Hover-1 H1 Shell Replacement: paso 9, imagen 1 de 1
    • Remove the charging port connector from the motherboard by squeezing the connector and pulling the connector up.

  10. Hover-1 H1 Shell Replacement: paso 10, imagen 1 de 2 Hover-1 H1 Shell Replacement: paso 10, imagen 2 de 2
    • Using an adjustable wrench, unscrew the nut that is attaching the charging port to the bottom shell.

    • It might be helpful to put the charger in the charging port while unscrewing the nut to ensure that the port is not spinning.

  11. Hover-1 H1 Shell Replacement: paso 11, imagen 1 de 2 Hover-1 H1 Shell Replacement: paso 11, imagen 2 de 2
    • Pull the charging port to the left through the shell.

  12. Hover-1 H1 Shell Replacement, Power Button: paso 12, imagen 1 de 1
    • Unplug the power button connector by pinching the tab on the front and pulling directly upwards.

    • Pull the cable through the center section of the hoverboard.

    • For reassembly, you will have to feed the cable back through the center section. This can be done using a rigid wire or cable.

  13. Hover-1 H1 Shell Replacement: paso 13, imagen 1 de 2 Hover-1 H1 Shell Replacement: paso 13, imagen 2 de 2
    • Using an adjustable wrench, remove the nut on the back of the power button by rotating the nut counterclockwise.

  14. Hover-1 H1 Shell Replacement: paso 14, imagen 1 de 1
    • Pull the power button through the hole in the shell.

  15. Hover-1 H1 Shell Replacement, Shell: paso 15, imagen 1 de 3 Hover-1 H1 Shell Replacement, Shell: paso 15, imagen 2 de 3 Hover-1 H1 Shell Replacement, Shell: paso 15, imagen 3 de 3
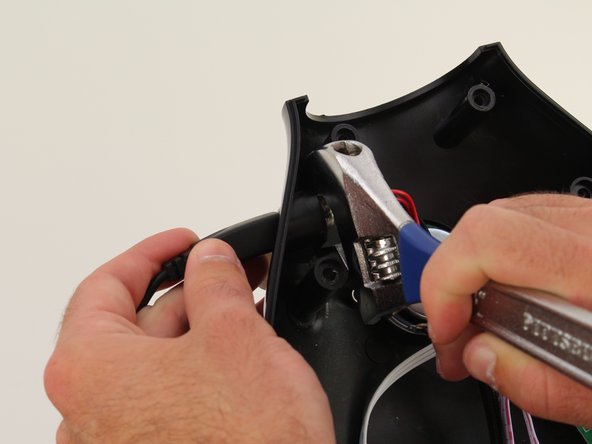
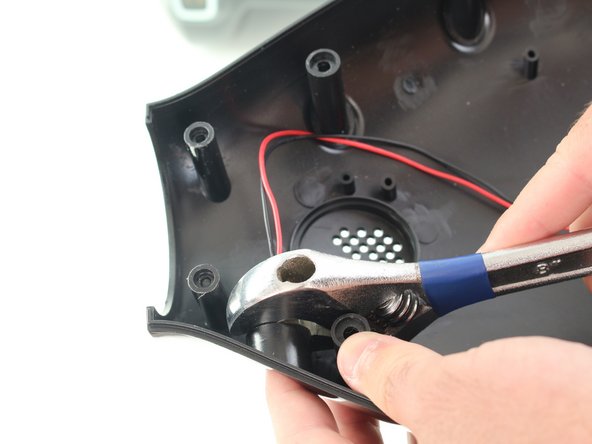
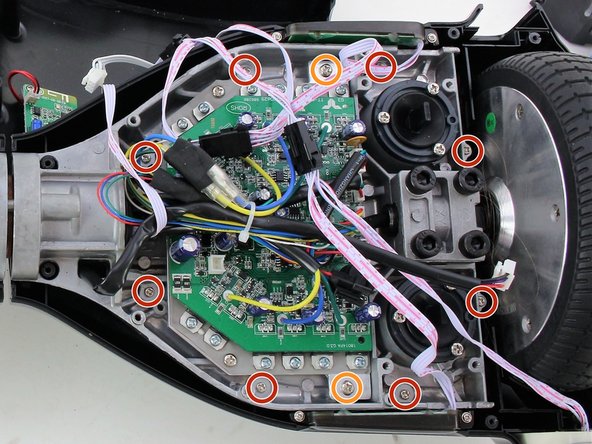
    • Remove the sixteen 10mm Phillips #2 machine screws by using a screwdriver to rotate the screws counterclockwise.

    • Remove the two 12mm Phillips #2 machine screws by using a screwdriver to rotate the screws counterclockwise.

  16. Hover-1 H1 Shell Replacement: paso 16, imagen 1 de 1
    • Lift both the left and right sides of the top half of the shell from the hoverboard's chassis.

  17. Hover-1 H1 Shell Replacement: paso 17, imagen 1 de 1
    • Remove the two 8mm Phillips #0 screws on the right half of the shell by using a screwdriver to rotate the screws counterclockwise.

    • Repeat for the left side of the shell.

  18. Hover-1 H1 Shell Replacement: paso 18, imagen 1 de 1
    • Lift the shell to remove it from the chassis.

Conclusión

To reassemble your device, follow these instructions in reverse order.

Una persona más ha completado esta guía.

Sara Passantino

Miembro Desde 10/08/18

347 Reputación

2 Guías creadas

Equipo

Cal Poly, Team S17-G6, White Fall 2018 Miembro de Cal Poly, Team S17-G6, White Fall 2018

CPSU-WHITE-F18S17G6

4 Miembros

7 Guías creadas

0 comentarios

Agregar Comentario

Ver Estadísticas:

Ultimas 24 horas: 0

Ultimos 7 días: 0

Ultimos 30 días: 13

Todo El Tiempo: 1,217