Saltar al contenido principal

Honda FC600 Tiller Carburetor Replacement

Qué necesitas

  1. Honda FC600 Tiller Carburetor Replacement, Remove the Spark Plug Cap: paso 1, imagen 1 de 3 Honda FC600 Tiller Carburetor Replacement, Remove the Spark Plug Cap: paso 1, imagen 2 de 3 Honda FC600 Tiller Carburetor Replacement, Remove the Spark Plug Cap: paso 1, imagen 3 de 3
    • Before you begin, it's important that you completely cut power to the tiller by disconnecting the spark plug. This will prevent the engine from accidentally starting up while you're working on the tiller.

    • Grab the spark plug cap and pull it straight out to disconnect the spark plug from the engine.

  2. Honda FC600 Tiller Carburetor Replacement, Remove the Air Filter Cover: paso 2, imagen 1 de 1
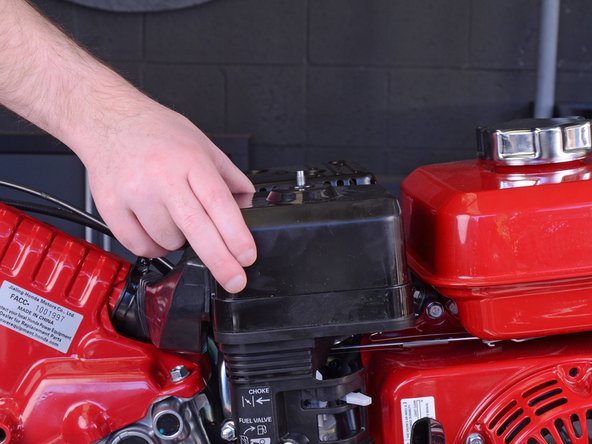
    • Use your fingers to unscrew and remove the wing nut securing the air filter cover to the air filter elbow.

  3. Honda FC600 Tiller Carburetor Replacement: paso 3, imagen 1 de 2 Honda FC600 Tiller Carburetor Replacement: paso 3, imagen 2 de 2
    • Lift up and remove the air filter cover to reveal the air filter.

    • The air filter cover will still be attached to the tiller by a flexible hose. You can push the cover to the side while you continue to work on the tiller, or follow the next two steps to completely remove the cover.

  4. Honda FC600 Tiller Carburetor Replacement, Detach the Air Filter Cover: paso 4, imagen 1 de 2 Honda FC600 Tiller Carburetor Replacement, Detach the Air Filter Cover: paso 4, imagen 2 de 2
    • The next two steps are optional, but they will make it easier to work on the tiller from here on out.

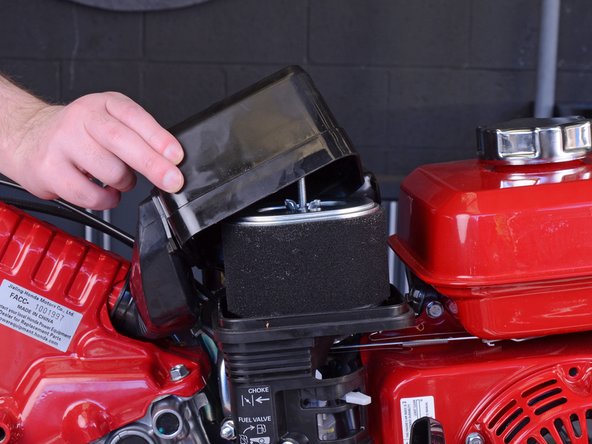
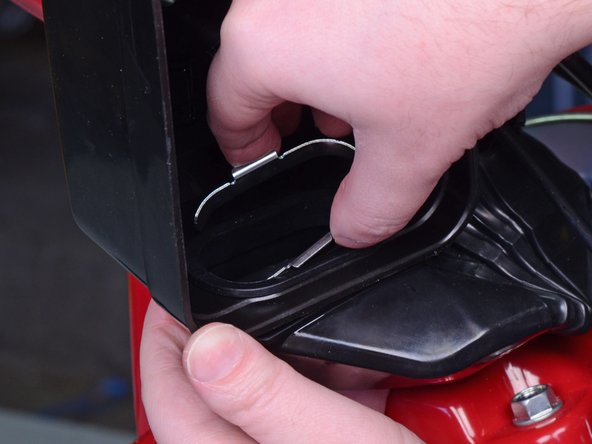
    • Squeeze the metal clip on the inside of the air filter cover and remove it.

  5. Honda FC600 Tiller Carburetor Replacement: paso 5, imagen 1 de 2 Honda FC600 Tiller Carburetor Replacement: paso 5, imagen 2 de 2
    • Hold onto the air filter hose and pull on the air filter cover to remove it.

  6. Honda FC600 Tiller Carburetor Replacement, Remove the Air Filter: paso 6, imagen 1 de 1
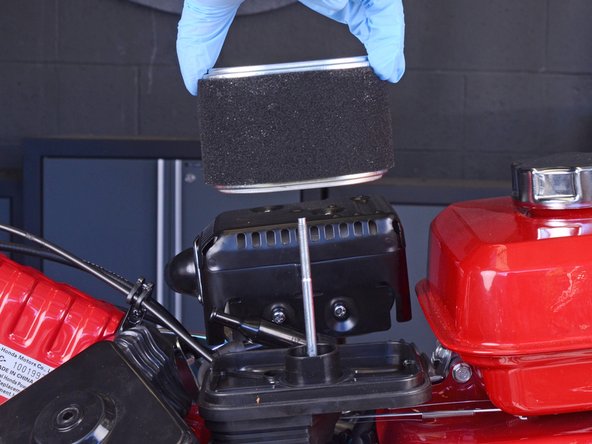
    • Use your fingers to unscrew and remove the wing nut securing the air filter to the air filter elbow.

  7. Honda FC600 Tiller Carburetor Replacement: paso 7, imagen 1 de 2 Honda FC600 Tiller Carburetor Replacement: paso 7, imagen 2 de 2
    • Wear gloves or use a rag during this step, as the air filter is coated with oil.

    • Lift the air filter straight up off the elbow, making sure it clears the threaded rod.

  8. Honda FC600 Tiller Carburetor Replacement, Remove the Air Filter Elbow: paso 8, imagen 1 de 1
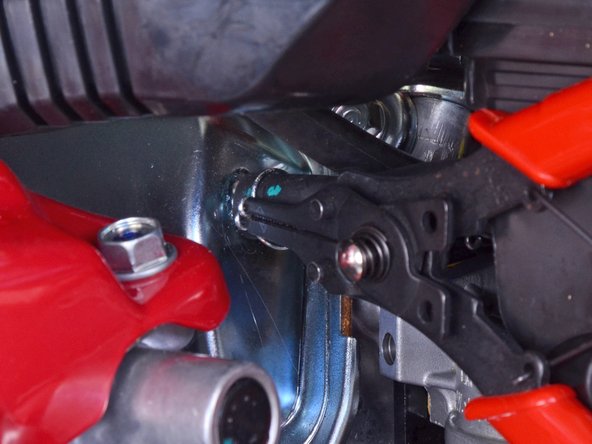
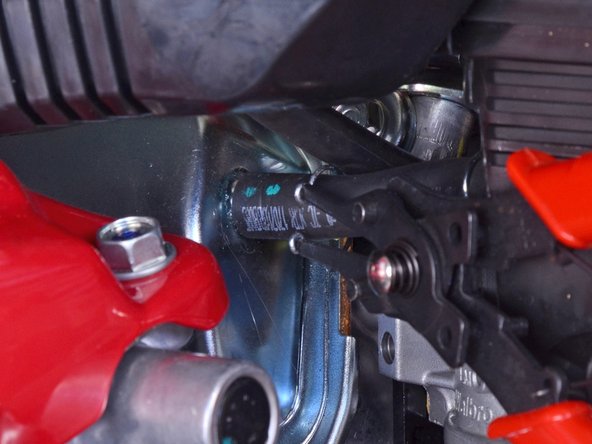
    • Use a 10 mm socket and socket wrench to remove the 25.5 mm-long bolt securing the air filter elbow to the tiller.

  9. Honda FC600 Tiller Carburetor Replacement: paso 9, imagen 1 de 1
    • Use a 10 mm socket and socket wrench to remove the two nuts securing the air filter elbow to the carburetor's threaded rods.

  10. Honda FC600 Tiller Carburetor Replacement: paso 10, imagen 1 de 3 Honda FC600 Tiller Carburetor Replacement: paso 10, imagen 2 de 3 Honda FC600 Tiller Carburetor Replacement: paso 10, imagen 3 de 3
    • Use a pair of snap ring pliers to loosen the spring hose clamp on the breather tube, pulling it out 2-3 cm so it's not clamping onto the end of the tube.

  11. Honda FC600 Tiller Carburetor Replacement: paso 11, imagen 1 de 2 Honda FC600 Tiller Carburetor Replacement: paso 11, imagen 2 de 2
    • Pull the air filter elbow straight off, making sure it clears the carburetor's threaded rods.

    • As you remove the elbow, you may need to use your other hand to remove the breather tube from the engine's valve cover.

  12. Honda FC600 Tiller Carburetor Replacement, Remove the Carburetor Spacer: paso 12, imagen 1 de 2 Honda FC600 Tiller Carburetor Replacement, Remove the Carburetor Spacer: paso 12, imagen 2 de 2
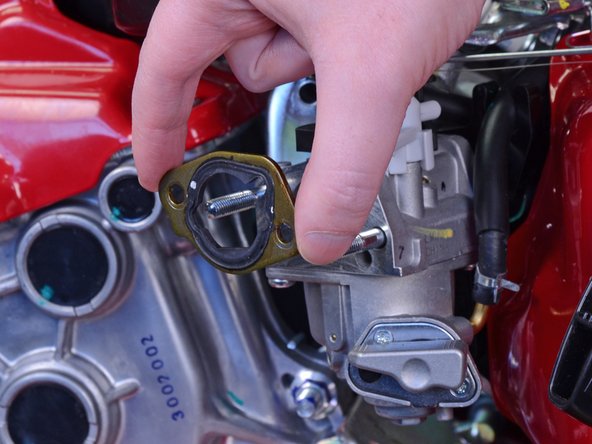
    • Pull the carburetor spacer straight off, making sure it clears the threaded rods.

  13. Honda FC600 Tiller Carburetor Replacement, Remove the Choke Lever: paso 13, imagen 1 de 2 Honda FC600 Tiller Carburetor Replacement, Remove the Choke Lever: paso 13, imagen 2 de 2
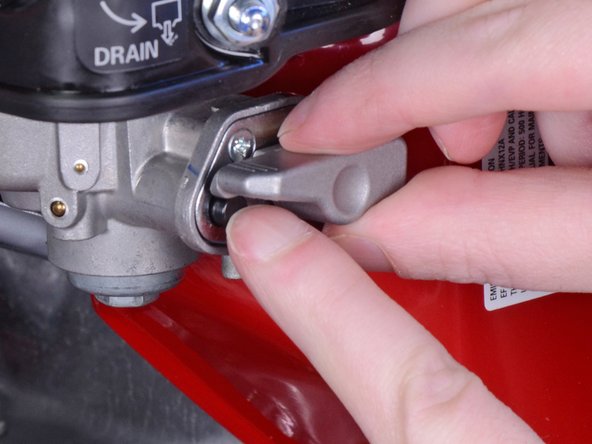
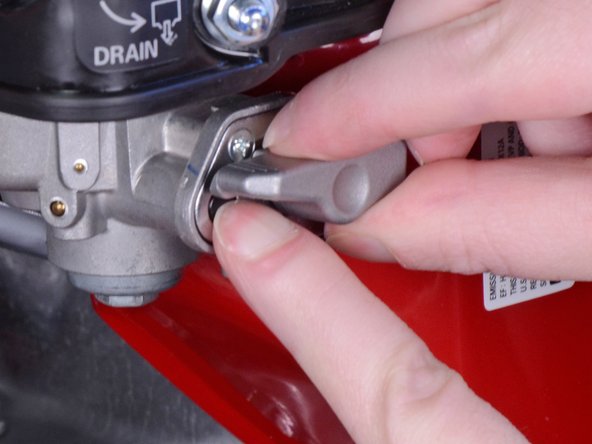
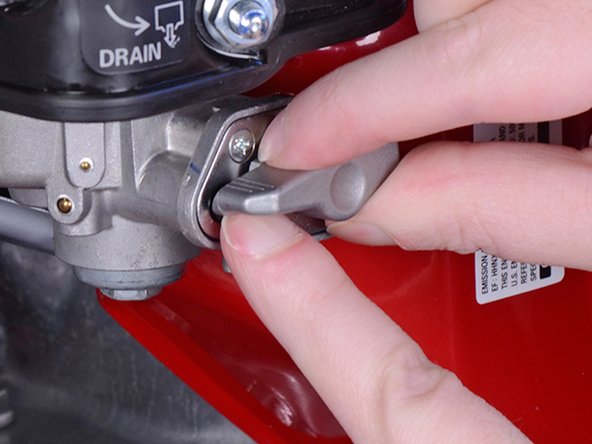
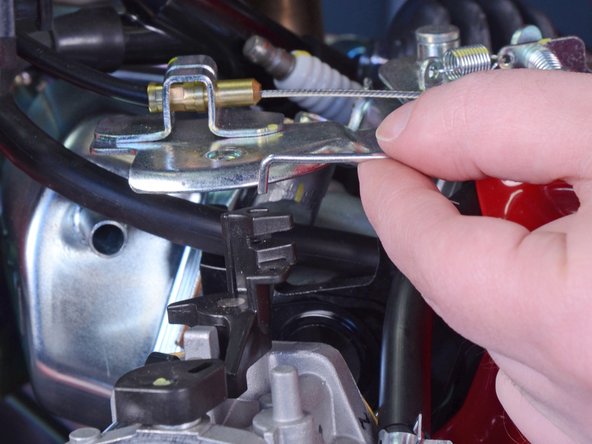
    • Pull the choke lever straight up to remove it from the carburetor.

  14. Honda FC600 Tiller Carburetor Replacement, Drain the Gasoline from the Carburetor: paso 14, imagen 1 de 3 Honda FC600 Tiller Carburetor Replacement, Drain the Gasoline from the Carburetor: paso 14, imagen 2 de 3 Honda FC600 Tiller Carburetor Replacement, Drain the Gasoline from the Carburetor: paso 14, imagen 3 de 3
    • The next two steps demonstrate how to empty gasoline out of the carburetor before removal.

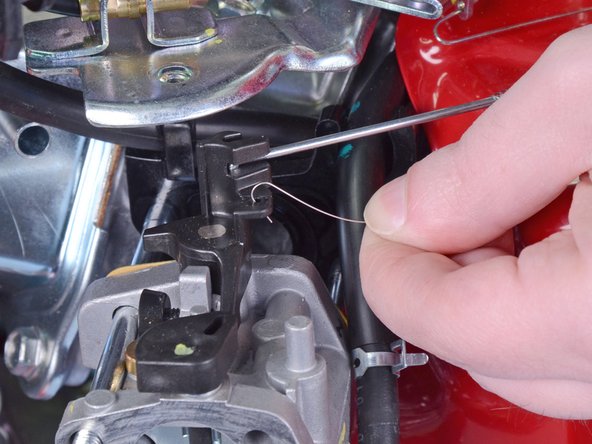
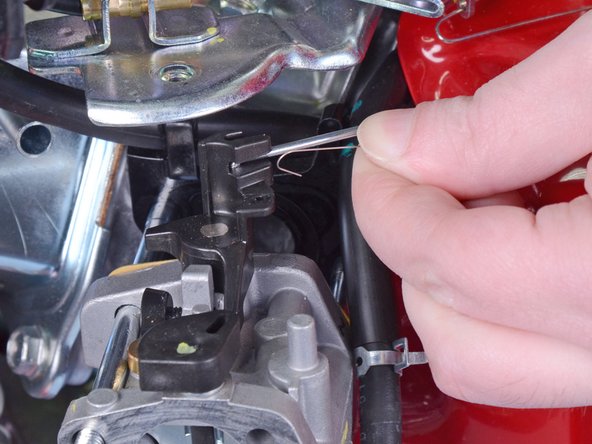
    • Press and hold down the fuel valve's safety lock button.

    • Begin to turn the fuel valve knob counter-clockwise, continuing to hold down the safety lock button until the knob clears the button.

  15. Honda FC600 Tiller Carburetor Replacement: paso 15, imagen 1 de 2 Honda FC600 Tiller Carburetor Replacement: paso 15, imagen 2 de 2
    • Place a small gasoline-safe container under the drain spout.

    • Turn the fuel valve knob counter-clockwise until it faces downward to drain any gasoline that may be remaining in the carburetor.

  16. Honda FC600 Tiller Carburetor Replacement, Disconnect the Fuel Supply Hose: paso 16, imagen 1 de 3 Honda FC600 Tiller Carburetor Replacement, Disconnect the Fuel Supply Hose: paso 16, imagen 2 de 3 Honda FC600 Tiller Carburetor Replacement, Disconnect the Fuel Supply Hose: paso 16, imagen 3 de 3
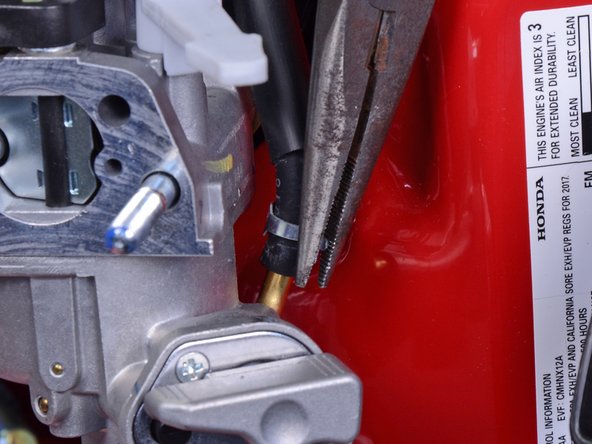
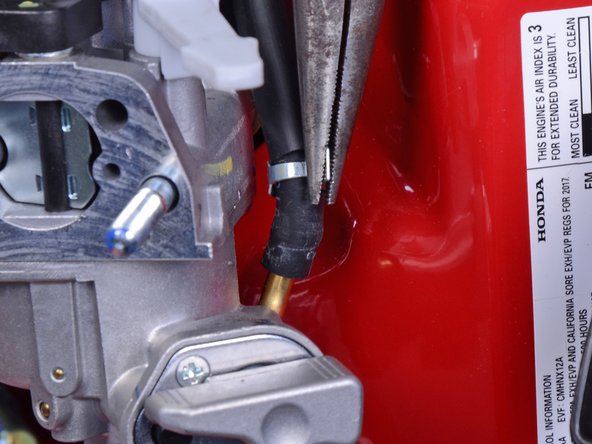
    • Use a pair of needle nose pliers to squeeze and loosen the spring hose clamp on the fuel supply hose.

    • Move the clamp up 2-3 cm so it's not clamping down onto the end of the tube.

  17. Honda FC600 Tiller Carburetor Replacement: paso 17, imagen 1 de 2 Honda FC600 Tiller Carburetor Replacement: paso 17, imagen 2 de 2
    • Wear gloves or use a rag during this step, as gasoline will begin to drain out once you remove the hose.

    • If you didn't completely drain the fuel tank beforehand, have a gasoline-safe container ready to catch the gasoline as it drains out of the hose.

    • Grab onto the end of the fuel supply hose and pull it straight up to disconnect it from the carburetor.

  18. Honda FC600 Tiller Carburetor Replacement, Disconnect the Throttle Spring and Governor Rod: paso 18, imagen 1 de 2 Honda FC600 Tiller Carburetor Replacement, Disconnect the Throttle Spring and Governor Rod: paso 18, imagen 2 de 2
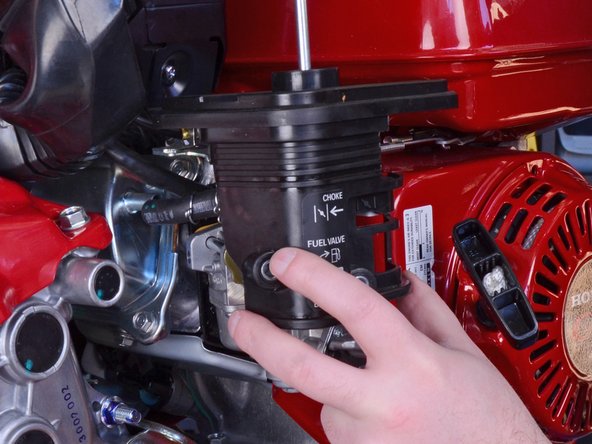
    • Pull the carburetor halfway out, but do not completely remove it yet.

  19. Honda FC600 Tiller Carburetor Replacement: paso 19, imagen 1 de 3 Honda FC600 Tiller Carburetor Replacement: paso 19, imagen 2 de 3 Honda FC600 Tiller Carburetor Replacement: paso 19, imagen 3 de 3
    • Grab the throttle return spring and push it down to point the tip of the hook downward.

    • Apply an upward motion to lift the tip of the hook out of its connector on the carburetor.

  20. Honda FC600 Tiller Carburetor Replacement: paso 20, imagen 1 de 2 Honda FC600 Tiller Carburetor Replacement: paso 20, imagen 2 de 2
    • Grab the governor rod and lift it straight up to remove it from the carburetor.

  21. Honda FC600 Tiller Carburetor Replacement, Remove the Carburetor: paso 21, imagen 1 de 2 Honda FC600 Tiller Carburetor Replacement, Remove the Carburetor: paso 21, imagen 2 de 2
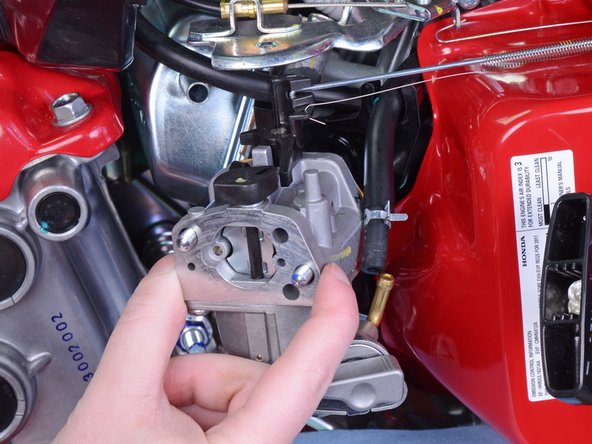
    • Pull the carburetor straight off of the threaded rods to remove it.

  22. Honda FC600 Tiller Carburetor Replacement: paso 22, imagen 1 de 1
    • The outlet on the rear of the carburetor has a thin gasket. Inspect the gasket's condition and replace if needed.

Conclusión

To reassemble your device, follow these instructions in reverse order.

Una persona más ha completado esta guía.

Craig Lloyd

Miembro Desde 02/10/16

35,354 Reputación

82 Guías creadas

0 comentarios

Agregar Comentario

Ver Estadísticas:

Ultimas 24 horas: 0

Ultimos 7 días: 9

Ultimos 30 días: 27

Todo El Tiempo: 1,239