Saltar al contenido principal

Hisense Sero 8 Speaker Replacement

Qué necesitas

  1. Hisense Sero 8 Speaker Replacement, Speaker: paso 1, imagen 1 de 3 Hisense Sero 8 Speaker Replacement, Speaker: paso 1, imagen 2 de 3 Hisense Sero 8 Speaker Replacement, Speaker: paso 1, imagen 3 de 3
    • Remove the back cover of the device using a combination of both plastic opening tools.

    • Use your plastic opening tool to pry open a corner of the device. Continue using the tool down the side of the device to open it completely.

  2. Hisense Sero 8 Speaker Replacement: paso 2, imagen 1 de 1
    • Remove the black tape located to the left of the device.

  3. Hisense Sero 8 Speaker Replacement: paso 3, imagen 1 de 1
    • Use a Phillips head #00 screwdriver to remove the two 4.43mm screws on the bottom that keep the speakers in place.

  4. Hisense Sero 8 Speaker Replacement: paso 4, imagen 1 de 2 Hisense Sero 8 Speaker Replacement: paso 4, imagen 2 de 2
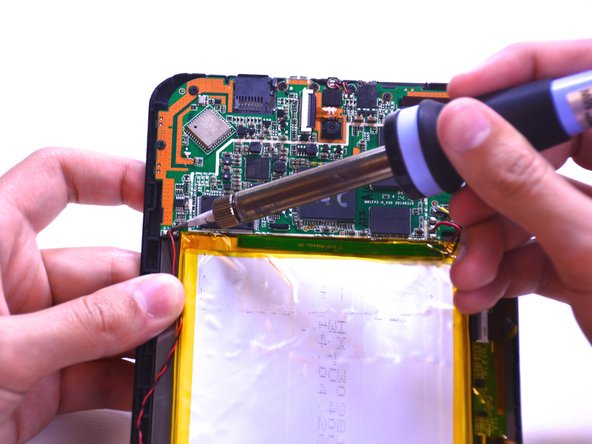
    • Unsolder the red and black wires connecting the speaker to the motherboard. Take a look at this guide to learn how to solder and unsolder connections.

  5. Hisense Sero 8 Speaker Replacement: paso 5, imagen 1 de 2 Hisense Sero 8 Speaker Replacement: paso 5, imagen 2 de 2
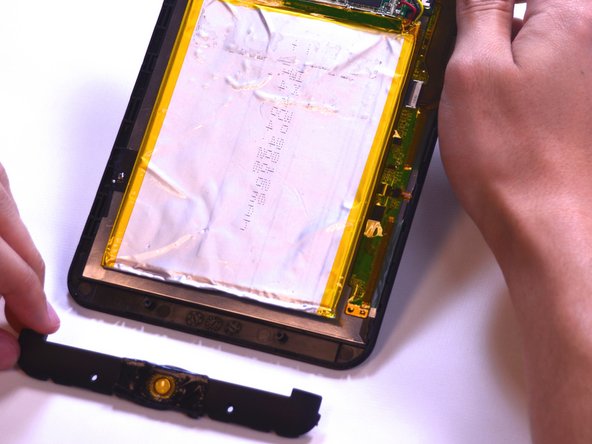
    • Use the spudger tool to remove the speaker panel carefully.

Conclusión

To reassemble your device, follow these instructions in reverse order.

Una persona más ha completado esta guía.

Katharina

Miembro Desde 02/23/15

506 Reputación

2 Guías creadas

Equipo

USF Tampa, Team 1-2, Leahy Winter 2015 Miembro de USF Tampa, Team 1-2, Leahy Winter 2015

USFT-LEAHY-W15S1G2

3 Miembros

10 Guías creadas

0 comentarios

Agregar Comentario

Ver Estadísticas:

Ultimas 24 horas: 0

Ultimos 7 días: 0

Ultimos 30 días: 1

Todo El Tiempo: 565