Saltar al contenido principal

Hipstreet Titan Plus Motherboard Replacement

Qué necesitas

  1. Hipstreet Titan Plus Motherboard Replacement, Motherboard: paso 1, imagen 1 de 2 Hipstreet Titan Plus Motherboard Replacement, Motherboard: paso 1, imagen 2 de 2
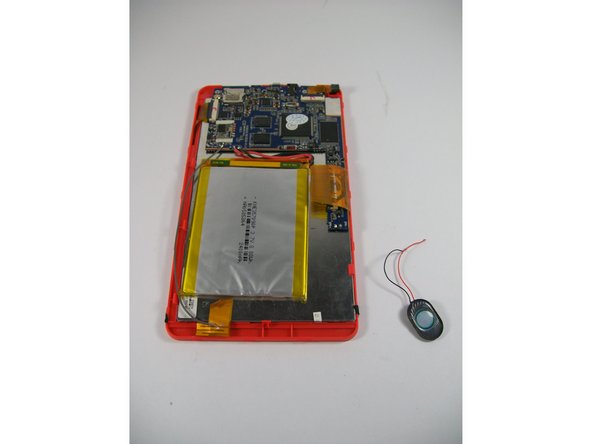
    • Use the plastic opening tools to pry the screen from the back of the device.

  2. Hipstreet Titan Plus Motherboard Replacement: paso 2, imagen 1 de 1
    • Use the spudger to remove the speaker from the back casing of the device.

  3. Hipstreet Titan Plus Motherboard Replacement: paso 3, imagen 1 de 1
    • Remove the black adhesive strips from the wires using the tweezers, and set the strips aside.

  4. Hipstreet Titan Plus Motherboard Replacement: paso 4, imagen 1 de 2 Hipstreet Titan Plus Motherboard Replacement: paso 4, imagen 2 de 2
    • Use the spudger to release three (3) black clips connecting the components to the motherboard.

  5. Hipstreet Titan Plus Motherboard Replacement: paso 5, imagen 1 de 2 Hipstreet Titan Plus Motherboard Replacement: paso 5, imagen 2 de 2
    • Unscrew the motherboard using a J0 Phillips head screwdriver.

  6. Hipstreet Titan Plus Motherboard Replacement: paso 6, imagen 1 de 2 Hipstreet Titan Plus Motherboard Replacement: paso 6, imagen 2 de 2
    • Use the metal spatula to remove the battery from the back of the screen.

  7. Hipstreet Titan Plus Motherboard Replacement: paso 7, imagen 1 de 2 Hipstreet Titan Plus Motherboard Replacement: paso 7, imagen 2 de 2
    • Use the soldering iron to heat the end of the wires connecting the speaker to the motherboard.

    • Apply heat until the wires are free.

  8. Hipstreet Titan Plus Motherboard Replacement: paso 8, imagen 1 de 2 Hipstreet Titan Plus Motherboard Replacement: paso 8, imagen 2 de 2
    • Using the soldering iron, apply heat to the end of the wires until they are free from the motherboard.

  9. Hipstreet Titan Plus Motherboard Replacement: paso 9, imagen 1 de 2 Hipstreet Titan Plus Motherboard Replacement: paso 9, imagen 2 de 2
    • Now that the battery and speaker are removed, the black clips are undone, and the motherboard is unscrewed, remove the motherboard.

Conclusión

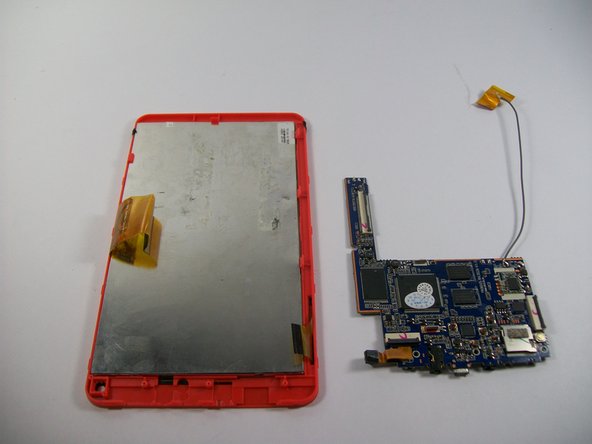
To reassemble your device, follow these instructions in reverse order.

Una persona más ha completado esta guía.

Kari Cannon

Miembro Desde 10/30/15

500 Reputación

4 Guías creadas

Equipo

UMass Dartmouth, Team 1-1, Miles Fall 2015 Miembro de UMass Dartmouth, Team 1-1, Miles Fall 2015

UMASSD-MILES-F15S1G1

3 Miembros

10 Guías creadas

0 comentarios

Agregar Comentario

Ver Estadísticas:

Ultimas 24 horas: 0

Ultimos 7 días: 0

Ultimos 30 días: 0

Todo El Tiempo: 347