Esta versión puede contener ediciones incorrectas. Cambiar a la última instantánea verificada.
Qué necesitas
-
Este paso está sin traducir. Ayuda a traducirlo
-
Open the hood by pulling the hood lever in the driver-side footwell.
-
Reach under the center of the grille and press the hood latch.
-
-
Este paso está sin traducir. Ayuda a traducirlo
-
In this guide we will be removing the left headlight. The steps are mirrored for the right headlight.
-
-
-
Este paso está sin traducir. Ayuda a traducirlo
-
Use the 10 mm socket wrench to unscrew the first of three 12 mm long 10 mm hex-head screws holding in the headlight assembly. The screw is located just to the left of the headlight assembly.
-
Unscrew the second screw located approximately 6 inches below the first.
-
Locate the third screw at the bottom left corner of the headlight assembly just behind the bumper and remove.
-
-
Este paso está sin traducir. Ayuda a traducirlo
-
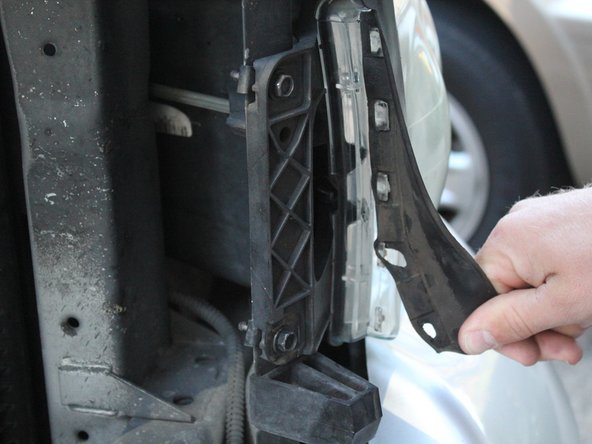
Pinch the bottom of the rubber gasket at the left side of the assembly and remove it from the plastic "buttons" on the headlight assembly.
-
-
Este paso está sin traducir. Ayuda a traducirlo
-
Locate the blue headlight wire. Use a flathead screwdriver to pry up one side of the clamping teeth and pull the connector off.
-
Locate the green turn signal wire clamp. Use a flathead screwdriver to push in the tab on the side and pull off the connector.
-
Now that all connections between the car and the headlight assembly are disconnected, it is safe to remove the headlight assembly from the truck.
-
-
Este paso está sin traducir. Ayuda a traducirlo
-
Rotate the outer ring of the headlight bulb holder counterclockwise to remove it.
-
Carefully pull the headlight bulb holder out of its socket.
-
If you accidentally touch the bulb, clean it immediately using rubbing alcohol on a clean cloth.
-


Cancelar: No complete esta guía.
Una persona más ha completado esta guía.

Equipo

Cal Poly, Team 3-24, Amido Fall 2012 Miembro de Cal Poly, Team 3-24, Amido Fall 2012
CPSU-AMIDO-F12S3G24
4 Miembros
11 Guías creadas
Un comentario
What is that rubber gasket called or a part # please, mine is all torn from previous owner