Saltar al contenido principal

Hasee Z7M-i78172D1 Graphic Card Fan Replacement

Qué necesitas

  1. Hasee Z7M-i78172D1 Graphic Card Fan Replacement, Rear Panel: paso 1, imagen 1 de 1
    • Use a #0 Phillips head screwdriver and unscrew the sixteen 7mm screws on the back of the device.

  2. Hasee Z7M-i78172D1 Graphic Card Fan Replacement: paso 2, imagen 1 de 3 Hasee Z7M-i78172D1 Graphic Card Fan Replacement: paso 2, imagen 2 de 3 Hasee Z7M-i78172D1 Graphic Card Fan Replacement: paso 2, imagen 3 de 3
    • Use a plastic opening tool to take off the back plastic panel.

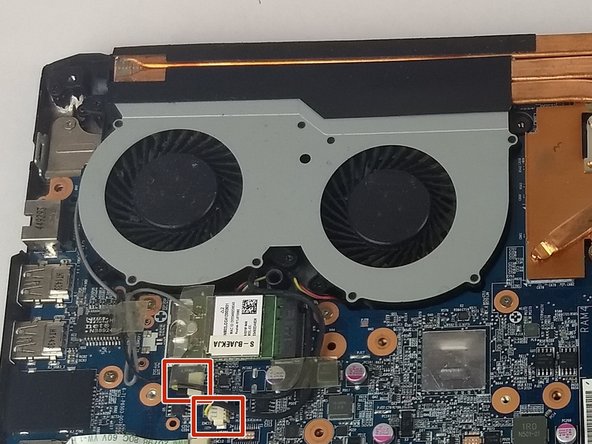
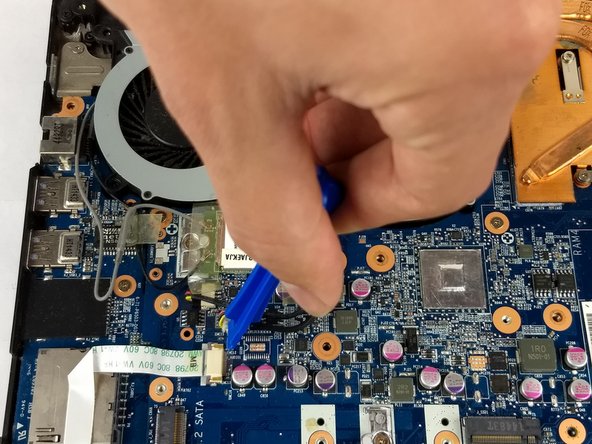
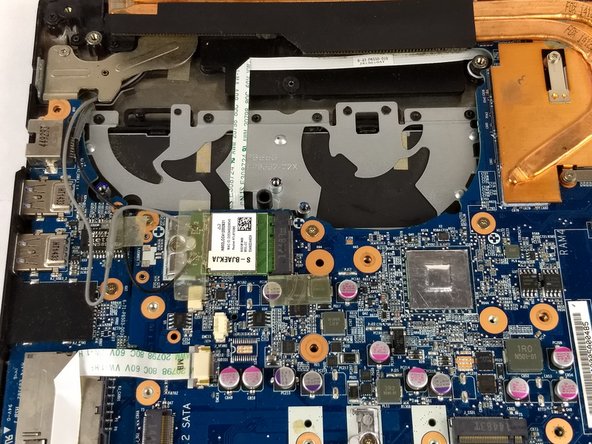
  3. Hasee Z7M-i78172D1 Graphic Card Fan Replacement, Graphic Card Fan: paso 3, imagen 1 de 3 Hasee Z7M-i78172D1 Graphic Card Fan Replacement, Graphic Card Fan: paso 3, imagen 2 de 3 Hasee Z7M-i78172D1 Graphic Card Fan Replacement, Graphic Card Fan: paso 3, imagen 3 de 3
    • To take out the Graphics card fan it is necessary to disconnect the two Graphic card fan cables. Use a plastic opening tool to remove the cable.

  4. Hasee Z7M-i78172D1 Graphic Card Fan Replacement: paso 4, imagen 1 de 1
    • Use a #0 Phillips head screwdriver and unscrew the five 7mm screws holding the fan in place.

  5. Hasee Z7M-i78172D1 Graphic Card Fan Replacement: paso 5, imagen 1 de 2 Hasee Z7M-i78172D1 Graphic Card Fan Replacement: paso 5, imagen 2 de 2
    • Lift the Graphics card fan out and replace with the replacement fan.

Conclusión

To reassemble your device, follow these instructions in reverse order.

Una persona más ha completado esta guía.

Zachary Gay

Miembro Desde 02/14/18

124 Reputación

1 Guía escrita

Equipo

USF Tampa, Team S6-G6, Eyestone Spring 2018 Miembro de USF Tampa, Team S6-G6, Eyestone Spring 2018

USFT-EYESTONE-S18S6G6

3 Miembros

12 Guías creadas

0 comentarios

Agregar Comentario

Ver Estadísticas:

Ultimas 24 horas: 0

Ultimos 7 días: 4

Ultimos 30 días: 10

Todo El Tiempo: 373