Saltar al contenido principal

Esta guía ha sufrido modificaciones. Revisa la última versión sin revisar.

Hasbro furby 2012 Speaker Replacement

Qué necesitas

  1. Hasbro furby 2012 Speaker Replacement, Outer Shell: paso 1, imagen 1 de 3 Hasbro furby 2012 Speaker Replacement, Outer Shell: paso 1, imagen 2 de 3 Hasbro furby 2012 Speaker Replacement, Outer Shell: paso 1, imagen 3 de 3
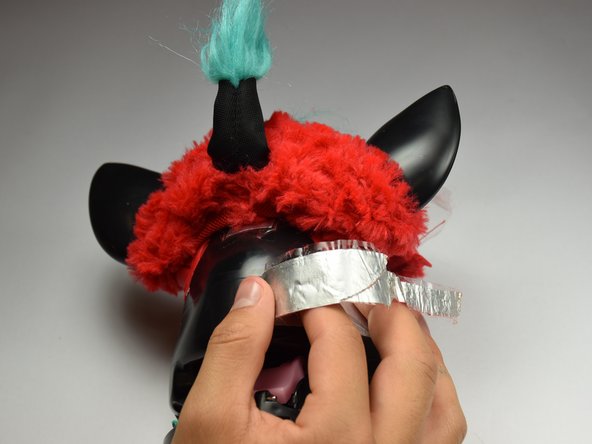
    • Use a flathead screwdriver to remove the two 10mm screws on the base of the Furby.

  2. Hasbro furby 2012 Speaker Replacement: paso 2, imagen 1 de 3 Hasbro furby 2012 Speaker Replacement: paso 2, imagen 2 de 3 Hasbro furby 2012 Speaker Replacement: paso 2, imagen 3 de 3
    • Use a Phillips #0 driver to unscrew the eight 10mm screws.

    • Remove the base ring after unscrewing all the screws.

    • Be careful when lifting the base ring from the Furby. There are sharp edges that hold the base ring in place.

  3. Hasbro furby 2012 Speaker Replacement: paso 3, imagen 1 de 2 Hasbro furby 2012 Speaker Replacement: paso 3, imagen 2 de 2
    • Unhook the white ribbon from the tab on the base.

  4. Hasbro furby 2012 Speaker Replacement: paso 4, imagen 1 de 3 Hasbro furby 2012 Speaker Replacement: paso 4, imagen 2 de 3 Hasbro furby 2012 Speaker Replacement: paso 4, imagen 3 de 3
    • Roll the Furby's fur downward.

    • Disconnect the now exposed red wire.

  5. Hasbro furby 2012 Speaker Replacement: paso 5, imagen 1 de 3 Hasbro furby 2012 Speaker Replacement: paso 5, imagen 2 de 3 Hasbro furby 2012 Speaker Replacement: paso 5, imagen 3 de 3
    • Locate the two middle clips first.

    • Locate the two remaining clips on Furby's sides, they are opposite each other.

    • Orient the Furby upside down with the tail facing away from you.

  6. Hasbro furby 2012 Speaker Replacement: paso 6, imagen 1 de 3 Hasbro furby 2012 Speaker Replacement: paso 6, imagen 2 de 3 Hasbro furby 2012 Speaker Replacement: paso 6, imagen 3 de 3
    • Insert a metal prying tool directly into the clip opening.

    • Press upward into the clip. At the same time, use your other hand to pull away the plastic seam from the Furby's body.

    • Repeat the previous step to remove the remaining three clips.

  7. Hasbro furby 2012 Speaker Replacement: paso 7, imagen 1 de 3 Hasbro furby 2012 Speaker Replacement: paso 7, imagen 2 de 3 Hasbro furby 2012 Speaker Replacement: paso 7, imagen 3 de 3
    • Locate the two 10mm screws and remove them with the Phillips #0 head screwdriver.

    • Lift up on the fur covering until the face of the Furby is exposed.

  8. Hasbro furby 2012 Speaker Replacement: paso 8, imagen 1 de 3 Hasbro furby 2012 Speaker Replacement: paso 8, imagen 2 de 3 Hasbro furby 2012 Speaker Replacement: paso 8, imagen 3 de 3
    • Orient the Furby on its side to where the beak is facing left and locate the edge of the aluminum tape.

    • Lift tape gently and peel back until the tape is nearly removed.

    • Do not pull on the yellow wire located on the opposite end of the tape.

  9. Hasbro furby 2012 Speaker Replacement: paso 9, imagen 1 de 2 Hasbro furby 2012 Speaker Replacement: paso 9, imagen 2 de 2
    • Locate the four 10mm screws. Two on either side of body, and two on top of back plate, around the tape.

    • Remove the 10mm screws with the Phillips#0 screwdriver.

  10. Hasbro furby 2012 Speaker Replacement: paso 10, imagen 1 de 1
    • Peel the tape gently, grabbing it from the bottom edge and folding the tape upward.

    • Peel the tape up until it is nearly detached from the black case.

  11. Hasbro furby 2012 Speaker Replacement: paso 11, imagen 1 de 2 Hasbro furby 2012 Speaker Replacement: paso 11, imagen 2 de 2
    • Orient the Furby face down, with the base facing away from you.

    • Locate the clips below the ears.

    • Repeat the technique used in Step 6. Create leverage using a metal prying tool to press upward into the clip, while also pulling back on the clip itself.

  12. Hasbro furby 2012 Speaker Replacement: paso 12, imagen 1 de 2 Hasbro furby 2012 Speaker Replacement: paso 12, imagen 2 de 2
    • Remove the loose, plastic back panel by pulling the panel away from Furby's body.

  13. Hasbro furby 2012 Speaker Replacement, Speaker: paso 13, imagen 1 de 2 Hasbro furby 2012 Speaker Replacement, Speaker: paso 13, imagen 2 de 2
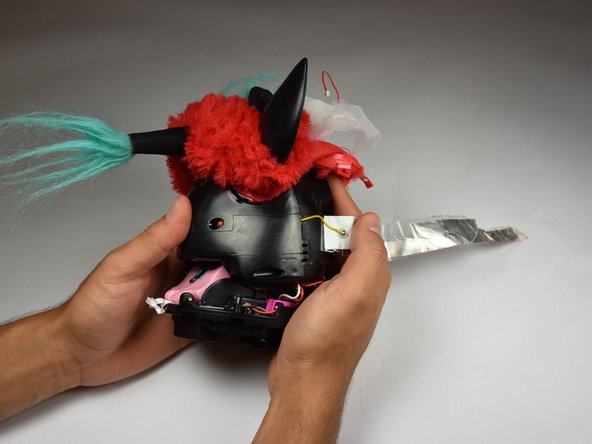
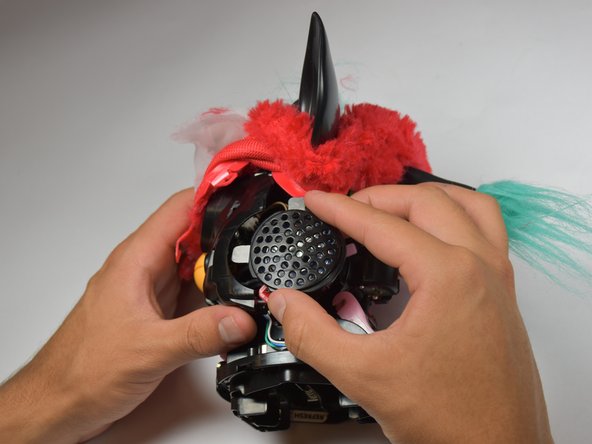
    • Orient Furby to where the mouth is facing left. Locate the speaker on the side of the device.

    • Lift the speaker out.

  14. Hasbro furby 2012 Speaker Replacement: paso 14, imagen 1 de 3 Hasbro furby 2012 Speaker Replacement: paso 14, imagen 2 de 3 Hasbro furby 2012 Speaker Replacement: paso 14, imagen 3 de 3
    • Use the blunt tweezers to pinch the latch on the speaker's casing. Detach the speaker from the both latches on both sides and remove the speaker's casing.

  15. Hasbro furby 2012 Speaker Replacement: paso 15, imagen 1 de 2 Hasbro furby 2012 Speaker Replacement: paso 15, imagen 2 de 2
    • Lift the connector, using the Blunt Tweezers, while tugging on the speaker's wire.

    • Plug the new speaker in by clipping the connector into place where the old connector was removed from.

Conclusión

To reassemble your device, follow these instructions in reverse order.

4 personas más completaron esta guía.

Equipo

Cal Poly, Team 15-5, Livingston Fall 2016 Miembro de Cal Poly, Team 15-5, Livingston Fall 2016

CPSU-LIVINGSTON-F16S15G5

4 Miembros

9 Guías creadas

3 comentarios

Where can i got speaker. Please help me. Thx so much.

Pituphong Yavirach - Contestar

What are the wattage ohm and diameter of the speaker?

RoboMew KitKat - Contestar

Can someone who did the repair send a link to a equivalent speaker please? Would GREATLY help...

Frubyx - Contestar

Agregar Comentario

Ver Estadísticas:

Ultimas 24 horas: 1

Ultimos 7 días: 4

Ultimos 30 días: 36

Todo El Tiempo: 5,044