Esta versión puede contener ediciones incorrectas. Cambie a la última instantánea verificada.
Qué necesitas
-
Este paso está sin traducir. Ayuda a traducirlo
-
Remove the four 14mm screws from the bottom of the Panini Press using the T10 Screwdriver.
-
-
Este paso está sin traducir. Ayuda a traducirlo
-
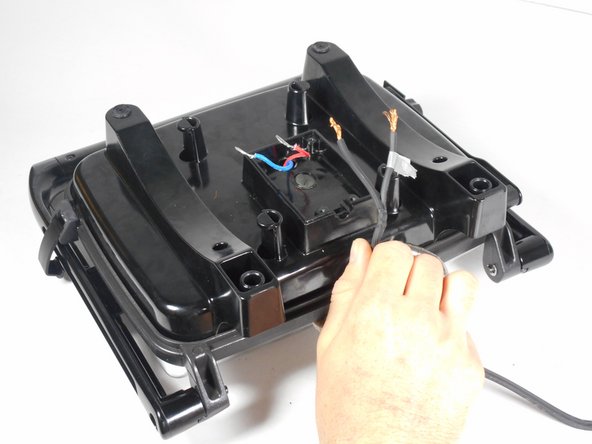
Lift up the plastic cover to expose the plug wiring.
-
-
-
Este paso está sin traducir. Ayuda a traducirlo
-
Use the pliers to pinch the widest point of the cap. This should be done opposite of the already existing crimps.
-
Slide off the white cap.
-
Repeat these steps for the second white cap.
-
-
Este paso está sin traducir. Ayuda a traducirlo
-
Remove the two rubber screw covers from the bottom of the Panini Press.
-
Remove the four uncovered 10mm screws with the PH2 Screwdriver.
-
-
Este paso está sin traducir. Ayuda a traducirlo
-
Lift the plastic lower heating element up and place to the side for reassembly. You have now disconnected the plug wiring completely.
-


Cancelar: No complete esta guía.
2 personas más completaron esta guía.
Equipo

Cal Poly, Team 6-27, Amido Winter 2015 Miembro de Cal Poly, Team 6-27, Amido Winter 2015
CPSU-AMIDO-W15S6G27
4 Miembros
6 Guías creadas