Saltar al contenido principal

Esta guía ha sufrido modificaciones. Revisa la última versión sin revisar.

HTC Touch Pro CDMA Screen Replacement

Qué necesitas

  1. HTC Touch Pro CDMA Screen Replacement, Battery: paso 1, imagen 1 de 2 HTC Touch Pro CDMA Screen Replacement, Battery: paso 1, imagen 2 de 2
    • First, gently press on the back plate and push down toward the camera.

  2. HTC Touch Pro CDMA Screen Replacement: paso 2, imagen 1 de 2 HTC Touch Pro CDMA Screen Replacement: paso 2, imagen 2 de 2
    • Use your finger to lift up the edge of the battery.

  3. HTC Touch Pro CDMA Screen Replacement, USB Logic Board: paso 3, imagen 1 de 1
    • Remove the 4 screws using the T6 screw driver.

  4. HTC Touch Pro CDMA Screen Replacement: paso 4, imagen 1 de 2 HTC Touch Pro CDMA Screen Replacement: paso 4, imagen 2 de 2
    • Lift the plastic cover near the memory card slot.

  5. HTC Touch Pro CDMA Screen Replacement: paso 5, imagen 1 de 1
    • Remove the two Phillips #00 screws from the backside of the screen.

  6. HTC Touch Pro CDMA Screen Replacement: paso 6, imagen 1 de 2 HTC Touch Pro CDMA Screen Replacement: paso 6, imagen 2 de 2
    • Insert a spudger or a plastic opening tool into the seam on the side of the phone.

    • Gently pry apart the two halves of the phone.

  7. HTC Touch Pro CDMA Screen Replacement: paso 7, imagen 1 de 2 HTC Touch Pro CDMA Screen Replacement: paso 7, imagen 2 de 2
    • Gently unplug the connectors.

    • Remove the screws with a 00 Phillips-head screwdriver.

  8. HTC Touch Pro CDMA Screen Replacement: paso 8, imagen 1 de 2 HTC Touch Pro CDMA Screen Replacement: paso 8, imagen 2 de 2
    • Gently lift the motherboard up using a nylon spudger.

    • BE AWARE OF THE ANTENNA.

  9. HTC Touch Pro CDMA Screen Replacement, Keyboard: paso 9, imagen 1 de 2 HTC Touch Pro CDMA Screen Replacement, Keyboard: paso 9, imagen 2 de 2
    • Remove the 4 screws circled in red using a 00 Phillips-head screwdriver.

  10. HTC Touch Pro CDMA Screen Replacement, Screen: paso 10, imagen 1 de 2 HTC Touch Pro CDMA Screen Replacement, Screen: paso 10, imagen 2 de 2
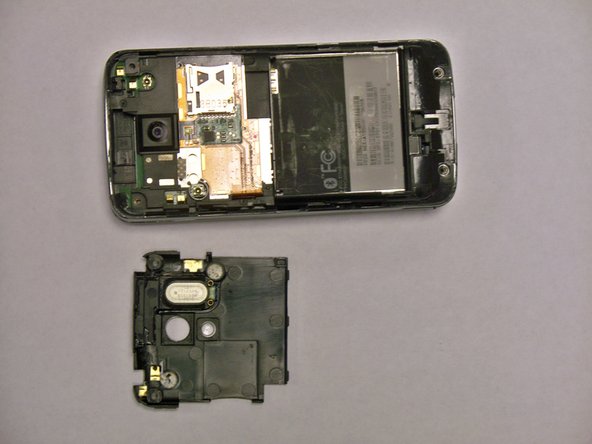
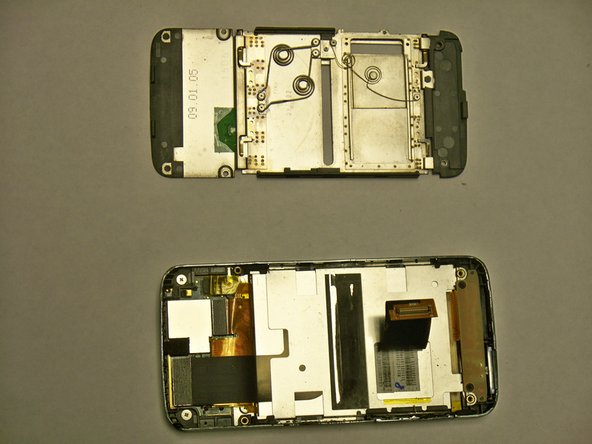
    • Start by lifting the back plate of the screen by using yours finger or a plastic opener tool.

  11. HTC Touch Pro CDMA Screen Replacement: paso 11, imagen 1 de 1
    • Remove the 4 screws by using a 00 Phillips-head screwdriver.

    • Gently lift the connectors.

  12. HTC Touch Pro CDMA Screen Replacement: paso 12, imagen 1 de 1
    • Lift the front keyboard by removing the screws with a 00 Phillips-head screwdriver.

  13. HTC Touch Pro CDMA Screen Replacement: paso 13, imagen 1 de 3 HTC Touch Pro CDMA Screen Replacement: paso 13, imagen 2 de 3 HTC Touch Pro CDMA Screen Replacement: paso 13, imagen 3 de 3
    • With the front keyboard removed, gently lift the screen up with a plastic opener tool and remove it .

Conclusión

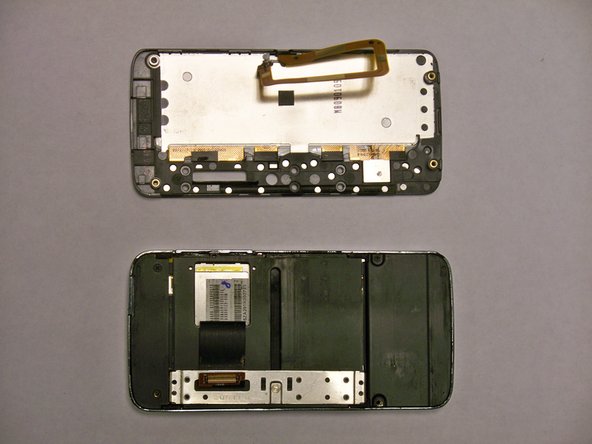
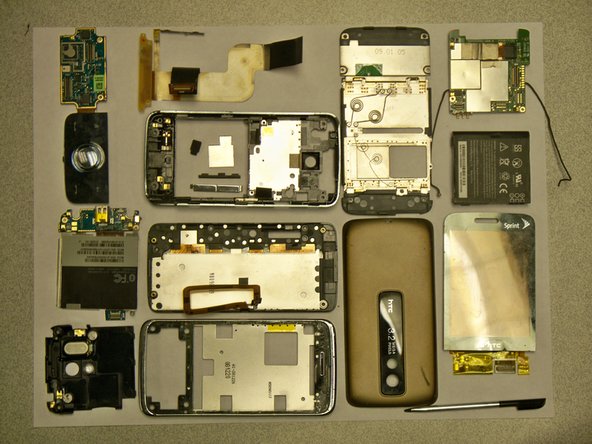
To reassemble your device, follow these instructions in reverse order.

3 personas más completaron esta guía.

Zhaowei Zhang

Miembro Desde 04/28/11

133 Reputación

4 Guías creadas

Equipo

0 comentarios

Agregar Comentario

Ver Estadísticas:

Ultimas 24 horas: 0

Ultimos 7 días: 2

Ultimos 30 días: 14

Todo El Tiempo: 3,629