Saltar al contenido principal

HTC Touch Pro CDMA Screen Replacement

Qué necesitas

  1. HTC Touch Pro CDMA Screen Replacement, Battery: paso 1, imagen 1 de 2 HTC Touch Pro CDMA Screen Replacement, Battery: paso 1, imagen 2 de 2
    • First, gently press on the back plate and push down toward the camera.

  2. HTC Touch Pro CDMA Screen Replacement: paso 2, imagen 1 de 2 HTC Touch Pro CDMA Screen Replacement: paso 2, imagen 2 de 2
    • Use your finger to lift up the edge of the battery.

  3. HTC Touch Pro CDMA Screen Replacement, USB Logic Board: paso 3, imagen 1 de 1
    • Remove the 4 screws using the T6 screw driver.

  4. HTC Touch Pro CDMA Screen Replacement: paso 4, imagen 1 de 2 HTC Touch Pro CDMA Screen Replacement: paso 4, imagen 2 de 2
    • Lift the plastic cover near the memory card slot.

  5. HTC Touch Pro CDMA Screen Replacement: paso 5, imagen 1 de 1
    • Remove the two Phillips #00 screws from the backside of the screen.

  6. HTC Touch Pro CDMA Screen Replacement: paso 6, imagen 1 de 2 HTC Touch Pro CDMA Screen Replacement: paso 6, imagen 2 de 2
    • Insert a spudger or a plastic opening tool into the seam on the side of the phone.

    • Gently pry apart the two halves of the phone.

  7. HTC Touch Pro CDMA Screen Replacement: paso 7, imagen 1 de 2 HTC Touch Pro CDMA Screen Replacement: paso 7, imagen 2 de 2
    • Gently unplug the connectors.

    • Remove the screws with a 00 Phillips-head screwdriver.

  8. HTC Touch Pro CDMA Screen Replacement: paso 8, imagen 1 de 2 HTC Touch Pro CDMA Screen Replacement: paso 8, imagen 2 de 2
    • Gently lift the motherboard up using a nylon spudger.

    • BE AWARE OF THE ANTENNA.

  9. HTC Touch Pro CDMA Screen Replacement, Keyboard: paso 9, imagen 1 de 2 HTC Touch Pro CDMA Screen Replacement, Keyboard: paso 9, imagen 2 de 2
    • Remove the 4 screws circled in red using a 00 Phillips-head screwdriver.

  10. HTC Touch Pro CDMA Screen Replacement, Screen: paso 10, imagen 1 de 2 HTC Touch Pro CDMA Screen Replacement, Screen: paso 10, imagen 2 de 2
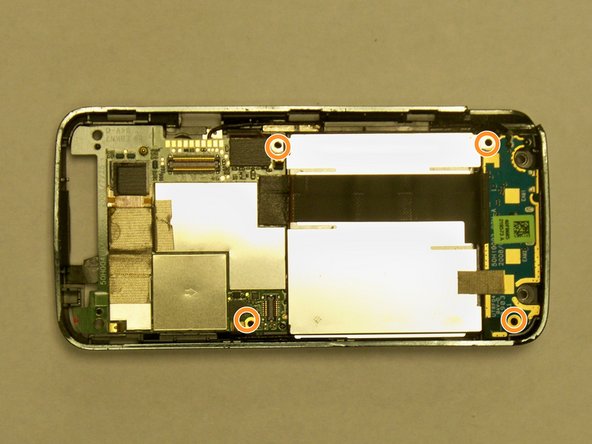
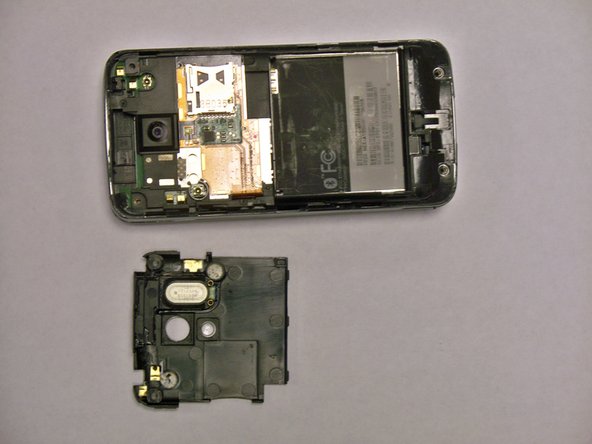
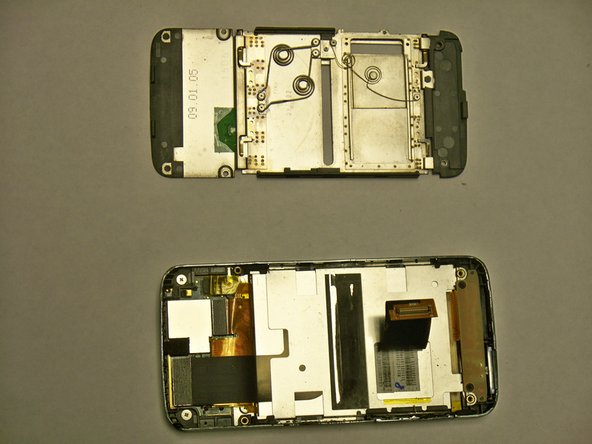
    • Start by lifting the back plate of the screen by using yours finger or a plastic opener tool.

  11. HTC Touch Pro CDMA Screen Replacement: paso 11, imagen 1 de 1
    • Remove the 4 screws by using a 00 Phillips-head screwdriver.

    • Gently lift the connectors.

  12. HTC Touch Pro CDMA Screen Replacement: paso 12, imagen 1 de 1
    • Lift the front keyboard by removing the screws with a 00 Phillips-head screwdriver.

  13. HTC Touch Pro CDMA Screen Replacement: paso 13, imagen 1 de 3 HTC Touch Pro CDMA Screen Replacement: paso 13, imagen 2 de 3 HTC Touch Pro CDMA Screen Replacement: paso 13, imagen 3 de 3
    • With the front keyboard removed, gently lift the screen up with a plastic opener tool and remove it .

Conclusión

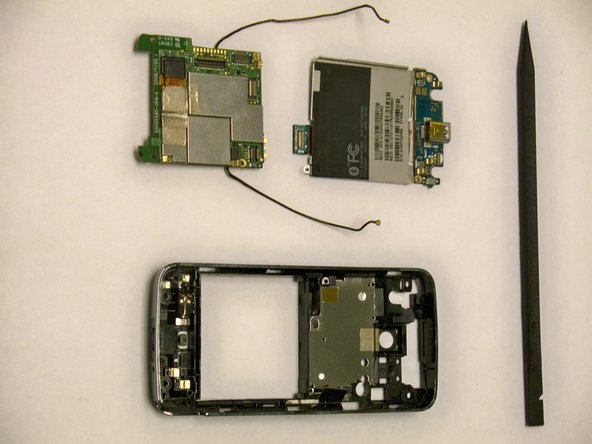
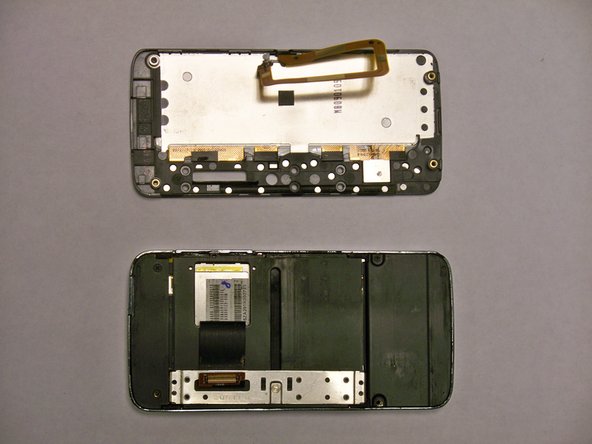
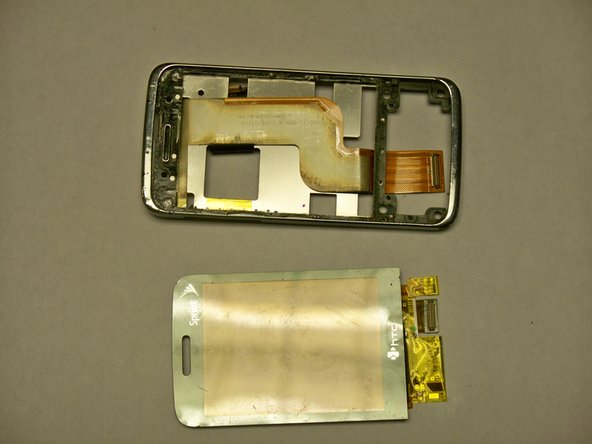
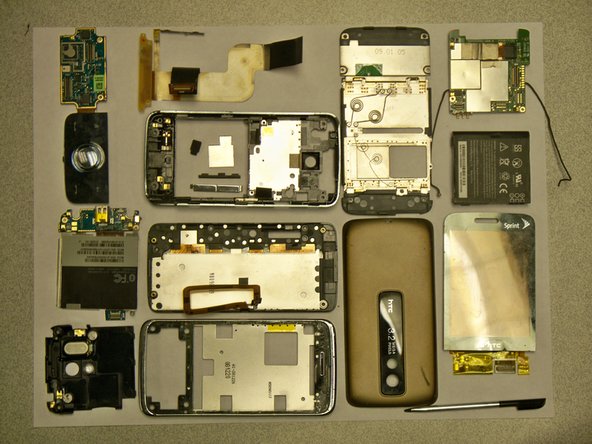
To reassemble your device, follow these instructions in reverse order.

3 personas más completaron esta guía.

Zhaowei Zhang

Miembro Desde 04/28/11

133 Reputación

4 Guías creadas

Equipo

0 comentarios

Agregar Comentario

Ver Estadísticas:

Ultimas 24 horas: 0

Ultimos 7 días: 0

Ultimos 30 días: 2

Todo El Tiempo: 3,616