Esta versión puede contener ediciones incorrectas. Cambie a la última instantánea verificada.
Qué necesitas
-
Este paso está sin traducir. Ayuda a traducirlo
-
Remove the 4 torx-head screws in the corners of the phone using the T5 Torx Screwdriver.
-
-
-
Este paso está sin traducir. Ayuda a traducirlo
-
Use the plastic opening tool to remove the front panel from the phone.
-
Unplug the front button cable from the inside of the phone.
-
-
Este paso está sin traducir. Ayuda a traducirlo
-
Unscrew the torx-head screws at the base of the LCD screen using the T5 Torx Screwdriver.
-
-
Este paso está sin traducir. Ayuda a traducirlo
-
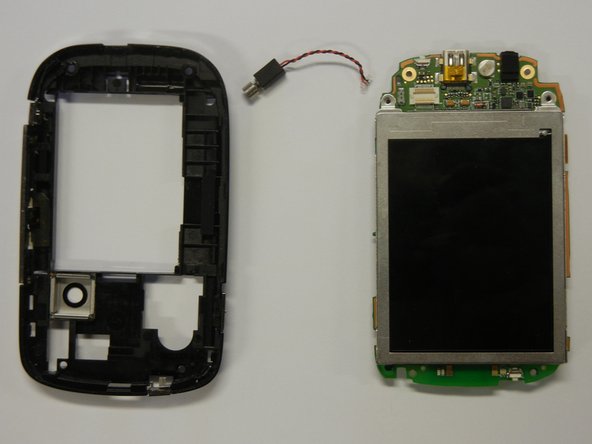
Seperate the motherboard from the black plastic casing.
-
Unplug the black and red wire from the motherboard.
-
Unplug the black and red wire from the black plastic casing.
-
-
Este paso está sin traducir. Ayuda a traducirlo
-
Lift the black lever next to the orange ribbon cable to remove the LCD Screen.
-
-
Este paso está sin traducir. Ayuda a traducirlo
-
Remove the camera lens from the motherboard using the plastic opening tool.
-


Cancelar: No complete esta guía.
Una persona más ha completado esta guía.
Equipo

Cal Poly, Team 15-12, Regan Spring 2011 Miembro de Cal Poly, Team 15-12, Regan Spring 2011
CPSU-REGAN-S11S15G12
4 Miembros
10 Guías creadas