Saltar al contenido principal

HTC Ozone Keyboard Replacement

Qué necesitas

  1. HTC Ozone Keyboard Replacement, Rear Battery Cover: paso 1, imagen 1 de 1
    • Flip the phone over to have the rear cover facing up.

    • The camera lens should be towards the top of the phone.

  2. HTC Ozone Keyboard Replacement: paso 2, imagen 1 de 2 HTC Ozone Keyboard Replacement: paso 2, imagen 2 de 2
    • Slide the cover up, towards the top of phone, to unlock the battery cover.

    • Lift the cover off phone and remove it.

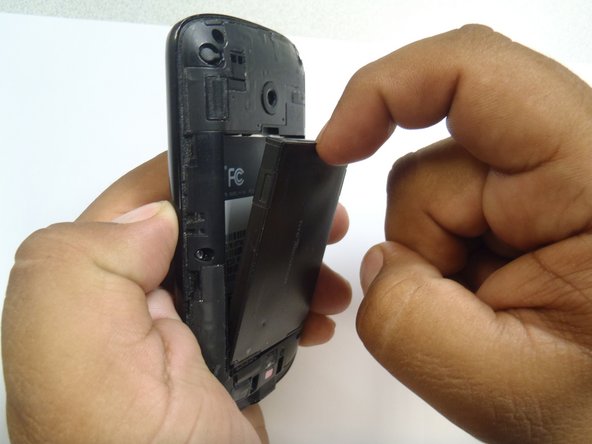
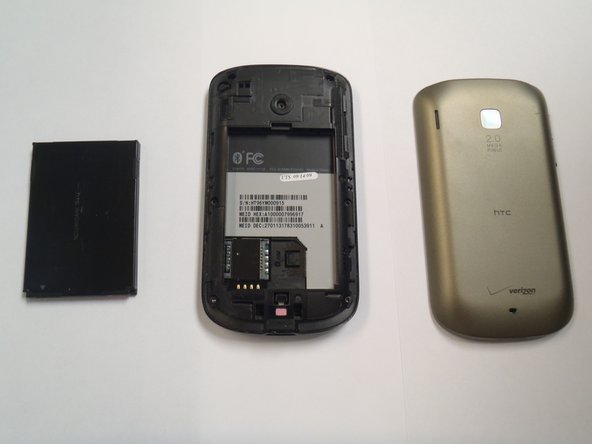
  3. HTC Ozone Keyboard Replacement, Battery: paso 3, imagen 1 de 3 HTC Ozone Keyboard Replacement, Battery: paso 3, imagen 2 de 3 HTC Ozone Keyboard Replacement, Battery: paso 3, imagen 3 de 3
    • Use your finger to push the top of the battery downwards and lift the battery out of the phone.

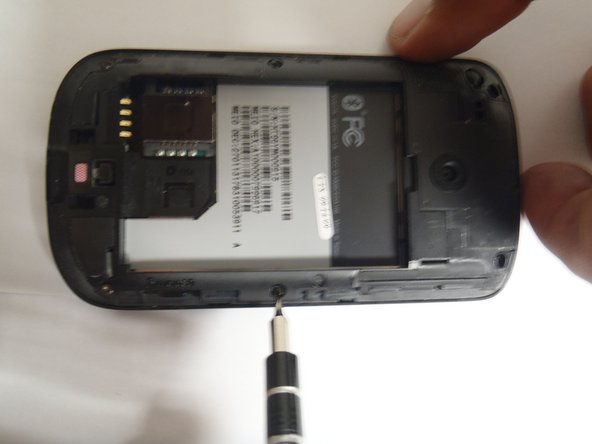
  4. HTC Ozone Keyboard Replacement, Frame: paso 4, imagen 1 de 3 HTC Ozone Keyboard Replacement, Frame: paso 4, imagen 2 de 3 HTC Ozone Keyboard Replacement, Frame: paso 4, imagen 3 de 3
    • Remove the six Torx #5 screws that are securing the rear frame.

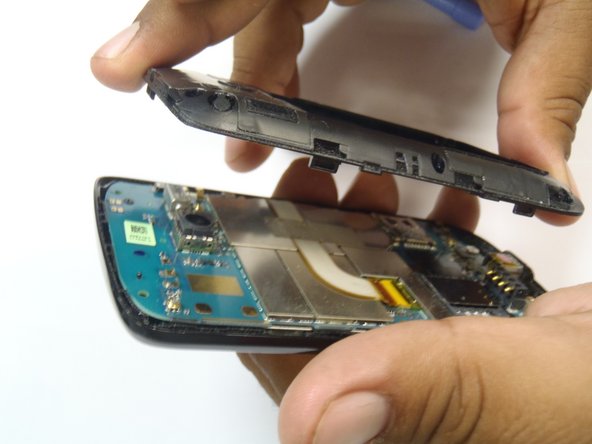
  5. HTC Ozone Keyboard Replacement: paso 5, imagen 1 de 3 HTC Ozone Keyboard Replacement: paso 5, imagen 2 de 3 HTC Ozone Keyboard Replacement: paso 5, imagen 3 de 3
    Herramienta utilizada en este paso:
    Plastic Cards
    $2.99
    Comprar
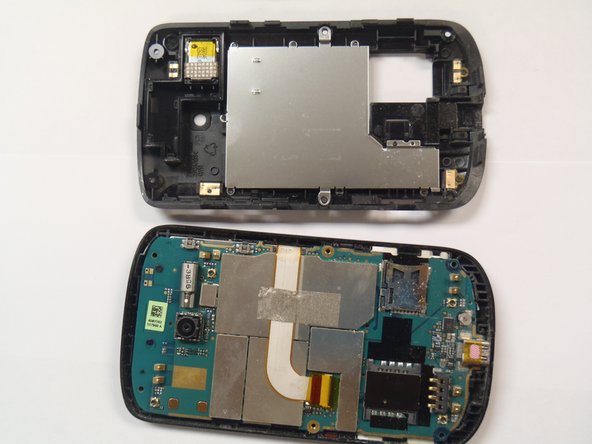
    • Pry the frame open, releasing the eight plastic tabs around the edge of the frame, using the plastic opening tool.

    • A plastic card can be used instead of the plastic opening tool.

  6. HTC Ozone Keyboard Replacement, Motherboard: paso 6, imagen 1 de 2 HTC Ozone Keyboard Replacement, Motherboard: paso 6, imagen 2 de 2
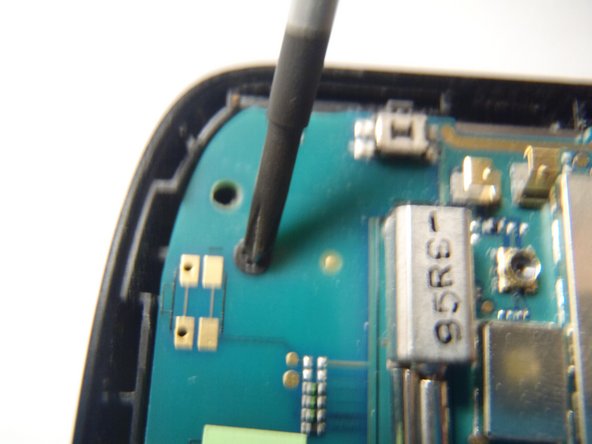
    • Remove the single Phillips #0 screw that is securing the motherboard to the front case of the phone.

  7. HTC Ozone Keyboard Replacement: paso 7, imagen 1 de 2 HTC Ozone Keyboard Replacement: paso 7, imagen 2 de 2
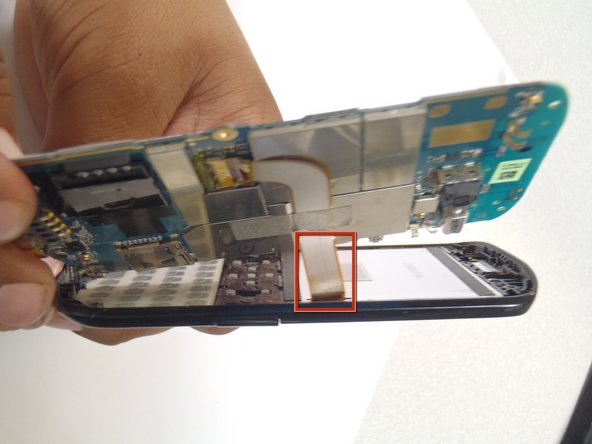
    • Pry the motherboard away from the front of the plastic case using a plastic opening tool.

    • Be careful not to break the ribbon cable when prying away the motherboard.

  8. HTC Ozone Keyboard Replacement: paso 8, imagen 1 de 3 HTC Ozone Keyboard Replacement: paso 8, imagen 2 de 3 HTC Ozone Keyboard Replacement: paso 8, imagen 3 de 3
    • Remove the plastic cover from the LCD display and the motherboard.

    • The Motherboard and the LCD are still attached together.

  9. HTC Ozone Keyboard Replacement, LCD Display: paso 9, imagen 1 de 2 HTC Ozone Keyboard Replacement, LCD Display: paso 9, imagen 2 de 2
    • Remove the gray tape securing the ribbon cable.

  10. HTC Ozone Keyboard Replacement: paso 10, imagen 1 de 1
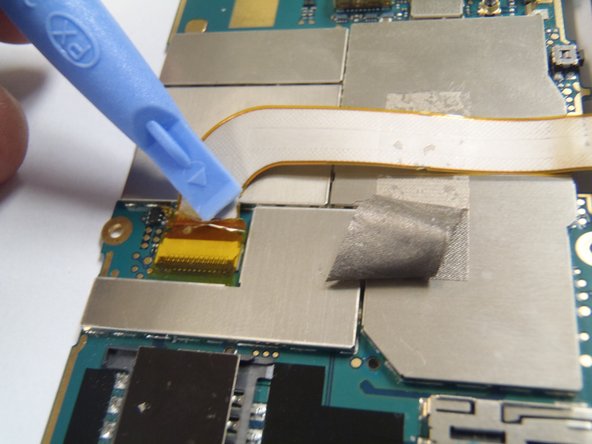
    • Remove the yellow tape securing the connector lock.

  11. HTC Ozone Keyboard Replacement: paso 11, imagen 1 de 2 HTC Ozone Keyboard Replacement: paso 11, imagen 2 de 2
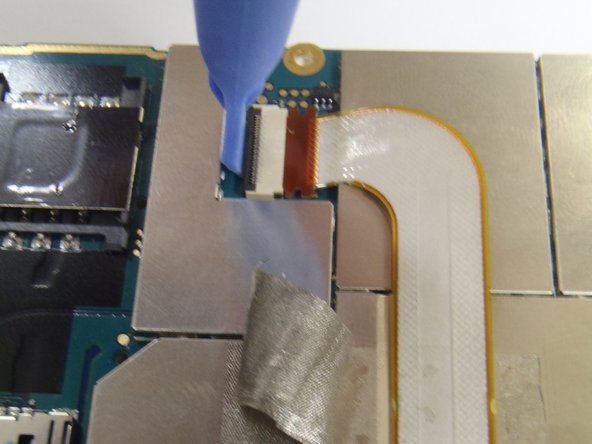
    • Carefully lift the black lock to release the ribbon cable, using the plastic opening tool.

  12. HTC Ozone Keyboard Replacement: paso 12, imagen 1 de 1
    • Pull the ribbon cable upwards, disconnecting it from the Motherboard.

  13. HTC Ozone Keyboard Replacement: paso 13, imagen 1 de 1
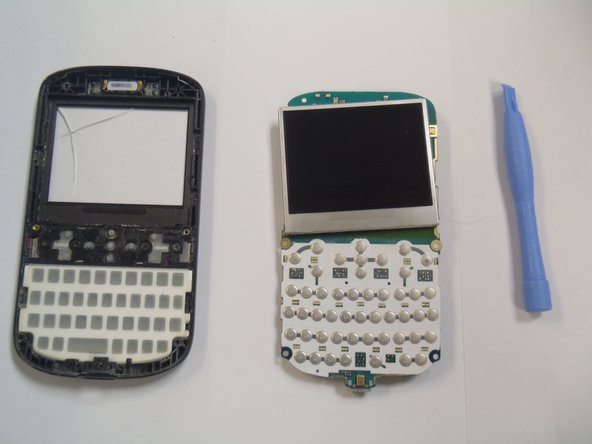
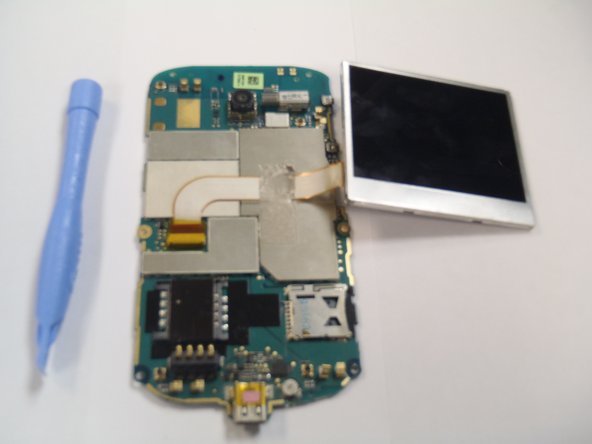
    • Lift the Motherboard away from the LCD display.

  14. HTC Ozone Keyboard Replacement, Keyboard: paso 14, imagen 1 de 2 HTC Ozone Keyboard Replacement, Keyboard: paso 14, imagen 2 de 2
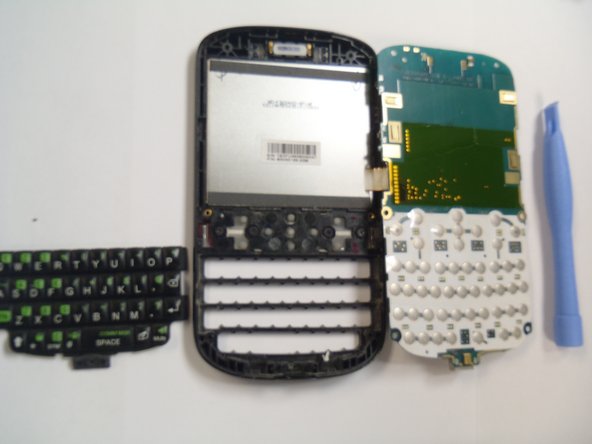
    • Lift off main keyboard from front plastic case using plastic opening tool.

  15. HTC Ozone Keyboard Replacement: paso 15, imagen 1 de 2 HTC Ozone Keyboard Replacement: paso 15, imagen 2 de 2
    • Remove four Phillips #00 screws securing function keys.

  16. HTC Ozone Keyboard Replacement: paso 16, imagen 1 de 2 HTC Ozone Keyboard Replacement: paso 16, imagen 2 de 2
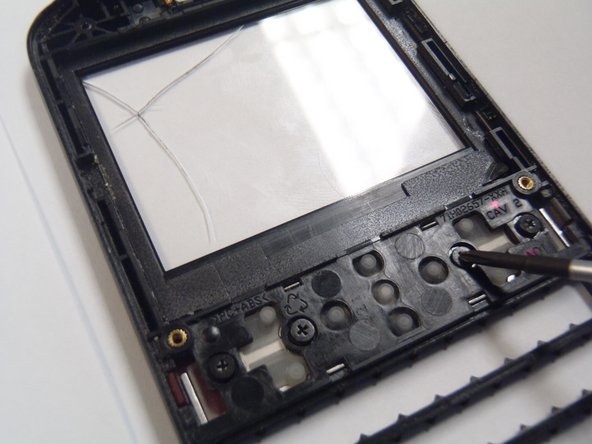
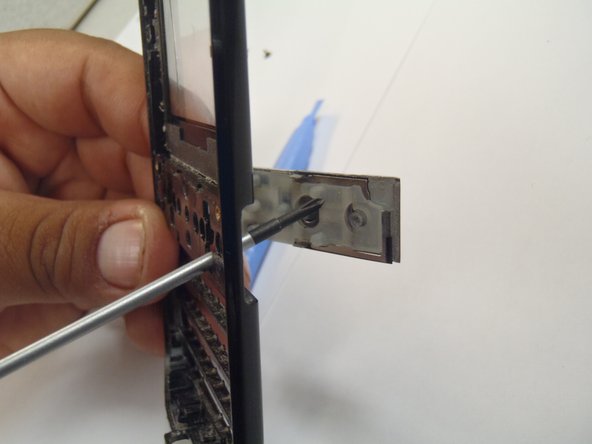
    • Pop keys out by pushing keys from back of the phone.

Conclusión

To reassemble your device, follow these instructions in reverse order.

Una persona más ha completado esta guía.

Marco Jokada

Miembro Desde 04/28/11

247 Reputación

6 Guías creadas

Equipo

0 comentarios

Agregar Comentario

Ver Estadísticas:

Ultimas 24 horas: 0

Ultimos 7 días: 0

Ultimos 30 días: 1

Todo El Tiempo: 1,769