Esta versión puede contener ediciones incorrectas. Cambie a la última instantánea verificada.
Qué necesitas
-
Este paso está sin traducir. Ayuda a traducirlo
-
Use the sim eject tool to remove the SIM cards on either side of the phone.
-
-
Este paso está sin traducir. Ayuda a traducirlo
-
Heat up the iOpener in the microwave for one minute. Place the iOpener on the top of the phone for three minutes.
-
-
Este paso está sin traducir. Ayuda a traducirlo
-
Once the top of the phone is warm, use a plastic spudger to pry the top left corner up.
-
-
Este paso está sin traducir. Ayuda a traducirlo
-
Take out the small 3 mm screw that is on the top left side using a T5 bit.
-
-
-
Este paso está sin traducir. Ayuda a traducirlo
-
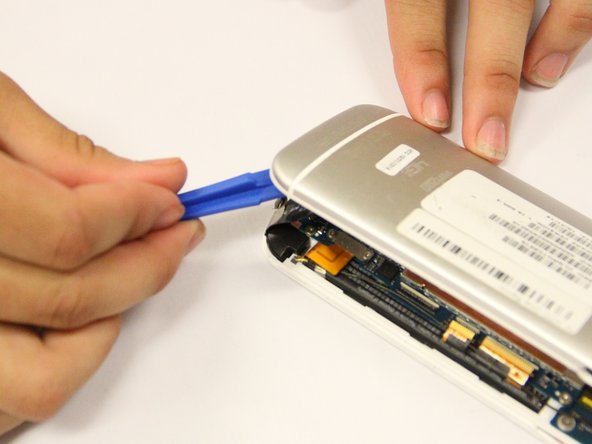
Use the plastic spudger to pry off the back cover. Place the tool in the SIM card insert and lift off the back cover with force. Continue to do this all around the phone.
-
-
Este paso está sin traducir. Ayuda a traducirlo
-
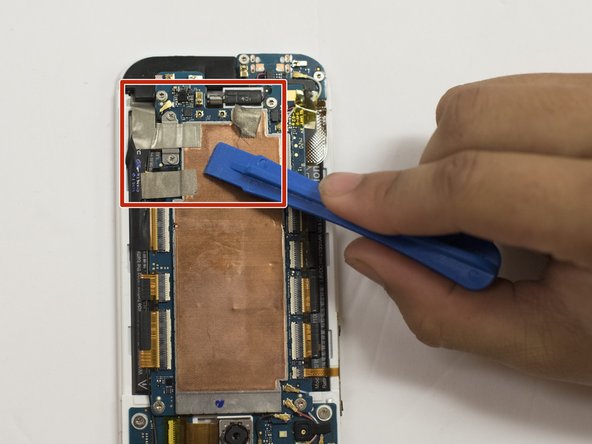
With tweezers, remove the small pieces of yellow tape that hold the phone in place.
-
Use the plastic prying tool to take off the three pieces of silver tape. They are located at the bottom right corner of the copper place.
-
-
Este paso está sin traducir. Ayuda a traducirlo
-
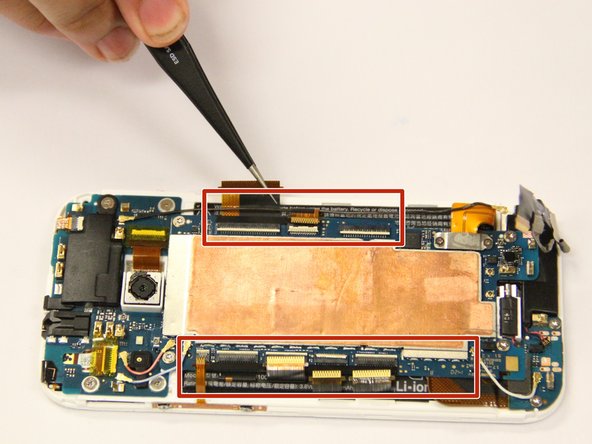
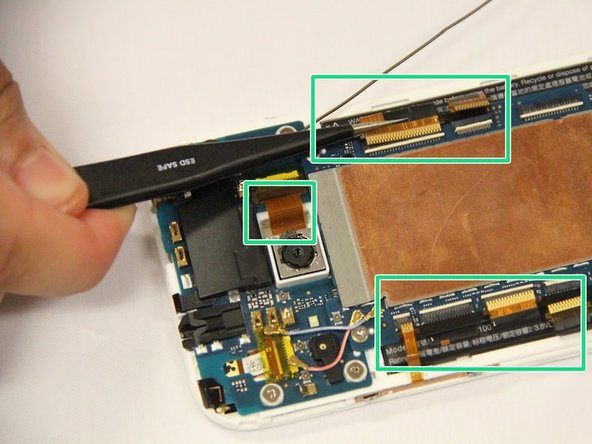
With the plastic spudger, disconnect the eight ZIF connectors. Do this by lifting the small white lines up and pulling the ribbon from it.
-
Use tweezers to carefully detach the eight ribbon cables from the connectors.
-
-
Este paso está sin traducir. Ayuda a traducirlo
-
Remove the two 1 mm screws at the bottom right of the motherboard using a Phillips #00 screwdriver.
-
-
Este paso está sin traducir. Ayuda a traducirlo
-
Pull off one end of each of the five colored connecting cables from the motherboard.
-
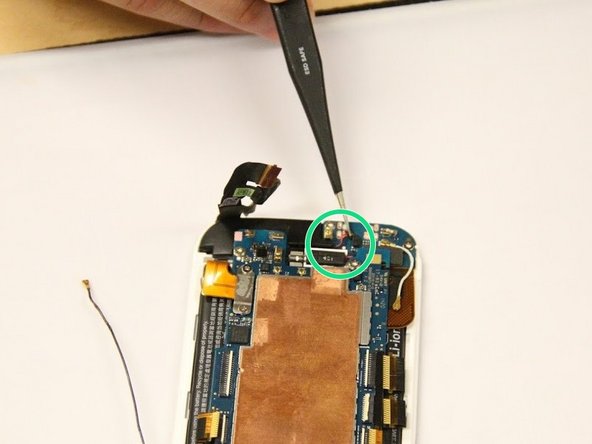
Pull the black and red wire from the motherboard on the bottom left.
-
-
Este paso está sin traducir. Ayuda a traducirlo
-
Take out the four 3 mm screws that are on each corner of the motherboard using a Torx 4 screwdriver.
-
Gently lift the motherboard out of the phone using the plastic spudger.
-


Cancelar: No complete esta guía.
Una persona más ha completado esta guía.
Equipo

Eastern Washington University, Team S2-G4, Ramos Spring 2018 Miembro de Eastern Washington University, Team S2-G4, Ramos Spring 2018
EWU-RAMOS-S18S2G4
5 Miembros
4 Guías creadas