Saltar al contenido principal

HTC One M8 Rear Case Replacement

Qué necesitas

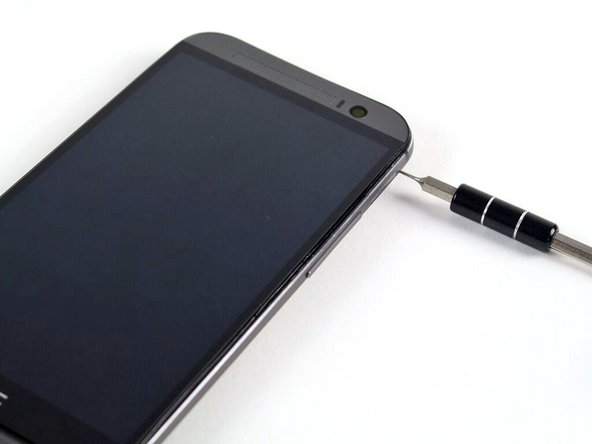
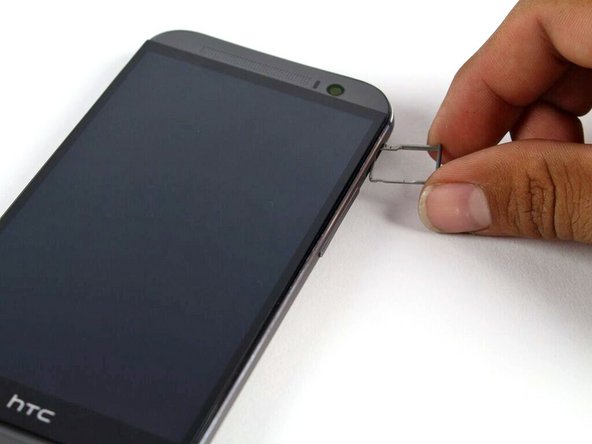
  1. HTC One M8 Rear Case Replacement, SIM Card: paso 1, imagen 1 de 2 HTC One M8 Rear Case Replacement, SIM Card: paso 1, imagen 2 de 2
    • Insert a SIM card eject tool or a paperclip into the small hole in the SIM card tray, located on the upper left hand side of the phone.

    • Press to eject the tray.

    • This may require a significant amount of force.

  2. HTC One M8 Rear Case Replacement: paso 2, imagen 1 de 1
    • Remove the SIM card tray assembly from the HTC One M8.

    • When reinserting the SIM card, ensure that it is in the proper orientation relative to the tray.

  3. HTC One M8 Rear Case Replacement, MicroSD Card: paso 3, imagen 1 de 2 HTC One M8 Rear Case Replacement, MicroSD Card: paso 3, imagen 2 de 2
    • Insert a SIM card eject tool or a paperclip into the small hole in the microSD card tray, located on the upper right hand side of the phone.

    • Press to eject the tray.

    • This may require a significant amount of force.

  4. HTC One M8 Rear Case Replacement: paso 4, imagen 1 de 1
    • Remove the microSD card tray assembly from the HTC One M8.

    • When reinserting the microSD card, ensure that it is in the proper orientation relative to the tray.

  5. HTC One M8 Rear Case Replacement, Rear Case: paso 5, imagen 1 de 2 HTC One M8 Rear Case Replacement, Rear Case: paso 5, imagen 2 de 2
    • Use an iOpener or heat gun to loosen the adhesive on the upper and lower speaker grilles.

    • Refer to the iOpener guide for info on how to use the iOpener.

  6. HTC One M8 Rear Case Replacement: paso 6, imagen 1 de 3 HTC One M8 Rear Case Replacement: paso 6, imagen 2 de 3 HTC One M8 Rear Case Replacement: paso 6, imagen 3 de 3
    • Use a plastic opening tool to gently peel up the lower speaker grille.

    • The adhesive is messy, and can be removed using Goo-gone.

  7. HTC One M8 Rear Case Replacement: paso 7, imagen 1 de 2 HTC One M8 Rear Case Replacement: paso 7, imagen 2 de 2
    • Use a plastic opening tool to gently peel up the upper speaker grille.

  8. HTC One M8 Rear Case Replacement: paso 8, imagen 1 de 1
    • Remove the two silver 3 mm Phillips #00 screws from the top.

    • Remove the four black 4 mm T5 Torx screws from the bottom.

  9. HTC One M8 Rear Case Replacement: paso 9, imagen 1 de 3 HTC One M8 Rear Case Replacement: paso 9, imagen 2 de 3 HTC One M8 Rear Case Replacement: paso 9, imagen 3 de 3
    • Work your way around the perimeter of the phone with a spudger and plastic opening picks to free the clips that secure the rear case to the display assembly.

    • A metal spudger is pictured, but it is best to use a nylon spudger to prevent marring the device.

    • Be careful not to lose the power button: it sits loosely in the top of the lower chassis.

    • Significant force may be required to pry the casing apart.

Conclusión

To reassemble your device, follow these instructions in reverse order.

12 personas más completaron esta guía.

Michael Gonzalez

Miembro Desde 04/14/15

4,430 Reputación

5 Guías creadas

Equipo

Cal Poly, Team 5-9, Maness Spring 2015 Miembro de Cal Poly, Team 5-9, Maness Spring 2015

CPSU-MANESS-S15S5G9

4 Miembros

18 Guías creadas

0 comentarios

Agregar Comentario

Ver Estadísticas:

Ultimas 24 horas: 1

Ultimos 7 días: 2

Ultimos 30 días: 12

Todo El Tiempo: 6,888