Esta versión puede contener ediciones incorrectas. Cambie a la última instantánea verificada.
Qué necesitas
-
Este paso está sin traducir. Ayuda a traducirlo
-
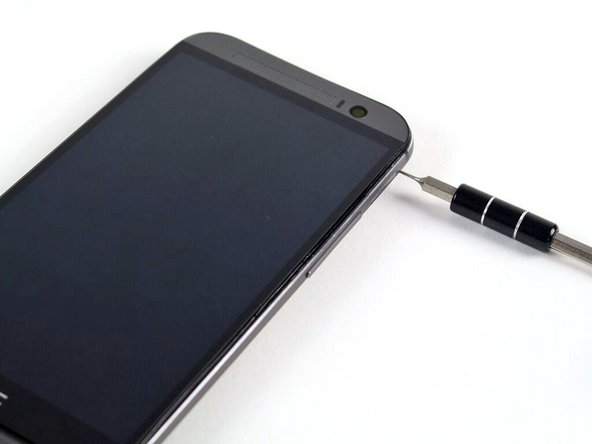
Insert a SIM card eject tool or a paperclip into the small hole in the SIM card tray, located on the upper left hand side of the phone.
-
Press to eject the tray.
-
-
Este paso está sin traducir. Ayuda a traducirlo
-
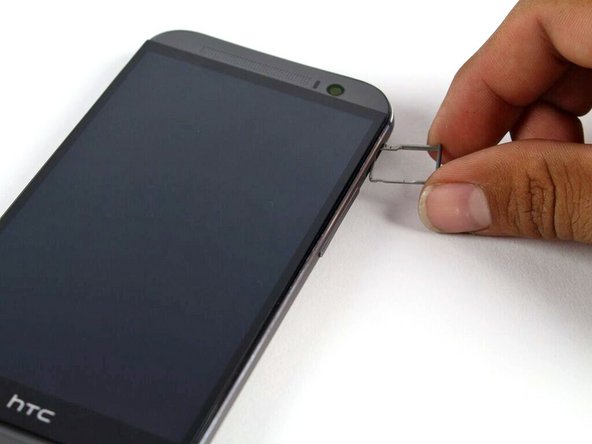
Remove the SIM card tray assembly from the HTC One M8.
-
-
Este paso está sin traducir. Ayuda a traducirlo
-
Insert a SIM card eject tool or a paperclip into the small hole in the microSD card tray, located on the upper right hand side of the phone.
-
Press to eject the tray.
-
-
Este paso está sin traducir. Ayuda a traducirlo
-
Remove the microSD card tray assembly from the HTC One M8.
-
-
-
Este paso está sin traducir. Ayuda a traducirlo
-
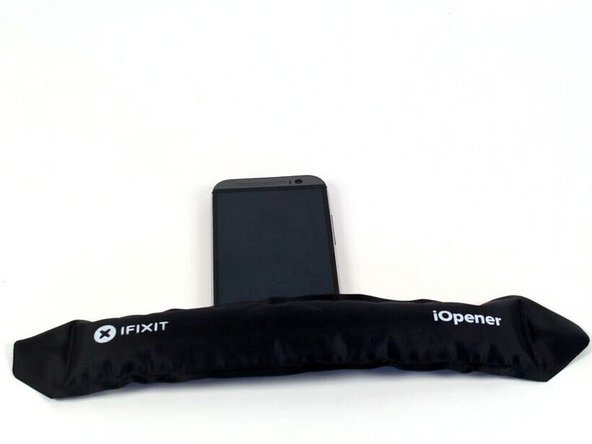
Use an iOpener or heat gun to loosen the adhesive on the upper and lower speaker grilles.
-
-
Este paso está sin traducir. Ayuda a traducirlo
-
Use a plastic opening tool to gently peel up the lower speaker grille.
-
-
Este paso está sin traducir. Ayuda a traducirlo
-
Use a plastic opening tool to gently peel up the upper speaker grille.
-
-
Este paso está sin traducir. Ayuda a traducirlo
-
Remove the two silver 3 mm Phillips #00 screws from the top.
-
Remove the four black 4 mm T5 Torx screws from the bottom.
-
-
Este paso está sin traducir. Ayuda a traducirlo
-
Work your way around the perimeter of the phone with a spudger and plastic opening picks to free the clips that secure the rear case to the display assembly.
-
-
Este paso está sin traducir. Ayuda a traducirlo
-
Remove the two silver 2mm Phillips #00 screws securing the battery connector to the motherboard.
-
Use a plastic opening tool to gently pry up the battery connector.
-
-
Este paso está sin traducir. Ayuda a traducirlo
-
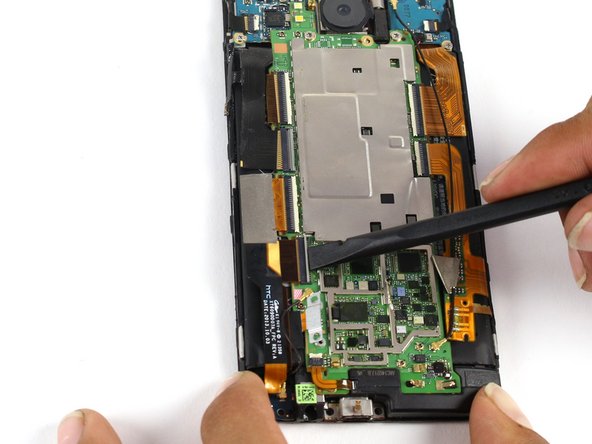
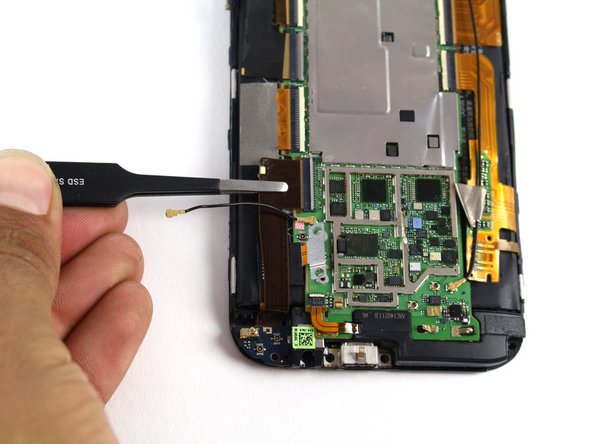
Use a spudger to disconnect the two ZIF connectors.
-
Use the flat end of a spudger to disconnect the black antenna cable.
-
Use a set of tweezers to pull the two ribbon cables free of the ZIF connectors.
-
-
Este paso está sin traducir. Ayuda a traducirlo
-
Remove the single silver 4mm T5 Torx screw securing the headphone jack/micro USB board.
-
Use a pair of tweezers or a plastic opening tool to gently pry the headphone jack/micro USB board up and out of the phone.
-


Cancelar: No complete esta guía.
71 personas más completaron esta guía.

Equipo

Cal Poly, Team 5-9, Maness Spring 2015 Miembro de Cal Poly, Team 5-9, Maness Spring 2015
CPSU-MANESS-S15S5G9
4 Miembros
18 Guías creadas
23 comentarios
Worked for me - though looks like I will need to reopen as there is a problem with the wifi antenna & bluetooth connection is weak
where can i buy
i dont have one from sprint or horizon.. Which one do i buy?
Anybody want a new battery and charging port? Ok, only slightly used as the repair failed. When I got everything back together the LCD/backlight won't come on. I could charge the battery fine and you can feel the device responding to touch so the sensors in the display are working, but the screen will not light up what so ever. Now after a 3rd attempt to disassemble and reassemble searching in vane to find a lose connection there's a new problem, when I connect the battery lead to the terminals the phone vibrates. The only way to make the phone stop vibrating is to disconnect the battery. I can only assume this phone is now toast so it would be a shame to toss the 2 new parts...
How much? I'm having issues with the charging port not connecting to the micro used well