Esta versión puede contener ediciones incorrectas. Cambie a la última instantánea verificada.
Qué necesitas
-
Este paso está sin traducir. Ayuda a traducirlo
-
Remove the outer casing of the phone with your hands by prying and lifting at the latch.
-
-
Este paso está sin traducir. Ayuda a traducirlo
-
Remove the battery with your hands, lifting at the marked area.
-
Remove the SD card by gently pulling down on the bottom of the card.
-
-
Este paso está sin traducir. Ayuda a traducirlo
-
Remove the four T5 screws using the corresponding screwdriver.
-
Remove the two J000 screws using the corresponding screwdriver.
-
-
Este paso está sin traducir. Ayuda a traducirlo
-
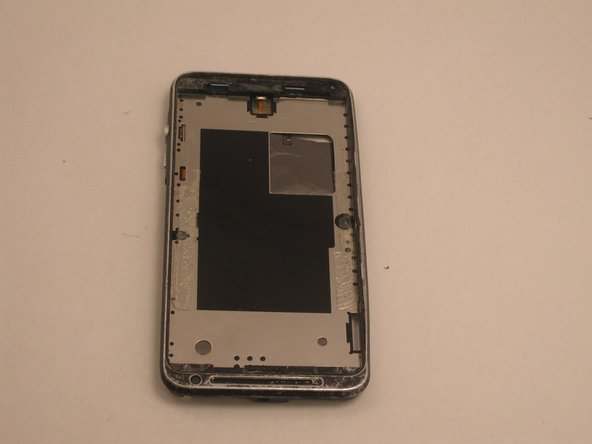
With the battery, SD card, and screws removed, the inner case of the phone can now be removed.
-
Using the plastic opening tool, pry the inner case off at the marked area. Continue prying around the entire perimeter of the phone.
-
This will remove the inner case, and allow access into the inner portion of the phone.
-
-
-
Este paso está sin traducir. Ayuda a traducirlo
-
Pictured here is the motherboard.
-
Using precision tweezers, remove the flash mechanism by prying the sides of the piece.
-
-
Este paso está sin traducir. Ayuda a traducirlo
-
Next we will remove the vibration mechanism shown here.
-
Using precision tweezers or fingers, gently pull on the wires connecting the vibration mechanism to the motherboard.
-
The piece should come loose easily.
-
-
Este paso está sin traducir. Ayuda a traducirlo
-
The next step is to disconnect all ribbons attached to the motherboard.
-
Begin by using tweezers to remove the plastic covering the ribbons.
-
Each ribbon needs to be removed by unlocking the white tab and pulling on the ribbon.
-
Unlock by lifting the white tab directly up.
-
-
Este paso está sin traducir. Ayuda a traducirlo
-
At this point the motherboard is almost fully detached.
-
Lift the motherboard and using precision tweezers, peel up the insulation cover on the bottom left corner.
-
-
Este paso está sin traducir. Ayuda a traducirlo
-
Disconnect the two ribbons on the backside of the mother board using precision tweezers.
-
Disconnect the Cellular/WIFI antenna by pulling directly up on the black wire.
-
The motherboard will now be free from the rest of the phone.
-
-
Este paso está sin traducir. Ayuda a traducirlo
-
Once the motherboard is removed, heat up the frame of the screen for 30 seconds with a heat gun or a hair dryer. This will make removal easier.
-
Use the plastic opening tool to pry open up one side of the screen.
-
Use the plastic opening tool to move around the borders and loosen the screen.
-
-
Este paso está sin traducir. Ayuda a traducirlo
-
Use the suction cup to remove the screen off the device.
-
After lifting the screen, begin prying the digitizer using a plastic opening tool.
-
Continue with this process around the entire perimeter of the phone.
-
-
Este paso está sin traducir. Ayuda a traducirlo
-
Once all the adhesive is separated, carefully remove the screen from the device.
-
Due to the removal of the motherboard, the screens should be easily removed from the phone.
-


Cancelar: No complete esta guía.
6 personas más completaron esta guía.
Equipo

USF Tampa, Team 14-20, Meier Fall 2015 Miembro de USF Tampa, Team 14-20, Meier Fall 2015
USFT-MEIER-F15S14G20
5 Miembros
10 Guías creadas