Saltar al contenido principal

HTC Desire V Rear Facing Camera Replacement

Qué necesitas

  1. HTC Desire V Rear Facing Camera Replacement, Battery: paso 1, imagen 1 de 3 HTC Desire V Rear Facing Camera Replacement, Battery: paso 1, imagen 2 de 3 HTC Desire V Rear Facing Camera Replacement, Battery: paso 1, imagen 3 de 3
    • Gently pry back cover away from phone.

    • If you are having difficulty you may need to use a Spudger or plastic opener.

  2. HTC Desire V Rear Facing Camera Replacement: paso 2, imagen 1 de 3 HTC Desire V Rear Facing Camera Replacement: paso 2, imagen 2 de 3 HTC Desire V Rear Facing Camera Replacement: paso 2, imagen 3 de 3
    • Lever the battery out from the bottom end first.

    • Do not bend or puncture the battery.

  3. HTC Desire V Rear Facing Camera Replacement, Midframe: paso 3, imagen 1 de 3 HTC Desire V Rear Facing Camera Replacement, Midframe: paso 3, imagen 2 de 3 HTC Desire V Rear Facing Camera Replacement, Midframe: paso 3, imagen 3 de 3
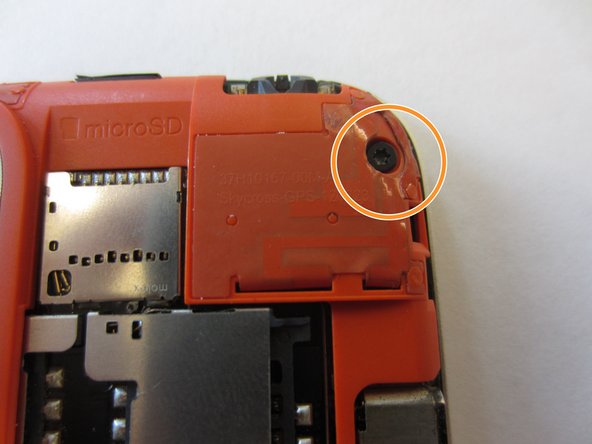
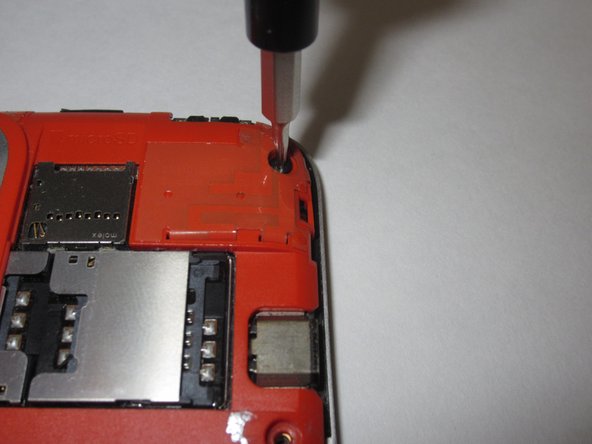
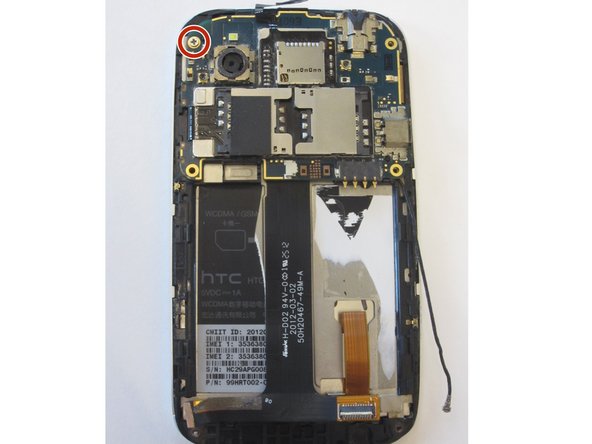
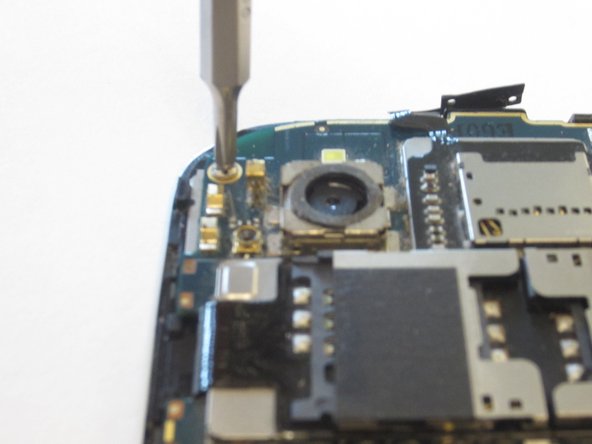
    • Use a Torx T5 screwdriver to unscrew and remove five 3.0 mm screws from the rear frame.

  4. HTC Desire V Rear Facing Camera Replacement: paso 4, imagen 1 de 3 HTC Desire V Rear Facing Camera Replacement: paso 4, imagen 2 de 3 HTC Desire V Rear Facing Camera Replacement: paso 4, imagen 3 de 3
    • Use an opening tool or a spudger to gently remove the rear frame.

  5. HTC Desire V Rear Facing Camera Replacement, Button Assembly: paso 5, imagen 1 de 2 HTC Desire V Rear Facing Camera Replacement, Button Assembly: paso 5, imagen 2 de 2
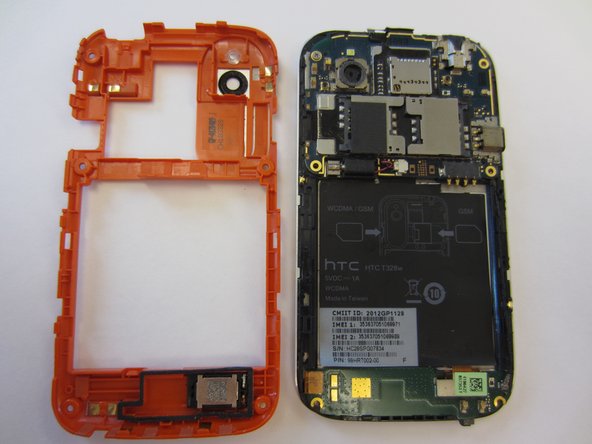
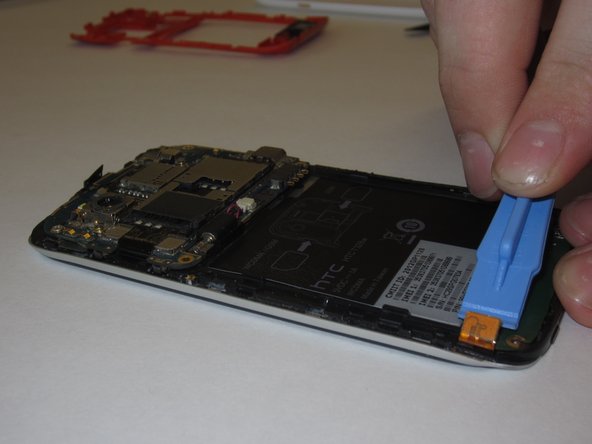
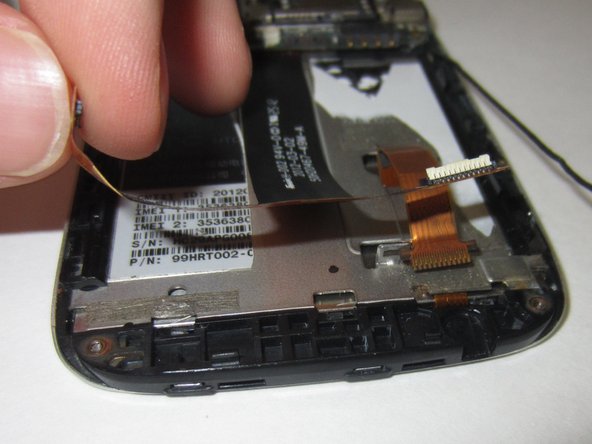
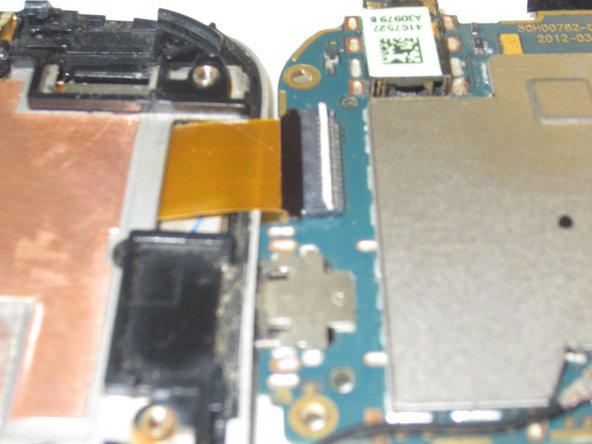
    • Remove the connector on left side of the Navigation board by unplugging/prying the orange ribbon.

  6. HTC Desire V Rear Facing Camera Replacement: paso 6, imagen 1 de 2 HTC Desire V Rear Facing Camera Replacement: paso 6, imagen 2 de 2
    • Gently unplug and remove aerial cable (black antenna) from bottom plug.

  7. HTC Desire V Rear Facing Camera Replacement: paso 7, imagen 1 de 2 HTC Desire V Rear Facing Camera Replacement: paso 7, imagen 2 de 2
    • Nav Board will be stuck down by glue.

    • Pull gently from the right end of the board, being careful of its flexibility.

  8. HTC Desire V Rear Facing Camera Replacement, Vibration Motor: paso 8, imagen 1 de 2 HTC Desire V Rear Facing Camera Replacement, Vibration Motor: paso 8, imagen 2 de 2
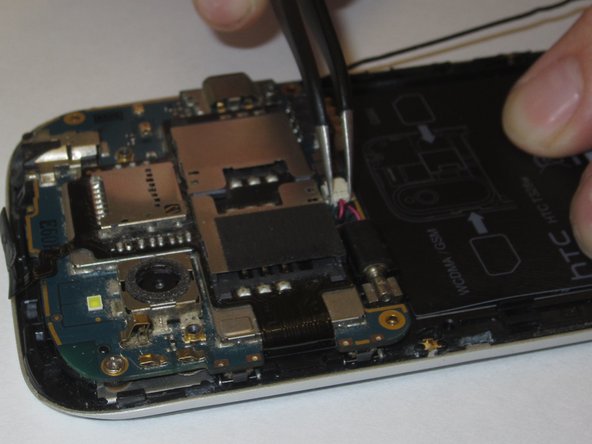
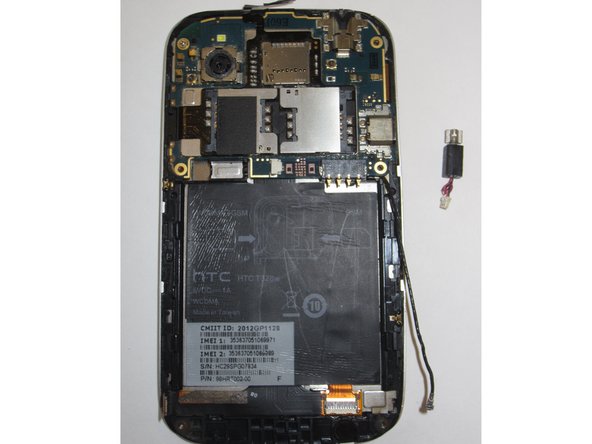
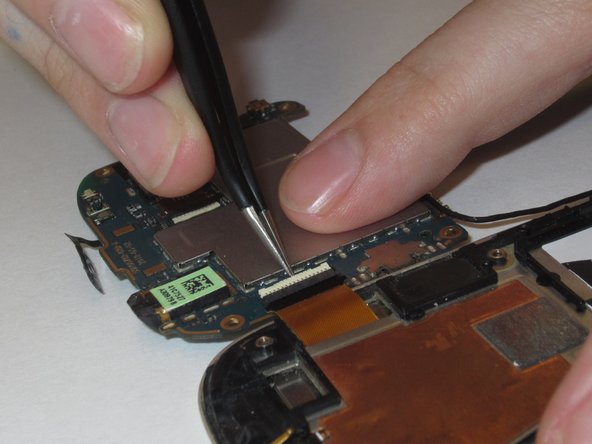
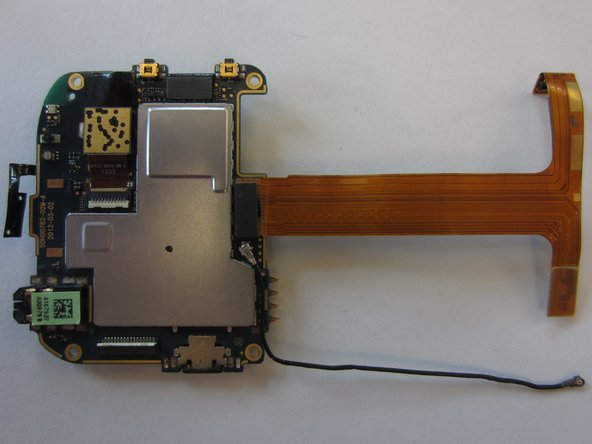
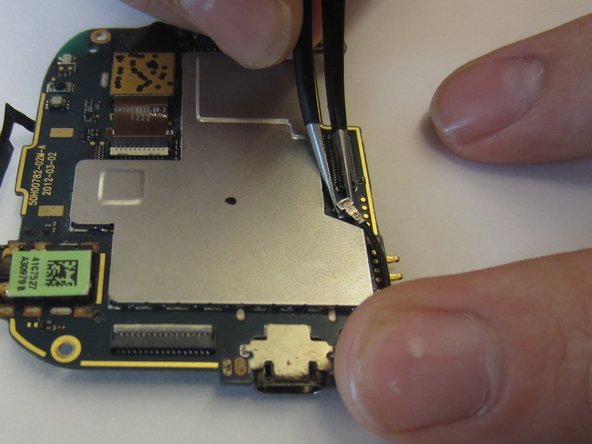
    • Unplug the vibration motor shown from the white plug on the motherboard.

    • You will probably need tweezers to do this.

  9. HTC Desire V Rear Facing Camera Replacement: paso 9, imagen 1 de 2 HTC Desire V Rear Facing Camera Replacement: paso 9, imagen 2 de 2
    • Gently remove the motor from its housing in the phone’s chassis.

    • The easiest way to do this is to lever the motor out by its rotating end using the tweezers.

  10. HTC Desire V Rear Facing Camera Replacement, Motherboard Assembly: paso 10, imagen 1 de 2 HTC Desire V Rear Facing Camera Replacement, Motherboard Assembly: paso 10, imagen 2 de 2
    • Remove the black information sticker if this is the first time opening the handset.

  11. HTC Desire V Rear Facing Camera Replacement: paso 11, imagen 1 de 3 HTC Desire V Rear Facing Camera Replacement: paso 11, imagen 2 de 3 HTC Desire V Rear Facing Camera Replacement: paso 11, imagen 3 de 3
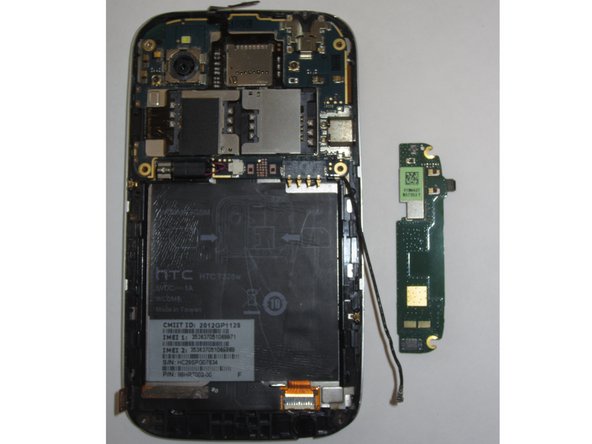
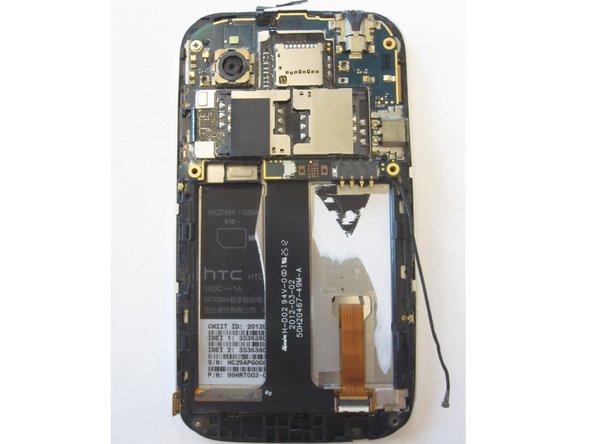
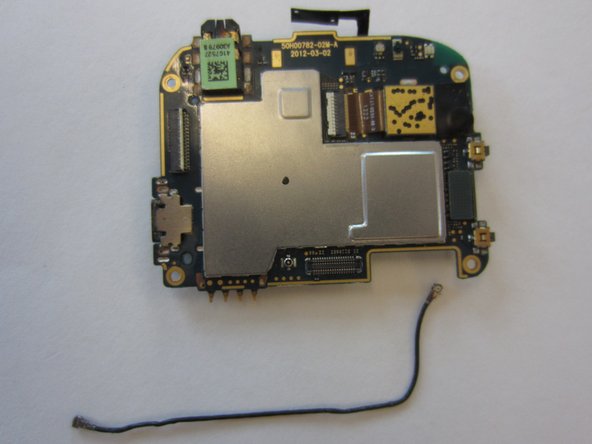
    • You should now see a black ribbon cable, which was connected at the left to the Nav board, and on the right, to a gold ribbon cable which goes to the screen.

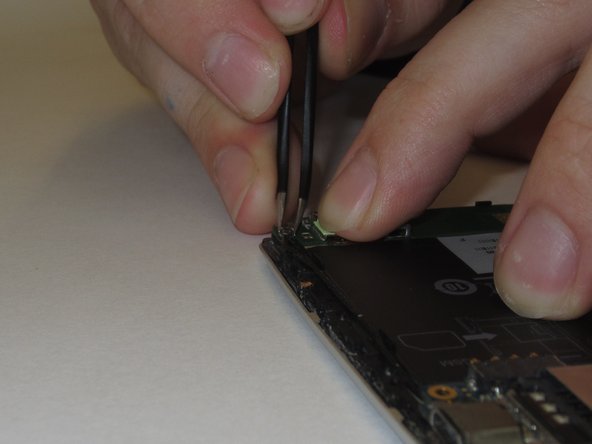
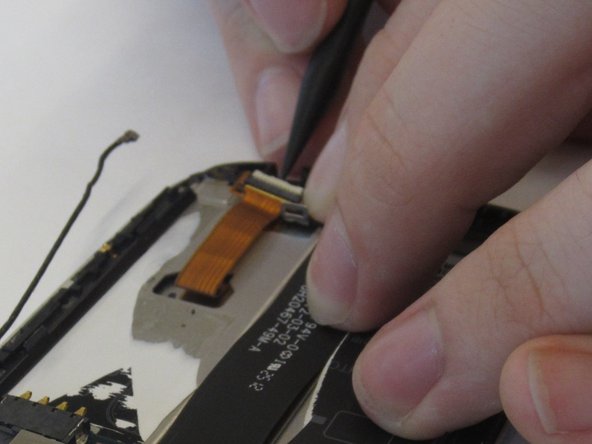
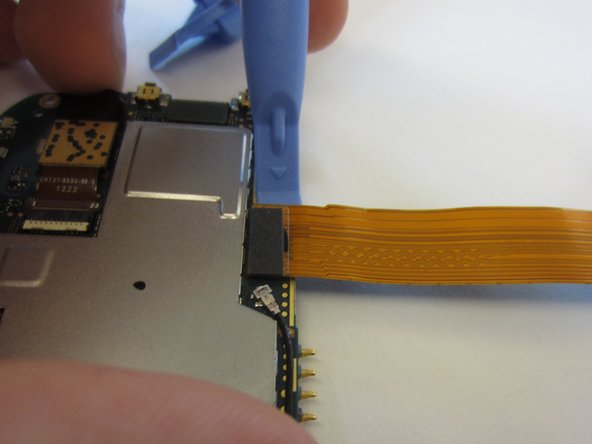
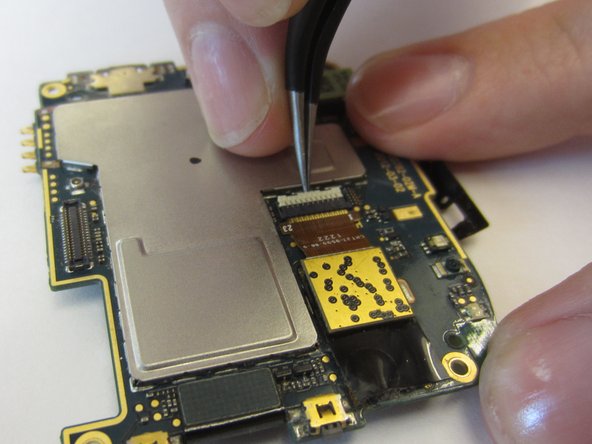
    • Unlock the gold ribbon cable connecting screen to logic board by lifting the locking tab at the back of the socket.

    • For this you may wish to use a spudger or tweezers.

  12. HTC Desire V Rear Facing Camera Replacement: paso 12, imagen 1 de 2 HTC Desire V Rear Facing Camera Replacement: paso 12, imagen 2 de 2
    • Disconnect gold ribbon cable connecting screen to logic board by pulling cable out gently.

  13. HTC Desire V Rear Facing Camera Replacement: paso 13, imagen 1 de 3 HTC Desire V Rear Facing Camera Replacement: paso 13, imagen 2 de 3 HTC Desire V Rear Facing Camera Replacement: paso 13, imagen 3 de 3
    • Gently unstick black ribbon cable from the chassis.

  14. HTC Desire V Rear Facing Camera Replacement: paso 14, imagen 1 de 2 HTC Desire V Rear Facing Camera Replacement: paso 14, imagen 2 de 2
    • Unscrew the 2mm silver screw from top left.

    • Use a Phillips PH00 Screwdriver for this.

  15. HTC Desire V Rear Facing Camera Replacement: paso 15, imagen 1 de 2 HTC Desire V Rear Facing Camera Replacement: paso 15, imagen 2 de 2
    • Gently pry logic board from the casing by lifting the left side up, as if there was a hinge on the right, folding it over the right edge where you will see a gold/orange ribbon cable.

  16. HTC Desire V Rear Facing Camera Replacement: paso 16, imagen 1 de 3 HTC Desire V Rear Facing Camera Replacement: paso 16, imagen 2 de 3 HTC Desire V Rear Facing Camera Replacement: paso 16, imagen 3 de 3
    • Remove the gold ribbon cable by lifting tab at the back of the socket, using a spudger or tweezers.

  17. HTC Desire V Rear Facing Camera Replacement: paso 17, imagen 1 de 2 HTC Desire V Rear Facing Camera Replacement: paso 17, imagen 2 de 2
    • Gently pull the logic board to the right and it will disconnect from the chassis.

  18. HTC Desire V Rear Facing Camera Replacement, Motherboard: paso 18, imagen 1 de 3 HTC Desire V Rear Facing Camera Replacement, Motherboard: paso 18, imagen 2 de 3 HTC Desire V Rear Facing Camera Replacement, Motherboard: paso 18, imagen 3 de 3
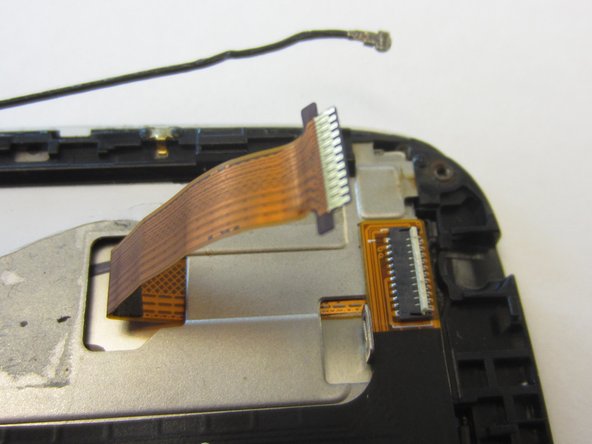
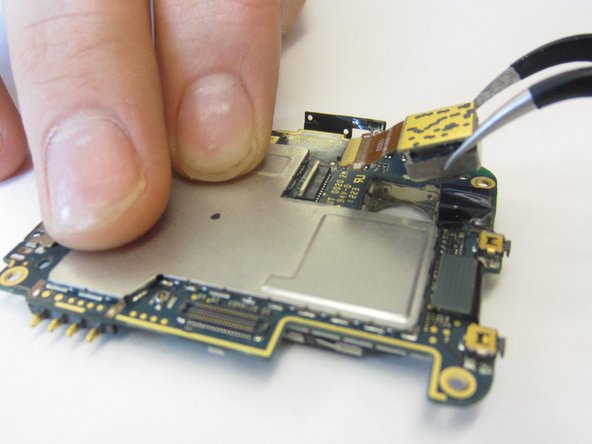
    • Noting that the rear side of the black ribbon cable is gold, use a spudger or an opening tool to gently disconnect it from the motherboard by levering it up at the right side

  19. HTC Desire V Rear Facing Camera Replacement: paso 19, imagen 1 de 3 HTC Desire V Rear Facing Camera Replacement: paso 19, imagen 2 de 3 HTC Desire V Rear Facing Camera Replacement: paso 19, imagen 3 de 3
    • Gently unplug and remove antenna cable (black antenna) from socket beside the ribbon cable

    • If you lack usable nails, you will need tweezers

  20. HTC Desire V Rear Facing Camera Replacement: paso 20, imagen 1 de 3 HTC Desire V Rear Facing Camera Replacement: paso 20, imagen 2 de 3 HTC Desire V Rear Facing Camera Replacement: paso 20, imagen 3 de 3
    • Locate the camera.

    • Lift the locking tab at the back of the connector for the camera using tweezers or opening tools.

  21. HTC Desire V Rear Facing Camera Replacement: paso 21, imagen 1 de 3 HTC Desire V Rear Facing Camera Replacement: paso 21, imagen 2 de 3 HTC Desire V Rear Facing Camera Replacement: paso 21, imagen 3 de 3
    • Preferably using tweezers, gently pull the camera assembly up from the motherboard, and away from the connector and the ribbon cable will slide out easily.

Conclusión

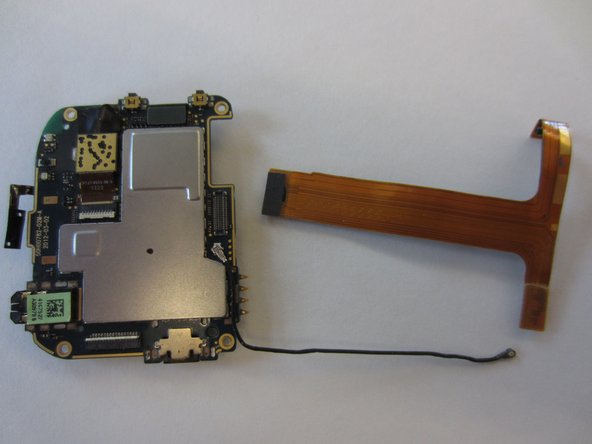
To reassemble your device, follow these instructions in reverse order.

William McCusker

Miembro Desde 01/29/15

1,096 Reputación

9 Guías creadas

Equipo

Clemson, Team 14-3, Shirley Winter 2015 Miembro de Clemson, Team 14-3, Shirley Winter 2015

CLEM-SHIRLEY-W15S14G3

6 Miembros

18 Guías creadas

0 comentarios

Agregar Comentario

Ver Estadísticas:

Ultimas 24 horas: 0

Ultimos 7 días: 0

Ultimos 30 días: 0

Todo El Tiempo: 182