Saltar al contenido principal

HTC Desire 826 Speakers Replacement

Qué necesitas

  1. HTC Desire 826 Speakers Replacement, Battery: paso 1, imagen 1 de 3 HTC Desire 826 Speakers Replacement, Battery: paso 1, imagen 2 de 3 HTC Desire 826 Speakers Replacement, Battery: paso 1, imagen 3 de 3
    • Find a seam in the back of the device.

    • Insert the plastic spudger into the seam and pry off the back panel.

    • There will be glue, so keep prying until it comes off or you may need to heat up the edges of the device to loosen the adhesive with the iOpener.

  2. HTC Desire 826 Speakers Replacement: paso 2, imagen 1 de 3 HTC Desire 826 Speakers Replacement: paso 2, imagen 2 de 3 HTC Desire 826 Speakers Replacement: paso 2, imagen 3 de 3
    • Remove the 4.0 mm screw above the battery with a T5 Torx screwdriver.

    • Remove the metal bracket with the tweezers.

  3. HTC Desire 826 Speakers Replacement: paso 3, imagen 1 de 1
    • Disconnect the battery cable from the motherboard with the tweezers.

  4. HTC Desire 826 Speakers Replacement: paso 4, imagen 1 de 2 HTC Desire 826 Speakers Replacement: paso 4, imagen 2 de 2
    • Lift the battery with a plastic spudger and remove it from the device.

  5. HTC Desire 826 Speakers Replacement, Back Camera: paso 5, imagen 1 de 3 HTC Desire 826 Speakers Replacement, Back Camera: paso 5, imagen 2 de 3 HTC Desire 826 Speakers Replacement, Back Camera: paso 5, imagen 3 de 3
    • Use a T5 Torx screwdriver to remove the three 4.0 mm screws.

  6. HTC Desire 826 Speakers Replacement: paso 6, imagen 1 de 1
    • Use the spudger to lift the black plastic covering.

  7. HTC Desire 826 Speakers Replacement: paso 7, imagen 1 de 3 HTC Desire 826 Speakers Replacement: paso 7, imagen 2 de 3 HTC Desire 826 Speakers Replacement: paso 7, imagen 3 de 3
    • Use the spudger to lift the green board. The back camera is attached on the side as shown.

    • Use the tweezers to disconnect and remove the camera.

  8. HTC Desire 826 Speakers Replacement, Motherboard: paso 8, imagen 1 de 2 HTC Desire 826 Speakers Replacement, Motherboard: paso 8, imagen 2 de 2
    • Remove the three 4.0 mm T5 Torx screws connected to the motherboard.

  9. HTC Desire 826 Speakers Replacement: paso 9, imagen 1 de 2 HTC Desire 826 Speakers Replacement: paso 9, imagen 2 de 2
    • Disconnect the ribbon cable from the motherboard by flipping up the locking tab with a spudger and pulling out the cable with your fingers.

    • Lift the motherboard out of the frame, using a spudger to help pick up one of the edges.

  10. HTC Desire 826 Speakers Replacement, Daughterboard: paso 10, imagen 1 de 1
    • Use a T5 Torx screwdriver to remove the two 4.0 mm screws in the bottom corners of the device.

  11. HTC Desire 826 Speakers Replacement: paso 11, imagen 1 de 1
    • Use a T5 Torx screwdriver to remove one screw connected to the daughterboard.

  12. HTC Desire 826 Speakers Replacement: paso 12, imagen 1 de 2 HTC Desire 826 Speakers Replacement: paso 12, imagen 2 de 2
    • Remove the interconnect ribbon cable by flipping up the black tab of the ZIF connector and pulling out the cable with your fingers.

    • Remove the daughterboard.

  13. HTC Desire 826 Speakers Replacement, Speakers: paso 13, imagen 1 de 2 HTC Desire 826 Speakers Replacement, Speakers: paso 13, imagen 2 de 2
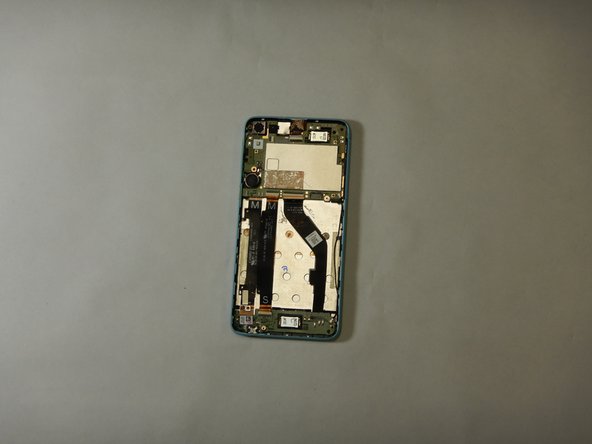
    • Use a pair of tweezers to unhook the locks on both sides of the speaker.

    • Grab the speaker with the tweezers and lift vertically to remove.

    • You can replace the top and bottom speakers independently as needed.

Conclusión

To reassemble your device, follow these instructions in reverse order.

0 comentarios

Agregar Comentario

Ver Estadísticas:

Ultimas 24 horas: 0

Ultimos 7 días: 0

Ultimos 30 días: 0

Todo El Tiempo: 128