Saltar al contenido principal

HTC Amaze Loud Speaker Replacement

Qué necesitas

  1. HTC Amaze Loud Speaker Replacement, Battery: paso 1, imagen 1 de 2 HTC Amaze Loud Speaker Replacement, Battery: paso 1, imagen 2 de 2
    • Gently press the Release Button located at the bottom of the phone in order to remove the back panel of the device.

  2. HTC Amaze Loud Speaker Replacement: paso 2, imagen 1 de 1
    • Once you locate the battery, look for a notch below it.

    • Gently insert your fingernails into the notch.

    • Lift the battery out of its recess.

  3. HTC Amaze Loud Speaker Replacement, HTC Amaze Back Panel Disassembly: paso 3, imagen 1 de 3 HTC Amaze Loud Speaker Replacement, HTC Amaze Back Panel Disassembly: paso 3, imagen 2 de 3 HTC Amaze Loud Speaker Replacement, HTC Amaze Back Panel Disassembly: paso 3, imagen 3 de 3
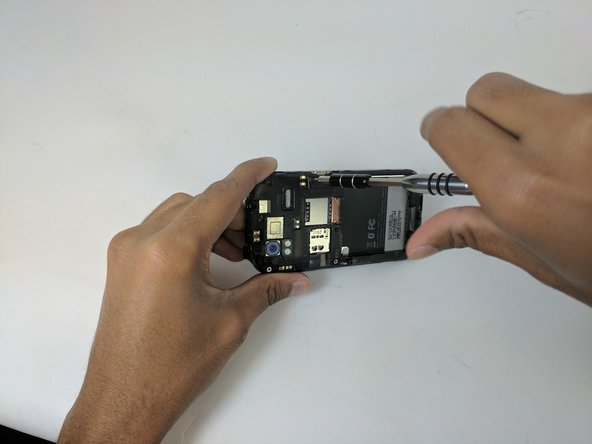
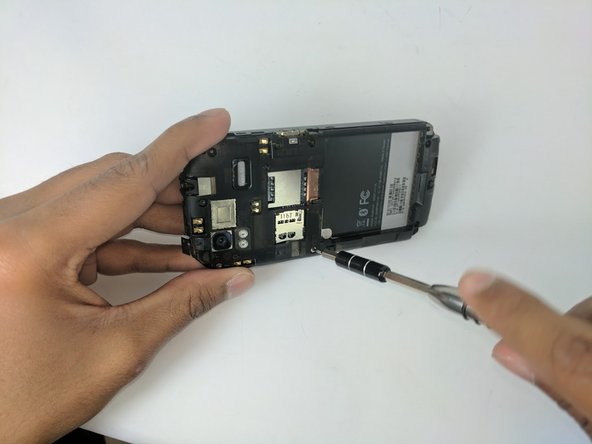
    • Use the Torx T5 screwdriver to remove the 7 Torx Screws (3mm) attached to the back housing of the device.

    • One of the Screws may have a tape attached to it that says void. Removing this screw will void the devices warranty.

  4. HTC Amaze Loud Speaker Replacement: paso 4, imagen 1 de 3 HTC Amaze Loud Speaker Replacement: paso 4, imagen 2 de 3 HTC Amaze Loud Speaker Replacement: paso 4, imagen 3 de 3
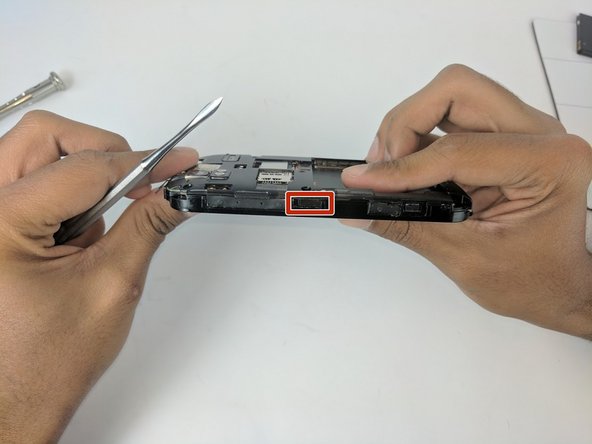
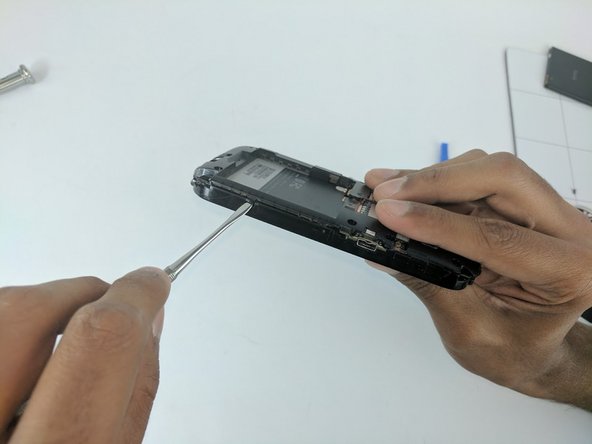
    • Proceed to remove the back housing by using the spudger to gently unclip each clip holding the back housing in place and then lift the outer edges of the back housing

    • If you're having trouble opening the back try using the spudger to gently pry all around the panel before you attempt to remove it.

  5. HTC Amaze Loud Speaker Replacement: paso 5, imagen 1 de 2 HTC Amaze Loud Speaker Replacement: paso 5, imagen 2 de 2
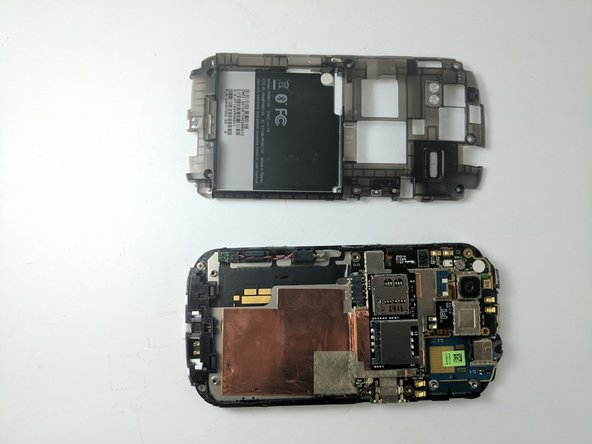
    • Now simply remove the back panel by gently pulling. This will make it easier to access the devices internal components.

  6. HTC Amaze Loud Speaker Replacement, Loud Speaker: paso 6, imagen 1 de 3 HTC Amaze Loud Speaker Replacement, Loud Speaker: paso 6, imagen 2 de 3 HTC Amaze Loud Speaker Replacement, Loud Speaker: paso 6, imagen 3 de 3
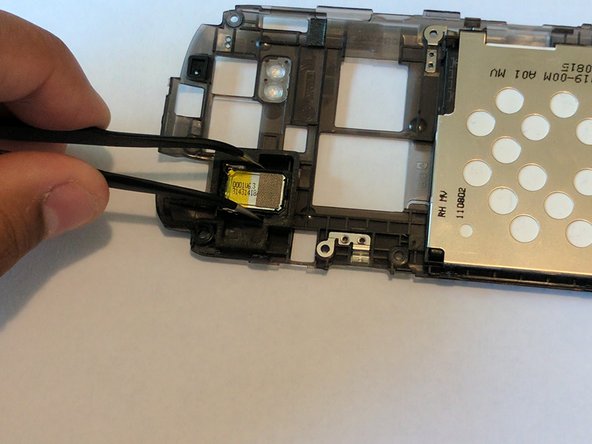
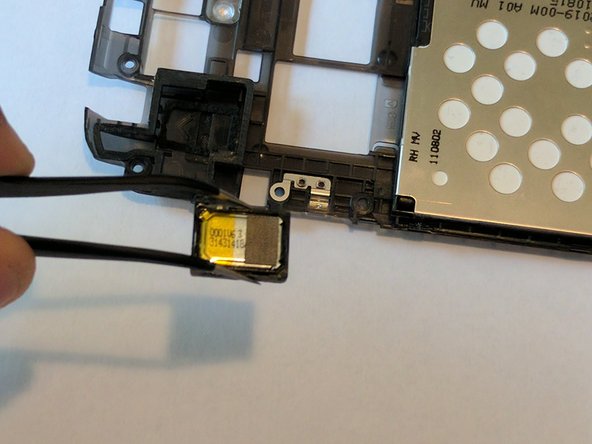
    • Turn the back panel over to access its interior, and locate the loudspeaker marked in the picture.

    • Remove it by gently pulling with the precision tweezers.

Conclusión

To reassemble your device, follow these instructions in reverse order.

Una persona más ha completado esta guía.

Akshat Shah

Miembro Desde 09/26/16

368 Reputación

3 Guías creadas

Equipo

USF Tampa, Team 16-3, Eyestone Fall 2016 Miembro de USF Tampa, Team 16-3, Eyestone Fall 2016

USFT-EYESTONE-F16S16G3

2 Miembros

10 Guías creadas

0 comentarios

Agregar Comentario

Ver Estadísticas:

Ultimas 24 horas: 0

Ultimos 7 días: 0

Ultimos 30 días: 1

Todo El Tiempo: 123