Esta versión puede contener ediciones incorrectas. Cambie a la última instantánea verificada.
Qué necesitas
-
Este paso está sin traducir. Ayuda a traducirlo
-
While sliding the silver release tab up, simultaneously lift the cover up from the left side.
-
-
Este paso está sin traducir. Ayuda a traducirlo
-
Now, lift the battery up and away from the device to remove it.
-
-
Este paso está sin traducir. Ayuda a traducirlo
-
Remove the four silver screws using the T5 Torx Screwdriver (T5 x .25 in).
-
-
Este paso está sin traducir. Ayuda a traducirlo
-
Remove the single black screw that is located beneath the HP sticker with the T5 Torx Screwdriver.
-
-
-
Este paso está sin traducir. Ayuda a traducirlo
-
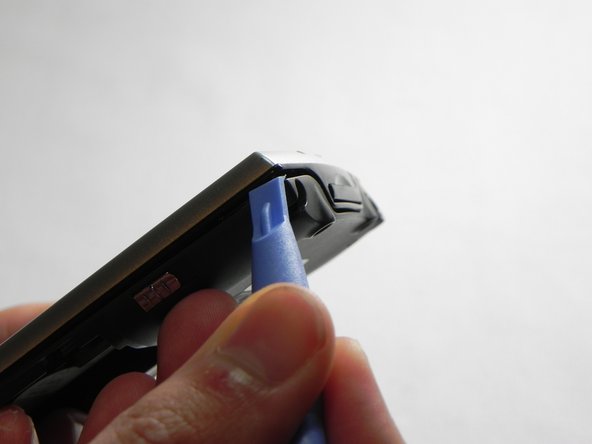
Next, use your plastic removal tool to separate the gray back from the black center piece.
-
For better results, start the separation at the corner piece.
-
-
Este paso está sin traducir. Ayuda a traducirlo
-
Now that the back cover is removed, use the #00 Philips x .17 screwdriver to remove the small screw to the left of the SD card slot.
-
-
Este paso está sin traducir. Ayuda a traducirlo
-
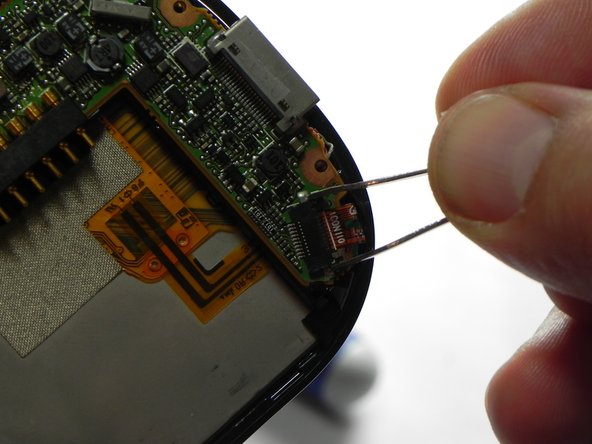
Next, unlock and remove the ribbon cable.
-
Using metal tweezers, carefully pull back on both sides of the brown bar unlocking the cable and slipping it out of the connector.
-
-
Este paso está sin traducir. Ayuda a traducirlo
-
Next, remove the wire from the bottom of the mother board.
-
Make sure all the connections are properly disconnected before separation from the motherboard.
-
-
Este paso está sin traducir. Ayuda a traducirlo
-
Next, use a plastic removal tool and separate the silver front case from the black frame.
-
-
Este paso está sin traducir. Ayuda a traducirlo
-
Remove the 4 screws along the bottom of the faceplate
-
They are #00 Philips head screws
-
-
Este paso está sin traducir. Ayuda a traducirlo
-
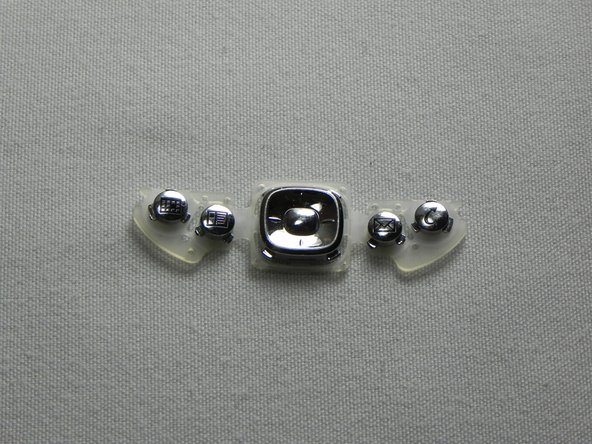
Once removed you can easily separate the keys from the body.
-
-
Este paso está sin traducir. Ayuda a traducirlo
-
once the joypad key have been removed use the tweezers to carefully maneuver the wire out of its clip releasing the battery
-


Cancelar: No complete esta guía.
4 personas más completaron esta guía.
2 comentarios
This guide is AWESOME.. Thanks! I have an iPAQ 1945 h1900, but this guide was the exact same for my device. I got as far as the taking the battery out without removing the 5th screw beneath the "warranty void" sticker. My only issue--do you know where to get the replacement battery?
IMPORTANT. The back up battery does not show charge immediately ( i don't know why ) Id read something before. When in April 2023 i swapped the old B U Batt for a known good one from another ipaq. At the end of the job . The level of charge on the b.up was zero. I charged the main batt to 100% then removed the ipaq from the charger and left it for a couple of hours . When I next checked it there was 100% on both batts....