Saltar al contenido principal

HP ProBook 440 G1 RAM Replacement

  1. HP ProBook 440 G1 RAM Replacement, Battery: paso 1, imagen 1 de 2 HP ProBook 440 G1 RAM Replacement, Battery: paso 1, imagen 2 de 2
    • Make sure the laptop is turned off before you start.

    • Push and hold the release tab on the right and left toward the center.

  2. HP ProBook 440 G1 RAM Replacement: paso 2, imagen 1 de 2 HP ProBook 440 G1 RAM Replacement: paso 2, imagen 2 de 2
    • Pull the battery out.

  3. HP ProBook 440 G1 RAM Replacement, Backplate: paso 3, imagen 1 de 3 HP ProBook 440 G1 RAM Replacement, Backplate: paso 3, imagen 2 de 3 HP ProBook 440 G1 RAM Replacement, Backplate: paso 3, imagen 3 de 3
    • Push and hold the release tabs on the right and left toward the center again.

  4. HP ProBook 440 G1 RAM Replacement: paso 4, imagen 1 de 1
    • Slide the backplate off.

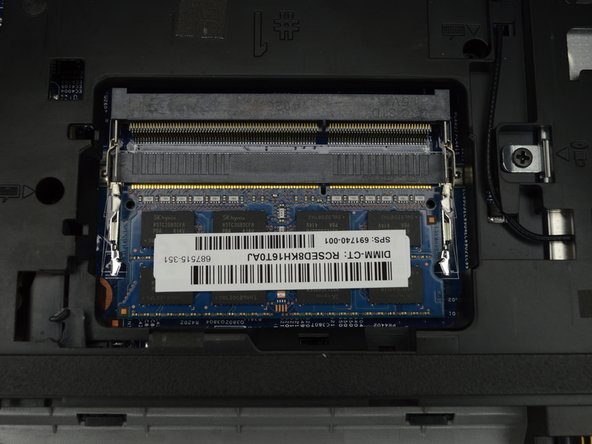
  5. HP ProBook 440 G1 RAM Replacement, RAM: paso 5, imagen 1 de 2 HP ProBook 440 G1 RAM Replacement, RAM: paso 5, imagen 2 de 2
    • Locate the RAM, in the middle of the laptop near the battery.

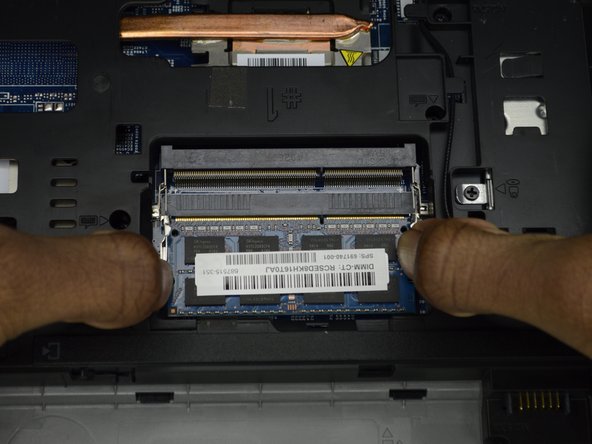
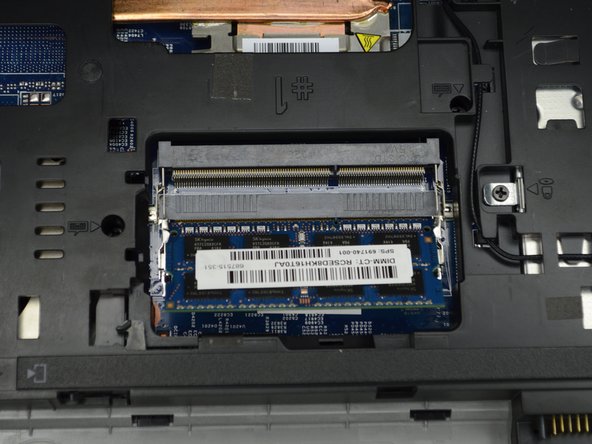
  6. HP ProBook 440 G1 RAM Replacement: paso 6, imagen 1 de 3 HP ProBook 440 G1 RAM Replacement: paso 6, imagen 2 de 3 HP ProBook 440 G1 RAM Replacement: paso 6, imagen 3 de 3
    • Push the two metal tabs on either side of the RAM stick out.

    • The RAM stick will pop up slightly.

  7. HP ProBook 440 G1 RAM Replacement: paso 7, imagen 1 de 1
    • Remove the RAM stick.

Conclusión

To reassemble your device, follow these instructions in reverse order.

2 personas más completaron esta guía.

0 comentarios

Agregar Comentario

Ver Estadísticas:

Ultimas 24 horas: 0

Ultimos 7 días: 4

Ultimos 30 días: 17

Todo El Tiempo: 2,213