Saltar al contenido principal

HP Photosmart D110a Power Button Replacement

Qué necesitas

  1. HP Photosmart D110a Power Button Replacement, Power Button: paso 1, imagen 1 de 1
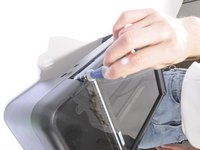
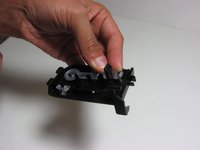
    • Open the printer's mouth by pulling the two mouth pieces down.

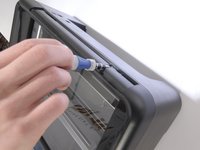
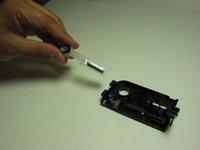
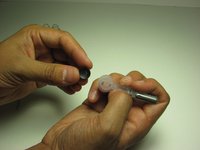
    • Lift the flap covering the scanner. When you are finished, the printer should appear as shown.

  2. HP Photosmart D110a Power Button Replacement: paso 2, imagen 1 de 1
    • Remove the flap for the scanner by pulling lightly on the clip that attaches it to the printer.

    • The clip may be damaged by applying too much force.

  3. HP Photosmart D110a Power Button Replacement: paso 3, imagen 1 de 3 HP Photosmart D110a Power Button Replacement: paso 3, imagen 2 de 3 HP Photosmart D110a Power Button Replacement: paso 3, imagen 3 de 3
    • Remove the three screws from the top of the printer using a T9 screwdriver as shown.

    • The screws are located in the far-left, far-right, and near-right corners of the printer, with respect to the front view.

  4. HP Photosmart D110a Power Button Replacement: paso 4, imagen 1 de 1
    • Reach into the mouth of the printer and press the clip behind the power button to release the power button face.

  5. HP Photosmart D110a Power Button Replacement: paso 5, imagen 1 de 1
    • A picture of the removed power button is provided to show the location of the clip that needs to be pressed.

    • After pressing the clip, pull out the face of the power button by sliding it from the right to the left side.

  6. HP Photosmart D110a Power Button Replacement: paso 6, imagen 1 de 3 HP Photosmart D110a Power Button Replacement: paso 6, imagen 2 de 3 HP Photosmart D110a Power Button Replacement: paso 6, imagen 3 de 3
    • The power button face has a plastic holder that attaches the power button and the wireless button to the face plate using two slots.

    • Loosen the plastic holder by pulling the slots on the face plate away from the plastic holder.

    • Remove the plastic holder from the face plate after the slots are loosened.

  7. HP Photosmart D110a Power Button Replacement: paso 7, imagen 1 de 3 HP Photosmart D110a Power Button Replacement: paso 7, imagen 2 de 3 HP Photosmart D110a Power Button Replacement: paso 7, imagen 3 de 3
    • The plastic holder secures the power button by two slots.

    • Using a spudger, push the holders inward to detach the button from the plastic holder.

Conclusión

To reassemble your device, follow these instructions in reverse order.

Una persona más ha completado esta guía.

Tim Wise

Miembro Desde 04/01/11

173 Reputación

7 Guías creadas

Equipo

Cal Poly, Team 10-38, Forte Spring 2011 Miembro de Cal Poly, Team 10-38, Forte Spring 2011

CPSU-FORTE-S11S10G38

5 Miembros

10 Guías creadas

0 comentarios

Agregar Comentario

Ver Estadísticas:

Ultimas 24 horas: 0

Ultimos 7 días: 0

Ultimos 30 días: 4

Todo El Tiempo: 3,530