Introducción
Before using this guide, make sure to review the troubleshooting page for the HP Pavilion x360 14m-ba011dx. The touchpad may not actually need to be replaced depending on the problem, which is why it is good to trouble shoot first.
This guide serves the purpose of taking the users step by step through accessing and removing the touchpad on the HP Pavillion x360 14m-ba011dx laptop. The model number for this device is 1KT47UA. If your touchpad is not responding or is moving your cursor erratically, you may need to replace replace your touchpad.
Qué necesitas
-
-
Remove the top left and right rubber pads closest to the hinge of the screen using a plastic spudger to locate the screws underneath.
-
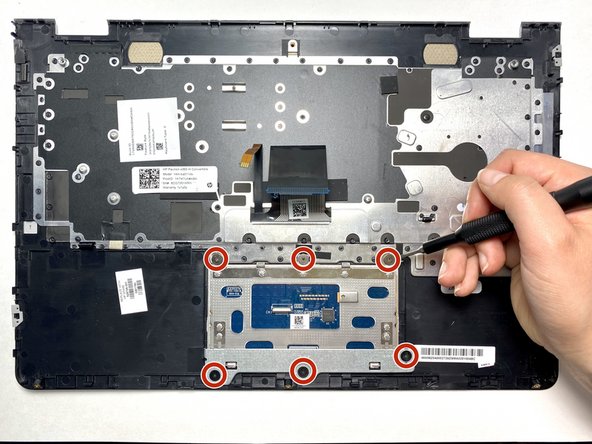
Remove the following 6 screws from the bottom of the device using a Phillips #00 Screwdriver:
-
Remove two 7.5 mm screws.
-
Remove three 5 mm screws.
-
Remove one 6.5 mm screw.
-
-


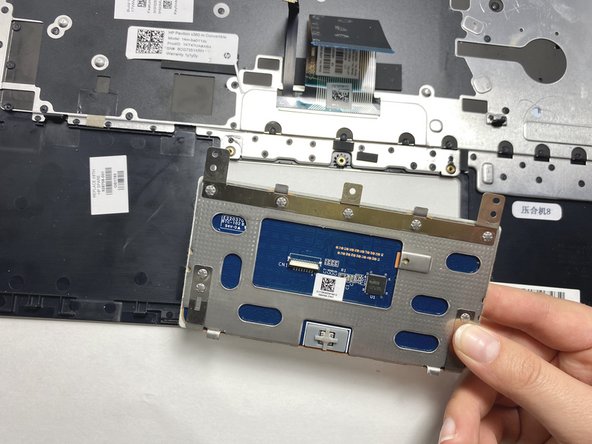
To reassemble your device, follow these instructions in reverse order.
To reassemble your device, follow these instructions in reverse order.
Equipo

Embry-Riddle Aeronautical University, Team S7-G5, Rauch Spring 2020 Miembro de Embry-Riddle Aeronautical University, Team S7-G5, Rauch Spring 2020
ERAU-RAUCH-S20S7G5
3 Miembros
5 Guías creadas