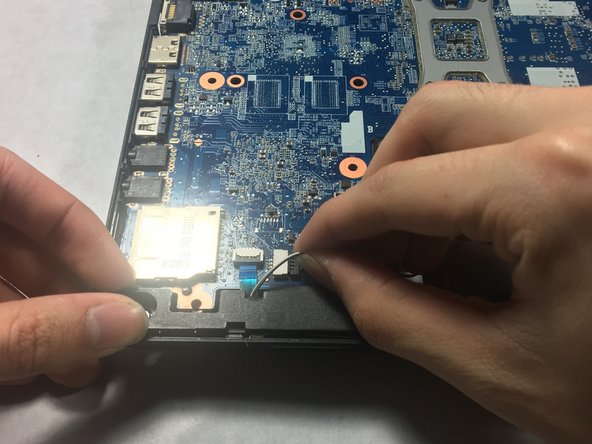
Saltar al contenido principal

HP Pavilion g4-1117dx Speaker Replacement

Qué necesitas

  1. HP Pavilion g4-1117dx Speaker Replacement, Battery: paso 1, imagen 1 de 1
    • Slide pill shaped tab to the other side of the channel.

    • Remove battery while keeping the tab to the side.

  2. HP Pavilion g4-1117dx Speaker Replacement, L-Shaped Back Panel: paso 3, imagen 1 de 1
    • Unscrew the two screws JIS #0 located on opposites sides of the panel.

    • Screws are attached to the panel and will not fully come out.

  3. HP Pavilion g4-1117dx Speaker Replacement: paso 4, imagen 1 de 1
    • Carefully pry off the L-shaped panel.

  4. HP Pavilion g4-1117dx Speaker Replacement, Hard Drive: paso 5, imagen 1 de 1
    • Pull out and unplug the tab on the right hand side.

  5. HP Pavilion g4-1117dx Speaker Replacement, Larger Back Panel: paso 6, imagen 1 de 1
    • Unscrew all nine 6.0mm JIS #0 screws located on the border of the back panel.

  6. HP Pavilion g4-1117dx Speaker Replacement: paso 7, imagen 1 de 1
    • Remove 3 screws located where the battery previously was.

  7. HP Pavilion g4-1117dx Speaker Replacement: paso 8, imagen 1 de 2 HP Pavilion g4-1117dx Speaker Replacement: paso 8, imagen 2 de 2
    • Remove 6 screws located under the spot where the smaller L-shaped panel was located.

  8. HP Pavilion g4-1117dx Speaker Replacement: paso 9, imagen 1 de 1
    • Slowly pry off the keyboard from the back panel.

    • Between the back panel and the keyboard there are two ribbon wires.

    • Remove slowly to not break the back panel. If it does not come off easily, check to see if all screws are removed.

  9. HP Pavilion g4-1117dx Speaker Replacement: paso 10, imagen 1 de 1
    • Unplug wires connecting back panel to keyboard.

  10. HP Pavilion g4-1117dx Speaker Replacement, Speaker: paso 11, imagen 1 de 2 HP Pavilion g4-1117dx Speaker Replacement, Speaker: paso 11, imagen 2 de 2
    • Unplug the red and white wires.

  11. HP Pavilion g4-1117dx Speaker Replacement: paso 12, imagen 1 de 1
    • Remove the speakers.

Conclusión

To reassemble your device, follow these instructions in reverse order.

Robert Hamilton

Miembro Desde 03/01/18

1,165 Reputación

10 Guías creadas

Equipo

0 comentarios

Agregar Comentario

Ver Estadísticas:

Ultimas 24 horas: 0

Ultimos 7 días: 0

Ultimos 30 días: 3

Todo El Tiempo: 557