Esta versión puede contener ediciones incorrectas. Cambiar a la última instantánea verificada.
Qué necesitas
-
Este paso está sin traducir. Ayuda a traducirlo
-
Begin removing the bottom cover by sliding the battery removal slider to the right to pop off the top of the cover.
-
-
Este paso está sin traducir. Ayuda a traducirlo
-
Slide a black spudger under the top of the cover to loosen the clips underneath.
-
-
Este paso está sin traducir. Ayuda a traducirlo
-
Slide the spudger down the left side of the cover to loosen the clips.
-
After the left side is loose, the rest of the cover should pop off, and you can remove it with your hands.
-
-
-
Este paso está sin traducir. Ayuda a traducirlo
-
Using a Phillips #0 screw driver, remove the four 4mm screws holding the hard drive in place.
-
-
Este paso está sin traducir. Ayuda a traducirlo
-
Using a plastic spudger, lift up the hard drive from the top left corner and flip it to the right of the laptop like opening a book.
-
-
Este paso está sin traducir. Ayuda a traducirlo
-
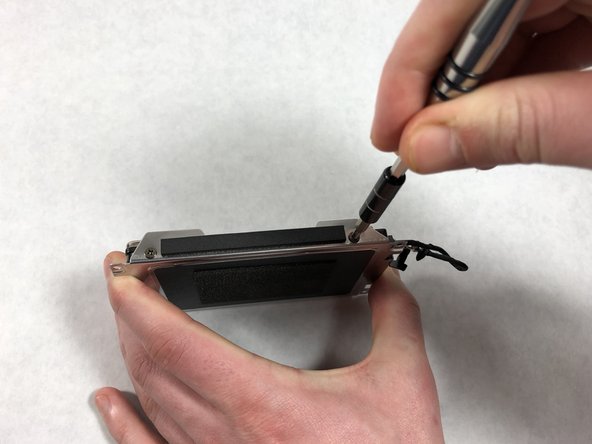
Pull the tab at the end of the cable connecting the hard drive to the laptop.
-
-
Este paso está sin traducir. Ayuda a traducirlo
-
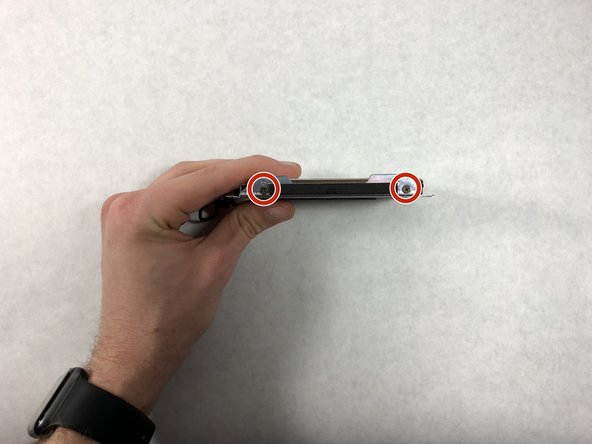
Using a Phillips #0 screw driver, remove the four 4mm screws on each side of the hard drive attaching it to its carriage.
-


Cancelar: No complete esta guía.
4 personas más completaron esta guía.
Equipo

UMass Dartmouth, Team S6-G3, Bernier Spring 2018 Miembro de UMass Dartmouth, Team S6-G3, Bernier Spring 2018
UMASSD-BERNIER-S18S6G3
3 Miembros
4 Guías creadas