Saltar al contenido principal

HP Pavilion dv5000 Optical Drive Replacement

Qué necesitas

  1. HP Pavilion dv5000 Optical Drive Replacement, Battery: paso 1, imagen 1 de 1
    • Turn off the computer, and unplug it from all external power sources.

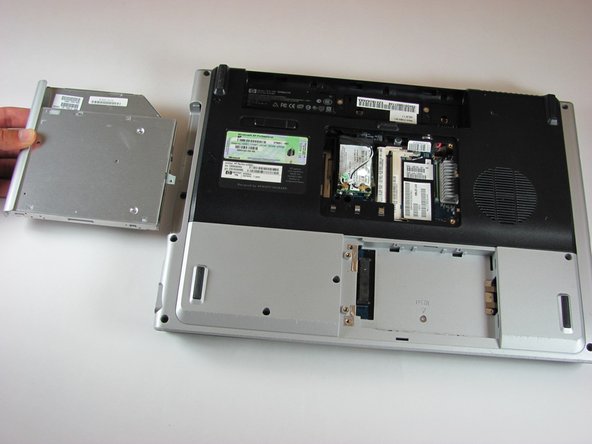
    • Lay the computer face-down on a flat surface. Orient the computer to match the image.

    • Locate the battery release switch, as indicated in the image by the red rectangle. Slide the switch from right to left, and remove the battery.

  2. HP Pavilion dv5000 Optical Drive Replacement, RAM Cover: paso 2, imagen 1 de 3 HP Pavilion dv5000 Optical Drive Replacement, RAM Cover: paso 2, imagen 2 de 3 HP Pavilion dv5000 Optical Drive Replacement, RAM Cover: paso 2, imagen 3 de 3
    • Remove the two 5mm Phillips screws on the right side of the RAM cover.

    • Lift the right side of the RAM cover, and remove it.

  3. HP Pavilion dv5000 Optical Drive Replacement, Optical Drive: paso 3, imagen 1 de 1
    • Remove the 11.0mm screw securing the optical drive to the computer.

  4. HP Pavilion dv5000 Optical Drive Replacement: paso 4, imagen 1 de 3 HP Pavilion dv5000 Optical Drive Replacement: paso 4, imagen 2 de 3 HP Pavilion dv5000 Optical Drive Replacement: paso 4, imagen 3 de 3
    • Locate the optical drive. The optical drive is located on the left side of the RAM bay.

    • Press the exposed edge of the optical drive gently with the spudger until the drive releases from the computer frame.

    • Pull the optical drive completely out of the computer frame.

Conclusión

To reassemble your device, follow these instructions in reverse order.

Una persona más ha completado esta guía.

Alex Kwok

Miembro Desde 10/05/10

271 Reputación

3 Guías creadas

Equipo

Cal Poly, Team 21-34, Regan Fall 2010 Miembro de Cal Poly, Team 21-34, Regan Fall 2010

CPSU-REGAN-F10S21G34

4 Miembros

11 Guías creadas

0 comentarios

Agregar Comentario

Ver Estadísticas:

Ultimas 24 horas: 0

Ultimos 7 días: 0

Ultimos 30 días: 1

Todo El Tiempo: 4,620