Esta versión puede contener ediciones incorrectas. Cambie a la última instantánea verificada.
Qué necesitas
-
Este paso está sin traducir. Ayuda a traducirlo
-
Shut down the computer.
-
Disconnect all external devices and cables from the computer.
-
-
Este paso está sin traducir. Ayuda a traducirlo
-
Locate the gray sliding tab next to the black bar where the battery is located.
-
Slide the gray sliding tab to the left until you hear a distinct click.
-
The inside edge of the battery should pop up.
-
-
Este paso está sin traducir. Ayuda a traducirlo
-
Grasp the inside edge of the battery.
-
Lift the inside edge of the battery up to detach the battery from the laptop.
-
-
Este paso está sin traducir. Ayuda a traducirlo
-
With the battery removed, locate the hard drive access panel.
-
-
Este paso está sin traducir. Ayuda a traducirlo
-
Identify the two screws that attach the hard drive access panel.
-
Remove the identified screws with your #00 Philips screwdriver.
-
Lift the left edge of the access panel up and to the right to detach the hard drive access panel from the laptop.
-
-
-
Este paso está sin traducir. Ayuda a traducirlo
-
Identify the plastic tab located on the left side of the hard drive.
-
Grasp the tab, gently lift up, and slide the tab to the left to remove the hard drive from the laptop.
-
-
Este paso está sin traducir. Ayuda a traducirlo
-
Locate RAM access door on the bottom side of the laptop.
-
-
Este paso está sin traducir. Ayuda a traducirlo
-
Locate the two screws holding down the RAM access cover
-
Unscrew the two screws with a size 00 Philips screwdriver.
-
-
Este paso está sin traducir. Ayuda a traducirlo
-
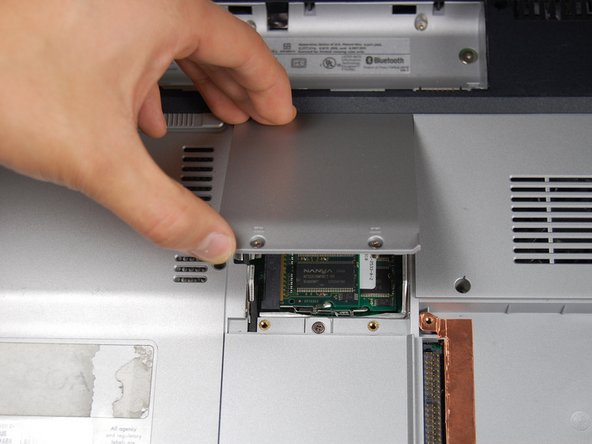
Lift up on the screw side of the RAM access cover to remove it.
-
-
Este paso está sin traducir. Ayuda a traducirlo
-
Gently pull apart the metal tabs located on both sides of the stick of RAM.
-
The RAM stick should tilt upwards.
-
-
Este paso está sin traducir. Ayuda a traducirlo
-
Repeat the previous two steps for the remaining stick of RAM.
-
-
Este paso está sin traducir. Ayuda a traducirlo
-
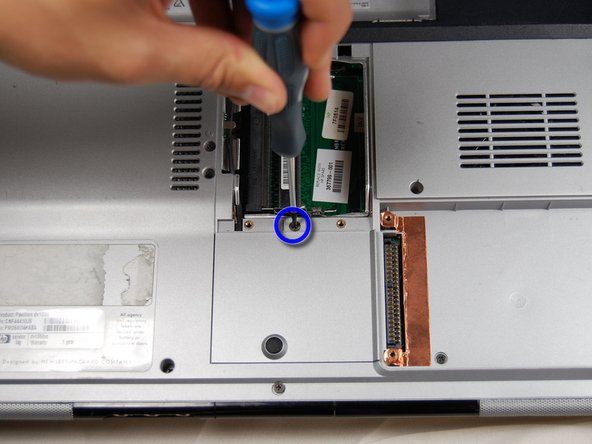
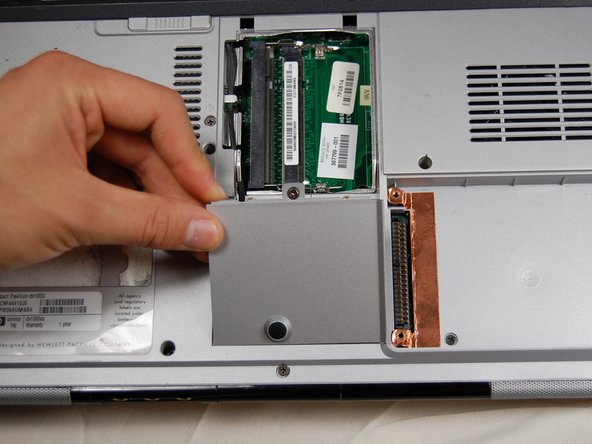
Locate the small panel below the panel you just removed.
-
Loosen the one screw in the middle with a #00 Phillips screwdriver. Again, the screw will not fall out of the panel when loosened.
-
Lift the panel up and out of its slot to remove.
-
-
Este paso está sin traducir. Ayuda a traducirlo
-
Identify the two connections at the top of the bluetooth card.
-
Using your fingers, gently pull up on the white clip until it releases.
-
Remove the black clip in the same manner as the white clip
-
-
Este paso está sin traducir. Ayuda a traducirlo
-
Locate the two clips on either side of the Bluetooth card.
-
Using your fingers, press the clips outwards, away from the card until the card pops up.
-
Grab the card gently from the top and pull the card up and out of the slot.
-


Cancelar: No complete esta guía.
3 personas más completaron esta guía.
Equipo

Cal Poly, Team 10-37, Forte Spring 2011 Miembro de Cal Poly, Team 10-37, Forte Spring 2011
CPSU-FORTE-S11S10G37
5 Miembros
9 Guías creadas