Saltar al contenido principal

HP Pavilion N3350 Optical Drive Replacement

Qué necesitas

  1. HP Pavilion N3350 Optical Drive Replacement, Keyboard: paso 1, imagen 1 de 2 HP Pavilion N3350 Optical Drive Replacement, Keyboard: paso 1, imagen 2 de 2
    • Open your laptop. Beneath the screen, here is a large plastic piece that contains slots for a speaker, the power button, and numerous indicator lights.

    • To remove this, pry it open with a spudger tool gently. It should pop out of place.

  2. HP Pavilion N3350 Optical Drive Replacement: paso 2, imagen 1 de 2 HP Pavilion N3350 Optical Drive Replacement: paso 2, imagen 2 de 2
    • Remove the three 6mm screws using a Phillips #1 screwdriver.

    • Once the screws are removed, the keyboard is free from the base of the laptop.

  3. HP Pavilion N3350 Optical Drive Replacement: paso 3, imagen 1 de 2 HP Pavilion N3350 Optical Drive Replacement: paso 3, imagen 2 de 2
    • Disconnect the green ribbon cable using a plastic opening tool.

  4. HP Pavilion N3350 Optical Drive Replacement, Optical Drives: paso 4, imagen 1 de 2 HP Pavilion N3350 Optical Drive Replacement, Optical Drives: paso 4, imagen 2 de 2
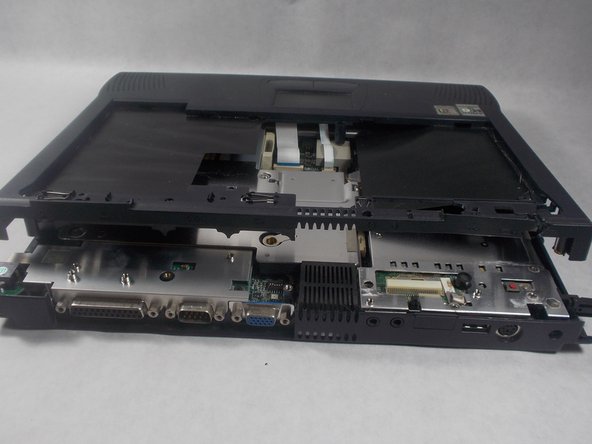
    • Remove the 6 millimeter screws indicated with a Phillips #1 screwdriver.

    • Remove the top plastic covering from the base of the device.

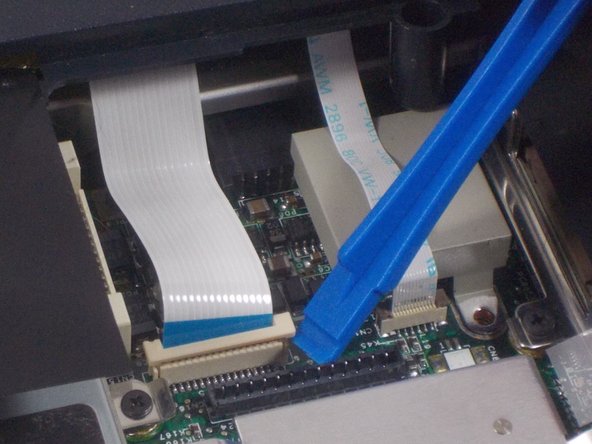
  5. HP Pavilion N3350 Optical Drive Replacement: paso 5, imagen 1 de 2 HP Pavilion N3350 Optical Drive Replacement: paso 5, imagen 2 de 2
    • Use a plastic opening tool to disconnect both cable connectors gently.

  6. HP Pavilion N3350 Optical Drive Replacement: paso 6, imagen 1 de 2 HP Pavilion N3350 Optical Drive Replacement: paso 6, imagen 2 de 2
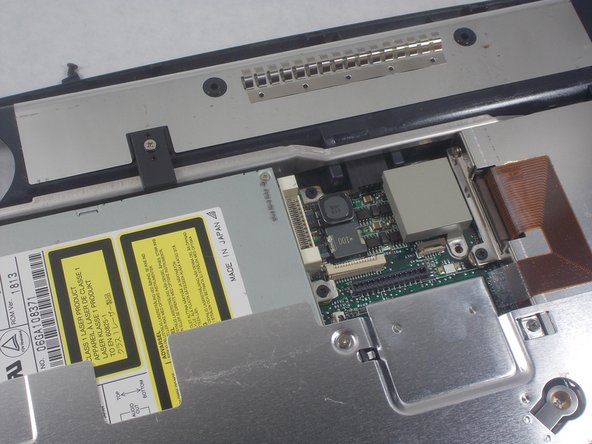
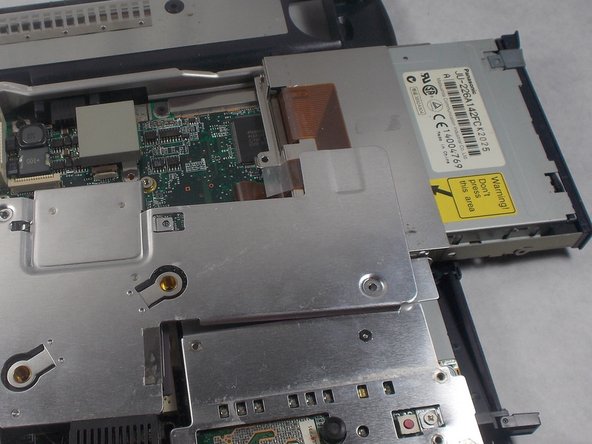
    • Once these cables are disconnected, the optical drives can be found inside.

    • This particular laptop has a CD/DVD combo drive on the left, and a floppy disc drive on the right.

  7. HP Pavilion N3350 Optical Drive Replacement: paso 7, imagen 1 de 2 HP Pavilion N3350 Optical Drive Replacement: paso 7, imagen 2 de 2
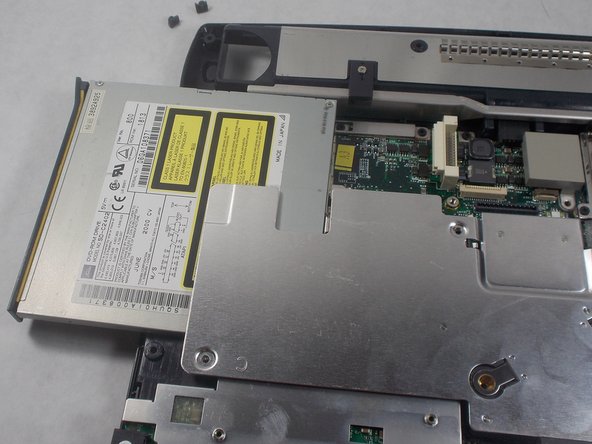
    • The 1 centimeter screws indicated need to be removed using a Phillips #1 screwdriver to free the CD/DVD combo drive.

    • Once freed, the CD/DVD combo drive should slide out and remove easily.

  8. HP Pavilion N3350 Optical Drive Replacement: paso 8, imagen 1 de 2 HP Pavilion N3350 Optical Drive Replacement: paso 8, imagen 2 de 2
    • The 1 centimeter screws indicated must be removed with a Phillips #1 screwdriver to free the floppy disc drive.

    • Remove the floppy disc drive from the device.

Conclusión

To reassemble your device, follow these instructions in reverse order.

Una persona más ha completado esta guía.

Lyndon Davis

Miembro Desde 03/19/18

124 Reputación

1 Guía escrita

Equipo

0 comentarios

Agregar Comentario

Ver Estadísticas:

Ultimas 24 horas: 0

Ultimos 7 días: 0

Ultimos 30 días: 0

Todo El Tiempo: 236