Esta versión puede contener ediciones incorrectas. Cambiar a la última instantánea verificada.
Qué necesitas
-
Este paso está sin traducir. Ayuda a traducirlo
-
Remove the back panel by inserting your fingers into the indentations next to the tabs. Press the tabs inward towards each other while pulling the back panel toward you.
-
-
Este paso está sin traducir. Ayuda a traducirlo
-
Using the T10 Torx Security Bit Screwdriver, unscrew the screws on the upper left and right corners of the inner panel to remove the inner back panel.
-
-
Este paso está sin traducir. Ayuda a traducirlo
-
Press down on the two plastic hinges to remove the upper portion of printer.
-
-
Este paso está sin traducir. Ayuda a traducirlo
-
Grasp the plastic plug on the end of the speaker wire, then gently pull the plug away from the printer until the wire is removed.
-
-
Este paso está sin traducir. Ayuda a traducirlo
-
Rotate the printer so the paper tray is facing towards you.
-
Gently lift the scanner tray up and away from the printer.
-
Press the gray plastic tabs inward to release the tabs from the printer.
-
-
-
Este paso está sin traducir. Ayuda a traducirlo
-
Returning to the back of the printer, remove the scanner from the back hinges.
-
-
Este paso está sin traducir. Ayuda a traducirlo
-
Gently grasp and unplug the two white ribbon cables from the printer body.
-
-
Este paso está sin traducir. Ayuda a traducirlo
-
Unplug the white plastic multi-wire connector (with orange, black, red, and brown wires) from it's port.
-
-
Este paso está sin traducir. Ayuda a traducirlo
-
Detach the scanner tray from the printer by lifting the scanner tray off the printer body.
-
-
Este paso está sin traducir. Ayuda a traducirlo
-
Remove printer carriage cover by unscrewing four black coarse thread T-10 torx screws marked with red circles.
-
-
Este paso está sin traducir. Ayuda a traducirlo
-
Depress the plastic tabs marked in red to release the cover from the sides.
-
-
Este paso está sin traducir. Ayuda a traducirlo
-
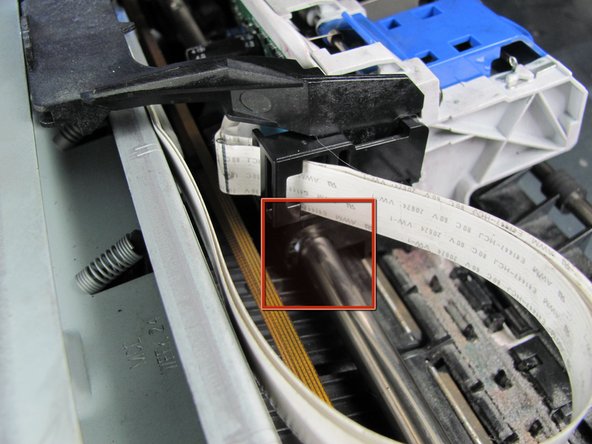
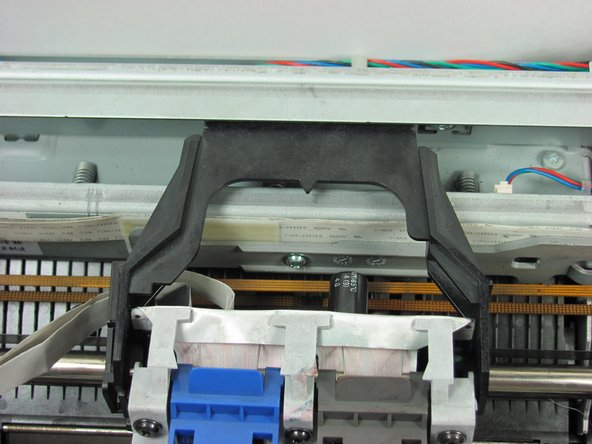
Slide the printer carriage to the center of the printer.
-
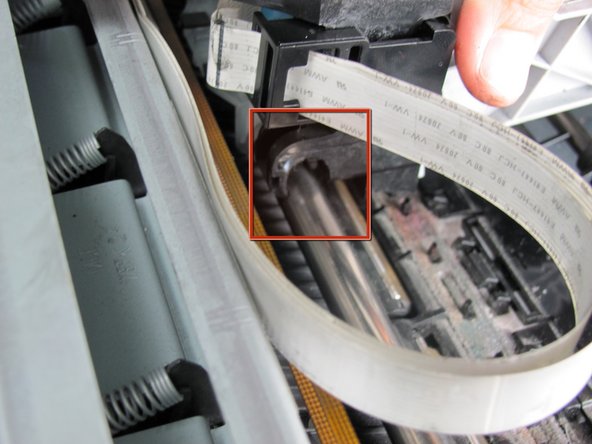
Disconnect the printer carriage from the rod one side at a a time by pulling upward from the bottom.
-
-
Este paso está sin traducir. Ayuda a traducirlo
-
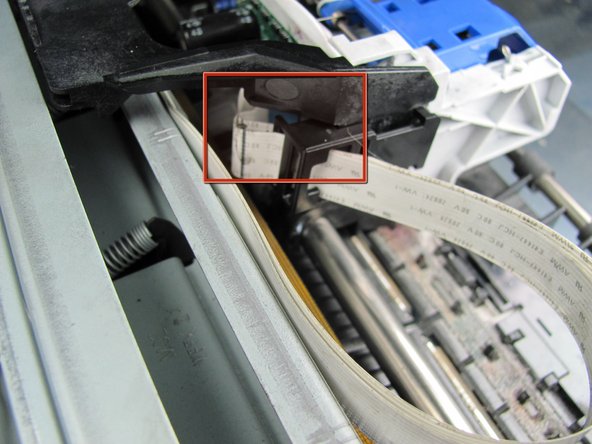
Pull on the two white wire strips on the printer carriage to remove which are marked in red.
-
-
Este paso está sin traducir. Ayuda a traducirlo
-
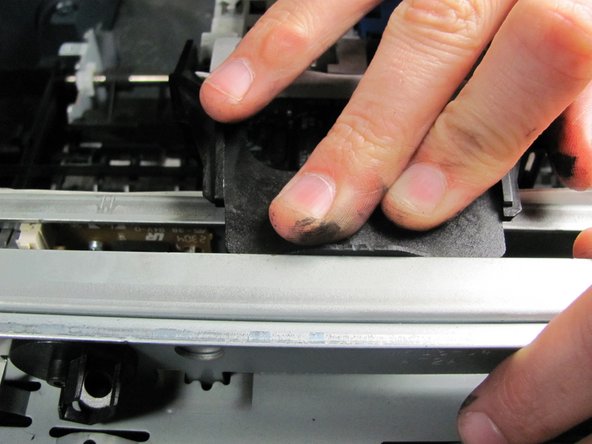
Place new printer carriage on the carriage rod one side at a time.
-


Cancelar: No complete esta guía.
4 personas más completaron esta guía.
Equipo

Cal Poly, Team 12-31, Maness Spring 2011 Miembro de Cal Poly, Team 12-31, Maness Spring 2011
CPSU-MANESS-S11S12G31
5 Miembros
9 Guías creadas