Saltar al contenido principal

HP Officejet J4550 All-in-one Button Replacement

Qué necesitas

  1. HP Officejet J4550 All-in-one Button Replacement, Button: paso 1, imagen 1 de 2 HP Officejet J4550 All-in-one Button Replacement, Button: paso 1, imagen 2 de 2
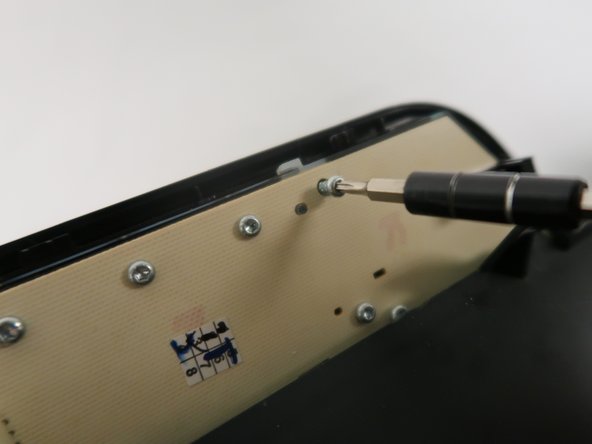
    • Insert 2 fingers in the dent on the right side of the printer and pull towards the front of the printer.

    • Using fingers to open the cover of the scanner which located on the top of the printer.
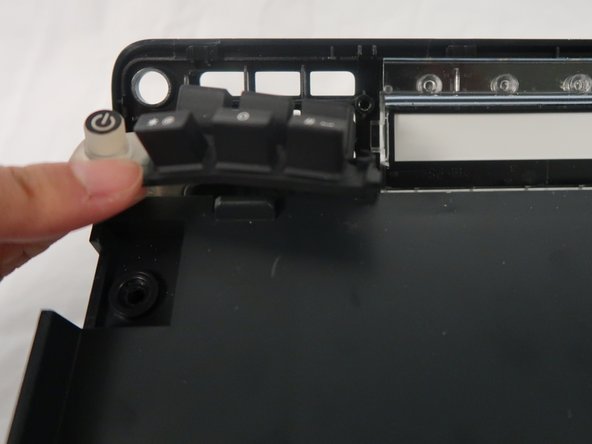
  2. HP Officejet J4550 All-in-one Button Replacement: paso 2, imagen 1 de 3 HP Officejet J4550 All-in-one Button Replacement: paso 2, imagen 2 de 3 HP Officejet J4550 All-in-one Button Replacement: paso 2, imagen 3 de 3
    • Remove four 10mm screws on the panel with T8 torx security screwdriver.

    • Remove the cover of the top part.

  3. HP Officejet J4550 All-in-one Button Replacement: paso 3, imagen 1 de 3 HP Officejet J4550 All-in-one Button Replacement: paso 3, imagen 2 de 3 HP Officejet J4550 All-in-one Button Replacement: paso 3, imagen 3 de 3
    • Remove eight 10mm screws on the back of the controlling keyboard with T8 torx security screwdriver.

    • Remove the back board of the controlling keyboard.

  4. HP Officejet J4550 All-in-one Button Replacement: paso 4, imagen 1 de 3 HP Officejet J4550 All-in-one Button Replacement: paso 4, imagen 2 de 3 HP Officejet J4550 All-in-one Button Replacement: paso 4, imagen 3 de 3
    • Remove the button that is located at the left of the controlling keyboard.

Conclusión

To reassemble your device, follow these instructions in reverse order.

Jiayin Zhu

Miembro Desde 10/21/18

349 Reputación

3 Guías creadas

Equipo

UC Davis, Team S11-G8, Lore Fall 2018 Miembro de UC Davis, Team S11-G8, Lore Fall 2018

UCD-LORE-F18S11G8

3 Miembros

8 Guías creadas

0 comentarios

Agregar Comentario

Ver Estadísticas:

Ultimas 24 horas: 0

Ultimos 7 días: 0

Ultimos 30 días: 0

Todo El Tiempo: 212