Saltar al contenido principal

HP Flyer Red Keyboard Replacement

Qué necesitas

  1. HP Flyer Red Keyboard Replacement, Battery: paso 1, imagen 1 de 2 HP Flyer Red Keyboard Replacement, Battery: paso 1, imagen 2 de 2
    • Make sure your laptop is powered off.

    • With laptop closed flip to look at the underside of the laptop.

  2. HP Flyer Red Keyboard Replacement: paso 2, imagen 1 de 1
    • On the underside of the laptop towards the hinge for the screen there are two rectangular slide switches located inside of rectangular tracks.

  3. HP Flyer Red Keyboard Replacement: paso 3, imagen 1 de 2 HP Flyer Red Keyboard Replacement: paso 3, imagen 2 de 2
    • The left switch is the battery unlock switch.

    • Inside the rectangular track of this switch there is an image of a closed lock that should be visible. Push this switch to the other end of the track and an image of an open lock should be visible.

  4. HP Flyer Red Keyboard Replacement: paso 4, imagen 1 de 1
    • Then take and slide the other switch to the other end of its track which will pop out the battery.

    • Grab the battery and pull it out of the slot.

  5. HP Flyer Red Keyboard Replacement, Keyboard: paso 5, imagen 1 de 2 HP Flyer Red Keyboard Replacement, Keyboard: paso 5, imagen 2 de 2
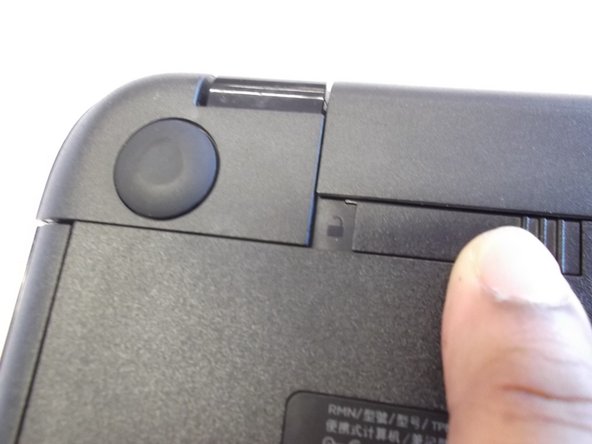
    • Next locate and unscrew the two 4mm Phllips #1 screws with the keyboard symbol located towards the middle and top of the bottom of the laptop.

  6. HP Flyer Red Keyboard Replacement: paso 6, imagen 1 de 3 HP Flyer Red Keyboard Replacement: paso 6, imagen 2 de 3 HP Flyer Red Keyboard Replacement: paso 6, imagen 3 de 3
    • Next turn the laptop over and flip open the screen.

    • Use the plastic opening tool to pry the keyboard upwards from the bottom right hand corner of the keyboard.

    • Use another plastic opening tool with the first plastic opening tool you placed to undo every plastic clasp surrounding the keyboard.

  7. HP Flyer Red Keyboard Replacement: paso 7, imagen 1 de 3 HP Flyer Red Keyboard Replacement: paso 7, imagen 2 de 3 HP Flyer Red Keyboard Replacement: paso 7, imagen 3 de 3
    • Next lift up the keyboard gently and use the plastic opening tool to undo the ribbon wire by unclasping the ZIF (zero insertion force) connector to the laptop.

    • Gently slide the ribbon wire out of its slot.

Conclusión

To reassemble your device, follow these instructions in reverse order.

7 personas más completaron esta guía.

Anthony Ciotti

Miembro Desde 04/07/16

747 Reputación

5 Guías creadas

Equipo

0 comentarios

Agregar Comentario

Ver Estadísticas:

Ultimas 24 horas: 0

Ultimos 7 días: 2

Ultimos 30 días: 10

Todo El Tiempo: 2,215