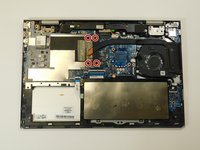
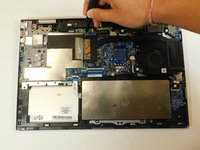
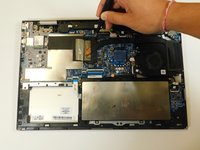
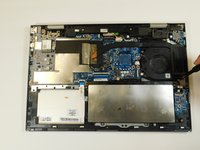
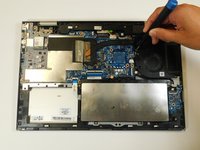
Saltar al contenido principal

HP Envy x360 15m-cn0011dx Fan Replacement

Qué necesitas

  1. HP Envy x360 15m-cn0011dx Fan Replacement, Back Cover: paso 1, imagen 1 de 1
    • Flip the laptop over to the back side.

  2. HP Envy x360 15m-cn0011dx Fan Replacement: paso 2, imagen 1 de 2 HP Envy x360 15m-cn0011dx Fan Replacement: paso 2, imagen 2 de 2
    • Remove the six 5.6 mm screws from the back cover using a Phillips #00 screwdriver.

    • Remove the single 4.3 mm screw in the bottom middle section of the back cover using a T5 Torx screwdriver.

  3. HP Envy x360 15m-cn0011dx Fan Replacement: paso 3, imagen 1 de 1
    • Lift the back cover off the laptop.

  4. HP Envy x360 15m-cn0011dx Fan Replacement, Fan: paso 4, imagen 1 de 3 HP Envy x360 15m-cn0011dx Fan Replacement, Fan: paso 4, imagen 2 de 3 HP Envy x360 15m-cn0011dx Fan Replacement, Fan: paso 4, imagen 3 de 3
    • Loosen the four captive screws on the heat sink using a Phillips #00 screwdriver.

  5. HP Envy x360 15m-cn0011dx Fan Replacement: paso 5, imagen 1 de 3 HP Envy x360 15m-cn0011dx Fan Replacement: paso 5, imagen 2 de 3 HP Envy x360 15m-cn0011dx Fan Replacement: paso 5, imagen 3 de 3
    • Remove two 10 mm screws from the fan using a Phillips #00 screwdriver.

  6. HP Envy x360 15m-cn0011dx Fan Replacement: paso 6, imagen 1 de 1
    • Unplug the fan from the motherboard and lift the fan and heatsink out of the laptop.

Conclusión

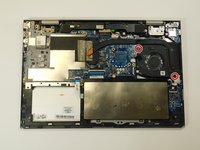
To reassemble your device, follow these instructions in reverse order.

Skylar Moore

Miembro Desde 08/24/22

715 Reputación

5 Guías creadas

Equipo

Gateway, Team 1-4, Class Fall 2022 Miembro de Gateway, Team 1-4, Class Fall 2022

GCC-CLASS-F22S1G4

Miembros de 4

5 Guías creadas

0 comentarios

Agregar Comentario

Ver Estadísticas:

Ultimas 24 horas: 0

Ultimos 7 días: 0

Ultimos 30 días: 4

Todo El Tiempo: 226