Introducción
The cooling fan is a key component of a laptop. This component keeps the computer cool while operating. If the fan fails, the computer may overheat and damage components in the computer. This guide will show in-depth steps on how to safely remove a cooling fan from an HP Envy x360.
Qué necesitas
-
-
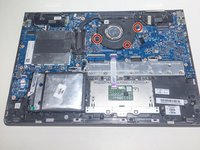
On the back panel of the device, remove the four (4) M2.5xL6 screws at the top of the photo using a Phillips #0 screwdriver.
-
Unscrew the three (3) screws at the bottom of the photo using a T5 Torx screwdriver.
-
-
-
Use the Philips #0 screwdriver to remove six (6) M2.0x3.2 screws from battery.
-
-
-
-
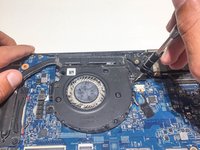
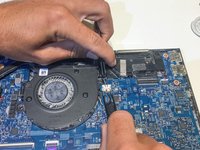
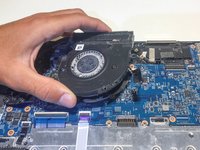
Using a Philips #0 screwdriver, remove the three M2x4 screws located around the cooling fan as shown in this picture.
-
-
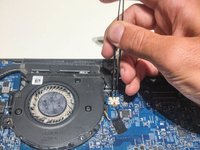
Herramienta utilizada en este paso:Tweezers$4.99
-
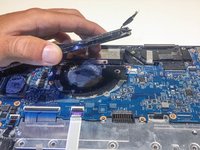
Remove the connector clip with the tweezers.
The fan connector on the one I was working on was in a different location, below the fan near the battery connector
-


To reassemble your device, follow these instructions in reverse order.
To reassemble your device, follow these instructions in reverse order.
Cancelar: No complete esta guía.
2 personas más completaron esta guía.
Equipo

University of Alabama, Team S2-G6, Bedsole Fall 2019 Miembro de University of Alabama, Team S2-G6, Bedsole Fall 2019
UA-BEDSOLE-F19S2G6
Miembros de 4
6 Guías creadas
Un comentario
I'm considering attempting this repair. I am curious as to why the instructions direct me to remove the battery before removing the fan. From the pictures shown above, it does not appear that battery is mechanically blocking the removal of the fan. Is the purpose of this step to remove a phisical impedance, or is the reason to remove power from the he device?
In the second step the photo looks like the laptop is still in the same position as the first step, which means, according to the first image, the second image shows someone removing the four screws at the top of the laptop. To be accurate to the text in Step 2, the barcode would appear at the top of the image.
lkmemphis - Contestar