Saltar al contenido principal

HP EliteBook x360 1030 G3 Screen Replacement

Qué necesitas

  1. HP EliteBook x360 1030 G3 Screen Replacement, Screen: paso 1, imagen 1 de 2 HP EliteBook x360 1030 G3 Screen Replacement, Screen: paso 1, imagen 2 de 2
    • Before starting, make sure your laptop is completely powered off.

    • Open the laptop and position the screen to face you.

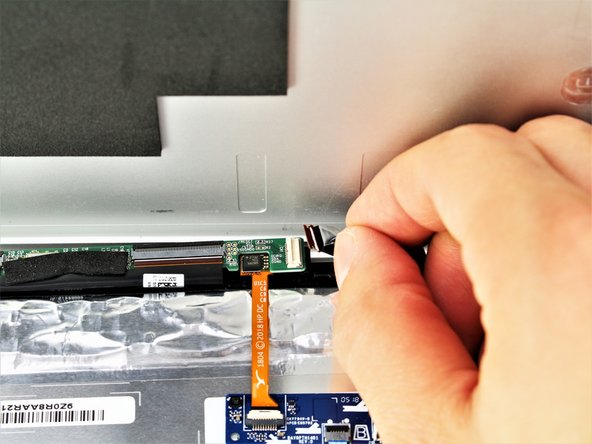
    • Carefully wedge a Jimmy between the black screen border and the silver monitor backing, and then rotate the Jimmy upwards and away from you until they separate.

    • If your screen is not cracked, there is a chance of doing so here. Perform this step with caution, control, and focus.

  2. HP EliteBook x360 1030 G3 Screen Replacement: paso 2, imagen 1 de 3 HP EliteBook x360 1030 G3 Screen Replacement: paso 2, imagen 2 de 3 HP EliteBook x360 1030 G3 Screen Replacement: paso 2, imagen 3 de 3
    • Reinsert the Jimmy and slowly twist it to begin separating the remainder of the screen.

    • Continue this along the edge until the top and two sides are fully separated.

    • Allow the top edge of the screen to rest against the keyboard.

  3. HP EliteBook x360 1030 G3 Screen Replacement: paso 3, imagen 1 de 2 HP EliteBook x360 1030 G3 Screen Replacement: paso 3, imagen 2 de 2
    • Pull the tape off the gold wire port on the left.

  4. HP EliteBook x360 1030 G3 Screen Replacement: paso 4, imagen 1 de 2 HP EliteBook x360 1030 G3 Screen Replacement: paso 4, imagen 2 de 2
    • There is a thin hinged bar hugging the front of the port to keep the wire housing in place. Use your nail or a thin object to lift it up and out of the way.

    • Use the hinged bar to slide the wire housing away from you and out of the port.

  5. HP EliteBook x360 1030 G3 Screen Replacement: paso 5, imagen 1 de 2 HP EliteBook x360 1030 G3 Screen Replacement: paso 5, imagen 2 de 2
    • Locate the collection of ports on the right.

    • Pull the tape from the port with the thicker orange sheet of wires and from the port on the small green circuit board.

  6. HP EliteBook x360 1030 G3 Screen Replacement: paso 6, imagen 1 de 2 HP EliteBook x360 1030 G3 Screen Replacement: paso 6, imagen 2 de 2
    • Use your nail or a thin object to lift the small white fastener at the front of the port.

    • Slide the orange sheet away from you out of the port.

  7. HP EliteBook x360 1030 G3 Screen Replacement: paso 7, imagen 1 de 3 HP EliteBook x360 1030 G3 Screen Replacement: paso 7, imagen 2 de 3 HP EliteBook x360 1030 G3 Screen Replacement: paso 7, imagen 3 de 3
    • Use your nail or a thin object to lift the small white fastener at end of the port on the green circuit board.

    • Slide the sheet of wires to the right and out of the port.

    • Carefully lift, and remove the screen.

Conclusión

To reassemble your device, follow these instructions in reverse order.

5 personas más completaron esta guía.

Equipo

Cal Poly, Team S2-G9, Maness Spring 2019 Miembro de Cal Poly, Team S2-G9, Maness Spring 2019

CPSU-MANESS-S19S2G9

4 Miembros

16 Guías creadas

Un comentario

I tried to perform this operation, since the top cover got a scratch and a ding. I bought a replacement top cover and tried to reinstall a perfectly working screen from one cover to another. I followed this manual to step 2 and realized that top is easy, sides are much harder. On the sides with the opener tool you start to touch directly the screen glass so the “slowly twist“ move suggested in this manual would likely create cracks in it. Finally I decided not to execute this procedure since the risk of losing the screen is too high. In case you replace a broken screen - then it is ok.

Nuc - Contestar

Agregar Comentario

Ver Estadísticas:

Ultimas 24 horas: 3

Ultimos 7 días: 26

Ultimos 30 días: 171

Todo El Tiempo: 8,906