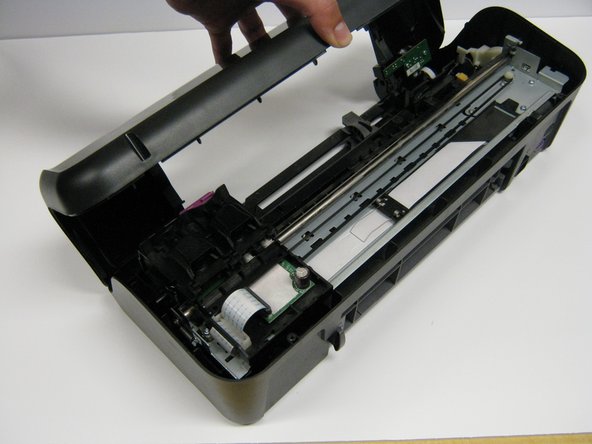
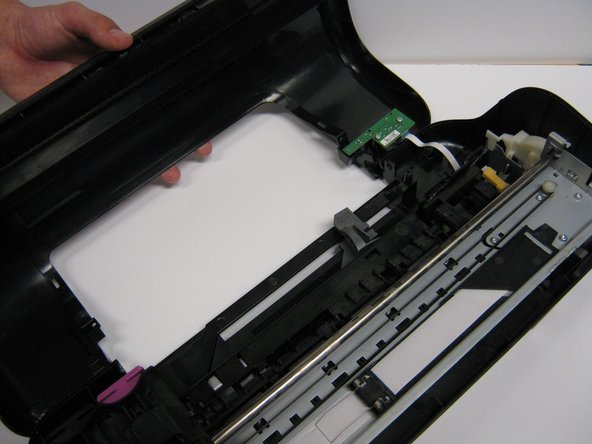
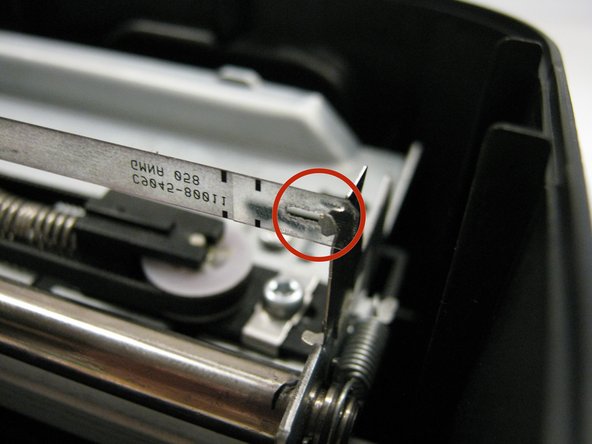
Saltar al contenido principal

HP Deskjet D1660 Encoder Strip Replacement

Qué necesitas

  1. HP Deskjet D1660 Encoder Strip Replacement, Encoder Strip: paso 1, imagen 1 de 1
    • Remove the back two 14.0 mm Torx #10 screws.

  2. HP Deskjet D1660 Encoder Strip Replacement: paso 2, imagen 1 de 1
    • Lay the printer on its back.

    • Grab the paper tray by its right side and pull it to the left and up.

  3. HP Deskjet D1660 Encoder Strip Replacement: paso 3, imagen 1 de 1
    • Open the frontal access panel by lifting it from the top.

    • Similar to the paper tray, grab it from the right side and pull it to the left and up.

  4. HP Deskjet D1660 Encoder Strip Replacement: paso 4, imagen 1 de 3 HP Deskjet D1660 Encoder Strip Replacement: paso 4, imagen 2 de 3 HP Deskjet D1660 Encoder Strip Replacement: paso 4, imagen 3 de 3
    • Take out the two frontal 14.0 mm Torx #10 screws.

    • Carefully lift the frontal cover.

    • Don't lift it up aggressively. A strip will be attached to it.

  5. HP Deskjet D1660 Encoder Strip Replacement: paso 5, imagen 1 de 3 HP Deskjet D1660 Encoder Strip Replacement: paso 5, imagen 2 de 3 HP Deskjet D1660 Encoder Strip Replacement: paso 5, imagen 3 de 3
    • Looking at the printer from the front, carefully unhook the encoder strip from the left side.

    • Pull the strip to the left and push a little to unhook the strip.

    • Do the same thing on the other side by pulling to the right and pushing a little.

    • Pull the strip completely out from the cartridge holder.

Conclusión

To reassemble your device, follow these instructions in reverse order.

3 personas más completaron esta guía.

Equipo

Cal Poly, Team 1-41, Maness Winter 2014 Miembro de Cal Poly, Team 1-41, Maness Winter 2014

CPSU-MANESS-W14S1G41

4 Miembros

14 Guías creadas

0 comentarios

Agregar Comentario

Ver Estadísticas:

Ultimas 24 horas: 1

Ultimos 7 días: 3

Ultimos 30 días: 14

Todo El Tiempo: 4,269