Saltar al contenido principal

HP Deskjet 2624 Scanner Glass Replacement

Qué necesitas

  1. HP Deskjet 2624 Scanner Glass Replacement, Scanner Glass: paso 1, imagen 1 de 1
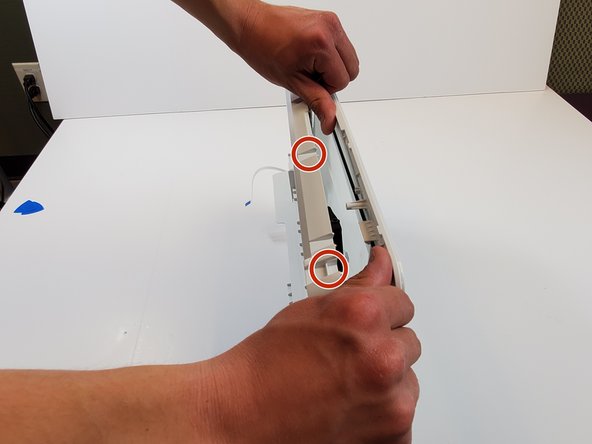
    • Unplug all cords from the printer, and remove all the paper from the tray.

  2. HP Deskjet 2624 Scanner Glass Replacement: paso 2, imagen 1 de 2 HP Deskjet 2624 Scanner Glass Replacement: paso 2, imagen 2 de 2
    • Remove the four screws securing the scanner bed module to the printer body with a Torx T5 screwdriver.

  3. HP Deskjet 2624 Scanner Glass Replacement: paso 3, imagen 1 de 1
    • Gently pry the scanner bed cover slightly off of the printer at the hinge.

    • Lifting the scanning bed cover to a 45 degree angle may make it easier to remove.

  4. HP Deskjet 2624 Scanner Glass Replacement: paso 4, imagen 1 de 1
    • Lift up the scanner bed module and remove the two ribbon cables by pulling them straight out.

    • Set the printer body aside.

  5. HP Deskjet 2624 Scanner Glass Replacement: paso 5, imagen 1 de 3 HP Deskjet 2624 Scanner Glass Replacement: paso 5, imagen 2 de 3 HP Deskjet 2624 Scanner Glass Replacement: paso 5, imagen 3 de 3
    • Separate the plastic halves of the scanner bed by gently pulling the tabs on the clips holding the halves together.

    • Pull the halves apart while undoing the clips to prevent plastic snapping.

  6. HP Deskjet 2624 Scanner Glass Replacement: paso 6, imagen 1 de 2 HP Deskjet 2624 Scanner Glass Replacement: paso 6, imagen 2 de 2
    • Remove the glass pane from the plastic shell by prying the tabs back that secure the glass, as well as peeling the adhesive apart slowly.

    • Glass edges can be sharp, handle glass and glass shards with gloves.

Conclusión

To reassemble your device, follow these instructions in reverse order.

Una persona más ha completado esta guía.

0 comentarios

Agregar Comentario

Ver Estadísticas:

Ultimas 24 horas: 1

Ultimos 7 días: 9

Ultimos 30 días: 36

Todo El Tiempo: 721