Introducción
Malfunctioning buttons can hinder the usefulness of your printer and make performing certain routine tasks impossible. Replace them to prevent any future unnecessary hassle.
Qué necesitas
-
-
Press your thumb down on the center of the button plate located on the left side of the printer.
-
Hook your fingers underneath the front edge of the button plate and pull upwards making sure to keep pressure on the middle of the plate with your thumb.
-
-
-
Once the front of the plate is loose, lift it up a few inches making sure to hold the back (paper feeding side) of the plate down.
-
Slide the plate towards the back of the printer and then lift up on the back of the plate.
-
The plate should now be disconnected from the tabs on the printer.
-
-
-
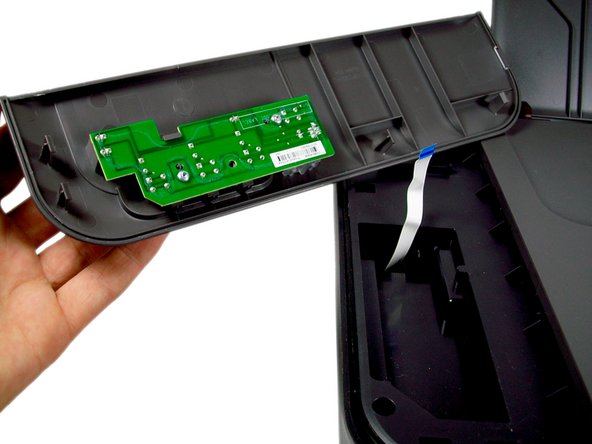
Turn the plate over to reveal the white strip of connecting tape that connects the plate to the printer.
-
Find where the tape is connected to the green button circuit board (Location circled in red)
-
Place two fingers on the tape right where it connects to the plate and gently pull the tape out of the circuit board.
-
-


To reassemble your device, follow these instructions in reverse order.
To reassemble your device, follow these instructions in reverse order.
Cancelar: No complete esta guía.
Una persona más ha completado esta guía.
Equipo

Cal Poly, Team 9-18, Amido Fall 2012 Miembro de Cal Poly, Team 9-18, Amido Fall 2012
CPSU-AMIDO-F12S9G18
4 Miembros
10 Guías creadas