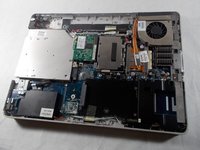
Saltar al contenido principal

HP Compaq Presario V5303NR Disk Drive Replacement

Qué necesitas

  1. HP Compaq Presario V5303NR Disk Drive Replacement, Disk Drive: paso 1, imagen 1 de 3 HP Compaq Presario V5303NR Disk Drive Replacement, Disk Drive: paso 1, imagen 2 de 3 HP Compaq Presario V5303NR Disk Drive Replacement, Disk Drive: paso 1, imagen 3 de 3
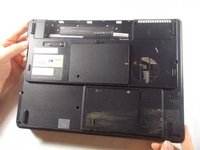
    • Turn the laptop bottom-side up.

    • Push the battery latch to the left position to unlock the battery.

    • Remove the battery from its socket.

    • Failure to unplug the computer and remove the battery can result in electrical discharges on contact with the computer's components. This can damage the computer or even hurt the user.

  2. HP Compaq Presario V5303NR Disk Drive Replacement: paso 2, imagen 1 de 2 HP Compaq Presario V5303NR Disk Drive Replacement: paso 2, imagen 2 de 2
    • Use the Phillips #0 screwdriver to remove the 3 5mm #0 screws highlighted in the picture.

    • Use the Phillips #0 screwdriver to remove the 2 4mm #0 screws highlighted in the picture.

    • Use the Phippips #0 screwdriver to remove the 10 5mm #0 screws highlighted in the picture.

    • Keep the different types of screws separate from one another. They will only fit into holes created for screws of their size, and thus cannot fit into other screw holes.

  3. HP Compaq Presario V5303NR Disk Drive Replacement: paso 3, imagen 1 de 2 HP Compaq Presario V5303NR Disk Drive Replacement: paso 3, imagen 2 de 2
    • Remove the laptops bottom panel.

  4. HP Compaq Presario V5303NR Disk Drive Replacement: paso 4, imagen 1 de 1
    • Gently remove the disk drive from its socket.

Conclusión

To reassemble your device, follow these instructions in reverse order.

Christopher M Paiva

Miembro Desde 03/19/18

109 Reputación

1 Guía escrita

Equipo

0 comentarios

Agregar Comentario

Ver Estadísticas:

Ultimas 24 horas: 0

Ultimos 7 días: 3

Ultimos 30 días: 3

Todo El Tiempo: 136