Esta versión puede contener ediciones incorrectas. Cambiar a la última instantánea verificada.
Qué necesitas
-
Este paso está sin traducir. Ayuda a traducirlo
-
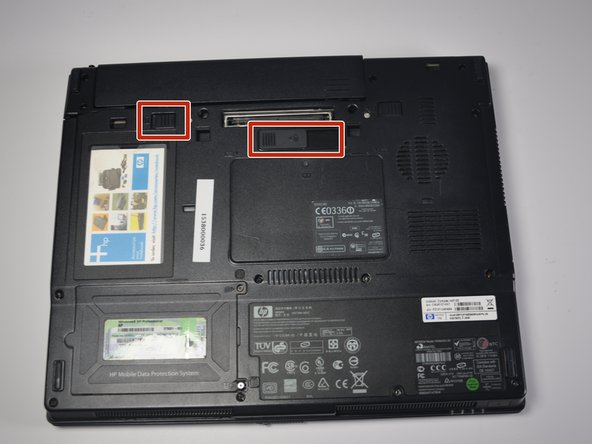
Flip laptop so the backside is facing upwards.
-
Pull the two plastic switches at the top of the backside of the computer outwards, and remove the battery.
-
-
Este paso está sin traducir. Ayuda a traducirlo
-
Remove all 13 screws from the back panel of the computer (includes the two torx screws under the battery and the two under the ram memory panel).
-
Remove the four screws at the hinge of the computer (also attaching the back panel to the rest of the computer).
-
-
Este paso está sin traducir. Ayuda a traducirlo
-
Open up the laptop so that the screen is facing towards you. Push the monitor back until it is flat, parallel to the keyboard.
-
-
Este paso está sin traducir. Ayuda a traducirlo
-
Using the iFixit opening tool, remove the plastic panel located between the keyboard and monitor. It should pop off easily with the spudger and can then be pulled away.
-
-
Este paso está sin traducir. Ayuda a traducirlo
-
Remove the white cable attached to the just-removed plastic panel from the motherboard.
-
-
Este paso está sin traducir. Ayuda a traducirlo
-
Flip the keyboard away from the monitor, rotating it so that the keys are face down on the mousepad. Remove the black cord at the bottom of the keyboard that connects it to the motherboard. The keyboard is now free and can be removed.
-
-
-
Este paso está sin traducir. Ayuda a traducirlo
-
Remove the two 9.8mm 3.0 flathead screws. There is one at each of the hinges.
-
-
Este paso está sin traducir. Ayuda a traducirlo
-
Unplug the black cable with rectangular white plastic head from the motherboard. It is located at the top left of the motherboard, directly below the left hinge.
-
-
Este paso está sin traducir. Ayuda a traducirlo
-
Pull the monitor directly upwards from where it lay. The two metal hinges should easily slide out of their holes and the monitor will be disconnected from the motherboard.
-
-
Este paso está sin traducir. Ayuda a traducirlo
-
Using the iFixit opening tool, pry the black plastic panel (with mousepad) off of the motherboard.
-
-
Este paso está sin traducir. Ayuda a traducirlo
-
Unplug the white cord connecting the mousepad to the motherboard from the motherboard, and pull off the entire plastic panel.
-
-
Este paso está sin traducir. Ayuda a traducirlo
-
Recommended: First, remove the second RAM chip, in the center of the motherboard. The chip is rectangular, with black squares and a "transcend" label on it.
-
-
Este paso está sin traducir. Ayuda a traducirlo
-
To remove the chip, locate the two metal clips on the top and bottom of the chip. Clamp them in towards the RAM chip and hold.
-
-
Este paso está sin traducir. Ayuda a traducirlo
-
Remove the chip by lifting up the side closest to the cd drive first.
-


Cancelar: No complete esta guía.
Una persona más ha completado esta guía.
Equipo

Cal Poly, Team 17-4, Forte Spring 2015 Miembro de Cal Poly, Team 17-4, Forte Spring 2015
CPSU-FORTE-S15S17G4
3 Miembros
6 Guías creadas
2 comentarios
16-step guide about an action that can be completed in 3 steps.. REALLY? Why do you make people do SO MANY steps for no reason whatsoever? You REALLY don't need to take apart the whole laptop JUST to remove the optical drive.
THIS FIXIT GUIDE IS COMPLETELY WRONG.
As Antti Vahtera said, you DO NOT have to disassemble the laptop to remove the CD/DVD. Here are the steps required:
1. Open DVD Tray by pressing button (if switched on) or by pushing a paperclip in the small hole next to button).
2. Turn laptop upside down and open the Memory Cover (one Phillips head screw, then lift off the cover).
3. Remove ONE keybpard screw (Torx or Flat screwdriver) - it’s in the corner of the memory opening, same side as DVD drive.
4. Slide the DVD Drive out by pulling (very little force required). FINISHED !!!!