Saltar al contenido principal

HP Chromebook 11A G8 EE Touchpad Replacement

Qué necesitas

  1. HP Chromebook 11A G8 EE Touchpad Replacement, Keyboard Assembly: paso 1, imagen 1 de 2 HP Chromebook 11A G8 EE Touchpad Replacement, Keyboard Assembly: paso 1, imagen 2 de 2
    • On the bottom of the laptop, remove four 7 mm screw using a Phillips #1 screwdriver.

    • Using the Phillips #1 screwdriver, remove the two remaining 8 mm screws by the hinges.

  2. HP Chromebook 11A G8 EE Touchpad Replacement: paso 2, imagen 1 de 3 HP Chromebook 11A G8 EE Touchpad Replacement: paso 2, imagen 2 de 3 HP Chromebook 11A G8 EE Touchpad Replacement: paso 2, imagen 3 de 3
    • Flip the laptop over and open up the display.

    • Using the iFixit opening tool, carefully separate the palm rest from the bottom cover by working your way around the perimeter and prying it up.

    • You will hear an audible and tactile click or pop letting you know that you have unclipped a portion of the palm rest from the base enclosure.

    • Lift the palm rest of the laptops towards you, away from the screen.

  3. HP Chromebook 11A G8 EE Touchpad Replacement: paso 3, imagen 1 de 2 HP Chromebook 11A G8 EE Touchpad Replacement: paso 3, imagen 2 de 2
    • Carefully, lift the keyboard ribbon lock and disconnect the keyboard ribbon from the motherboard.

    • Disconnect the touchpad ribbon from the motherboard, and remove top cover.

    • Remove the keyboard.

  4. HP Chromebook 11A G8 EE Touchpad Replacement, Touchpad: paso 4, imagen 1 de 2 HP Chromebook 11A G8 EE Touchpad Replacement, Touchpad: paso 4, imagen 2 de 2
    • Using tweezers, carefully disconnect the touchpad board ribbon cable from the touchpad board.

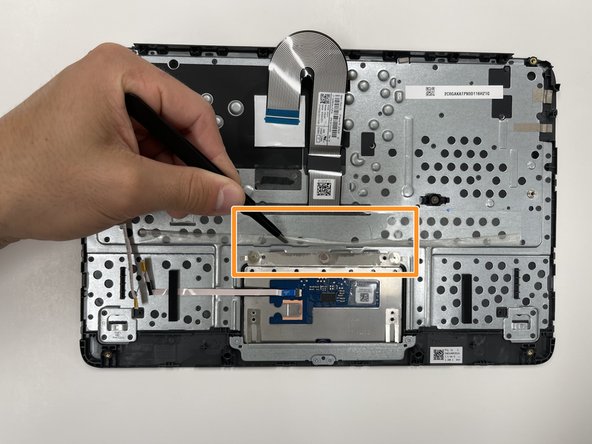
    • Using tweezers, carefully peel back the clear sheet that covers the the touchpad board screws.

  5. HP Chromebook 11A G8 EE Touchpad Replacement: paso 5, imagen 1 de 2 HP Chromebook 11A G8 EE Touchpad Replacement: paso 5, imagen 2 de 2
    • Use the Phillips #0 screwdriver and remove the top three 1.6 mm screws from the touchpad.

    • Remove the four bottom 2 mm screws using the same Phillips #0 screwdriver.

  6. HP Chromebook 11A G8 EE Touchpad Replacement: paso 6, imagen 1 de 1
    • Lift the touchpad brackets off of the alignment pins on the top cover and remove.

  7. HP Chromebook 11A G8 EE Touchpad Replacement: paso 7, imagen 1 de 1
    • Using tweezers, carefully lift the touchpad board off of the board to remove.

Conclusión

To reassemble your device, follow these instructions in reverse order.

2 personas más completaron esta guía.

0 comentarios

Agregar Comentario

Ver Estadísticas:

Ultimas 24 horas: 0

Ultimos 7 días: 5

Ultimos 30 días: 16

Todo El Tiempo: 407