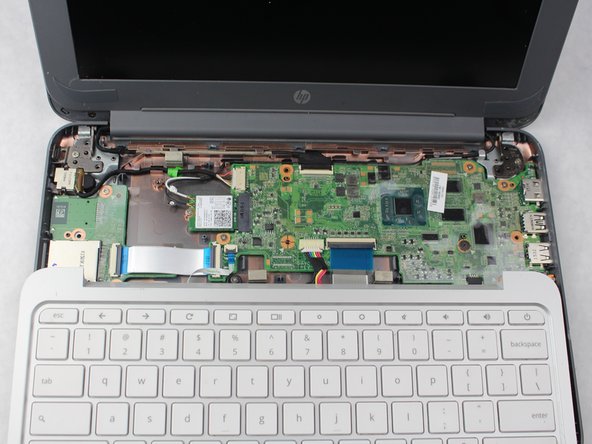
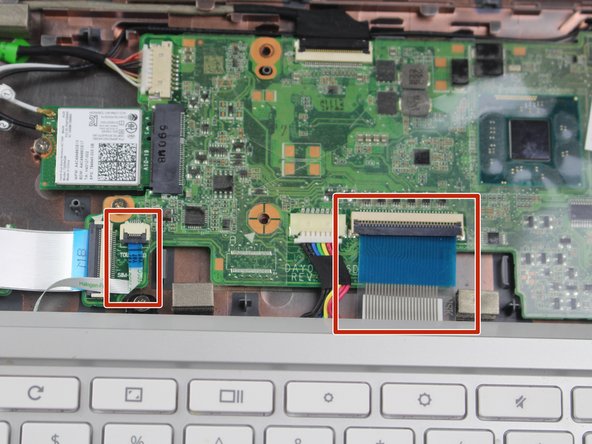
Saltar al contenido principal

HP Chromebook 11-2210nr Battery Replacement

Qué necesitas

  1. HP Chromebook 11-2210nr Battery Replacement, Battery: paso 1, imagen 1 de 2 HP Chromebook 11-2210nr Battery Replacement, Battery: paso 1, imagen 2 de 2
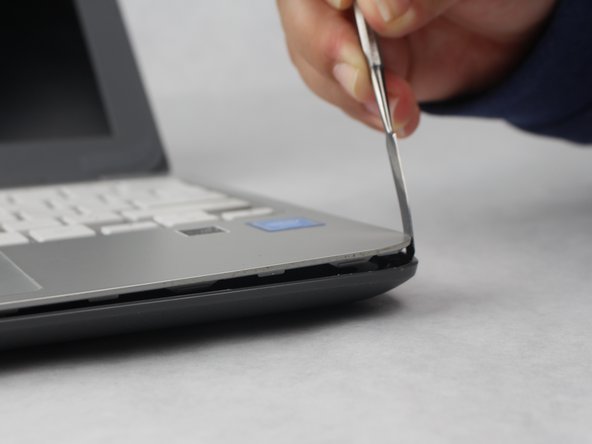
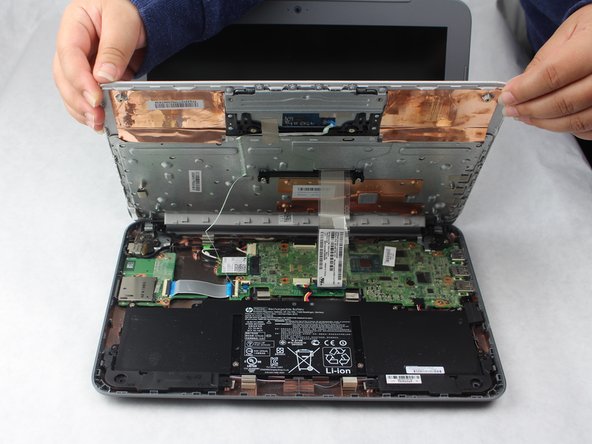
    • Position your closed laptop face down to remove the 9 visible 6 mm screws using a Phillips #1 screwdriver.

  2. HP Chromebook 11-2210nr Battery Replacement: paso 2, imagen 1 de 3 HP Chromebook 11-2210nr Battery Replacement: paso 2, imagen 2 de 3 HP Chromebook 11-2210nr Battery Replacement: paso 2, imagen 3 de 3
    • Use a metal spudger to remove the two bottom rubber pads located closer to the hinge of the laptop.

    • Remove the two additional 6 mm screws located beneath the rubber pads using the Phillips #1 screwdriver.

    • The other two bottom rubber pads do not have screws beneath them.

  3. HP Chromebook 11-2210nr Battery Replacement: paso 3, imagen 1 de 3 HP Chromebook 11-2210nr Battery Replacement: paso 3, imagen 2 de 3 HP Chromebook 11-2210nr Battery Replacement: paso 3, imagen 3 de 3
    • Turn the Laptop over, and with the metal spudger start to run it along the plastic seam to pry it off.

    • You will hear popping sounds when you are sliding the spudger along the device.

    • For an easier removal, start from the sides and work your way in to the corners.

    • Be careful when using the metal spudger as it could cause damage to the internals of the device. Don't push the spudger too deeply into the seam.

  4. HP Chromebook 11-2210nr Battery Replacement: paso 4, imagen 1 de 3 HP Chromebook 11-2210nr Battery Replacement: paso 4, imagen 2 de 3 HP Chromebook 11-2210nr Battery Replacement: paso 4, imagen 3 de 3
    • Carefully lift the keyboard up and gently place it towards you until the two ribbon wires become visible and place the keyboard down.

    • Locate where the two ribbon wires are being held in place by two locks.

    • This does not disconnect the keyboard from the laptop just yet.

  5. HP Chromebook 11-2210nr Battery Replacement: paso 5, imagen 1 de 3 HP Chromebook 11-2210nr Battery Replacement: paso 5, imagen 2 de 3 HP Chromebook 11-2210nr Battery Replacement: paso 5, imagen 3 de 3
    • Using the nylon spudger, push the plastic clasps holding the two ribbon wires up to properly disconnect the wires.

    • It is important to use the nylon spudger for this step to avoid any metal on metal circuit damage.

    • This step completely disconnects the keyboard to allow safe removal.

  6. HP Chromebook 11-2210nr Battery Replacement: paso 6, imagen 1 de 2 HP Chromebook 11-2210nr Battery Replacement: paso 6, imagen 2 de 2
    • Remove the six 4 mm screws holding the battery in place with a Phillips #1 screwdriver.

  7. HP Chromebook 11-2210nr Battery Replacement: paso 7, imagen 1 de 3 HP Chromebook 11-2210nr Battery Replacement: paso 7, imagen 2 de 3 HP Chromebook 11-2210nr Battery Replacement: paso 7, imagen 3 de 3
    • Carefully unplug the bundle power cable by pulling both edges towards you.

    • This successfully disconnects the battery from the laptop.

  8. HP Chromebook 11-2210nr Battery Replacement: paso 8, imagen 1 de 3 HP Chromebook 11-2210nr Battery Replacement: paso 8, imagen 2 de 3 HP Chromebook 11-2210nr Battery Replacement: paso 8, imagen 3 de 3
    • Carefully lift the battery and remove it from the laptop.

    • The battery may have an adhesive sticker attached to the bottom, if so apply more force when lifting up.

Conclusión

To reassemble your device, follow these instructions in reverse order.

0 comentarios

Agregar Comentario

Ver Estadísticas:

Ultimas 24 horas: 0

Ultimos 7 días: 1

Ultimos 30 días: 3

Todo El Tiempo: 341