Saltar al contenido principal

HP 7 1800 Display Replacement

Qué necesitas

  1. HP 7 1800 Display Replacement, Remove the back panel: paso 1, imagen 1 de 2 HP 7 1800 Display Replacement, Remove the back panel: paso 1, imagen 2 de 2
    • Carefully insert a Spudger into one of the corners of the tablet.

    • Slide the Spudger along the edge popping the tabs out along the way.

    • Be careful not to break the tabs.

  2. HP 7 1800 Display Replacement, Remove the battery: paso 2, imagen 1 de 3 HP 7 1800 Display Replacement, Remove the battery: paso 2, imagen 2 de 3 HP 7 1800 Display Replacement, Remove the battery: paso 2, imagen 3 de 3
    • Slide the Spudger under the battery to lift it off the adhesive.

    • Gently pull the cable connection from the motherboard using tweezers.

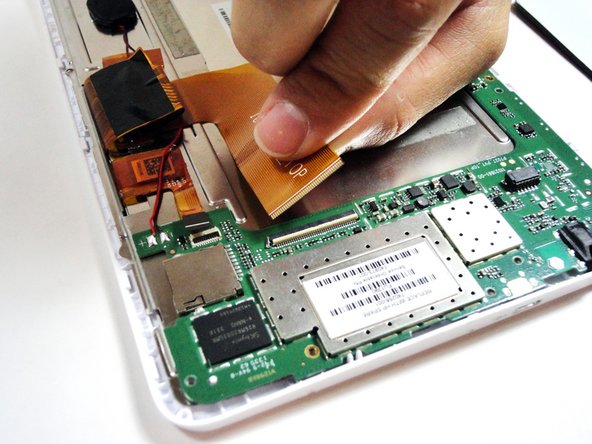
  3. HP 7 1800 Display Replacement, Remove the large ribbon cable: paso 3, imagen 1 de 2 HP 7 1800 Display Replacement, Remove the large ribbon cable: paso 3, imagen 2 de 2
    • Remove the larger ribbon cable by gently flipping the beige latch and pulling it out with tweezers.

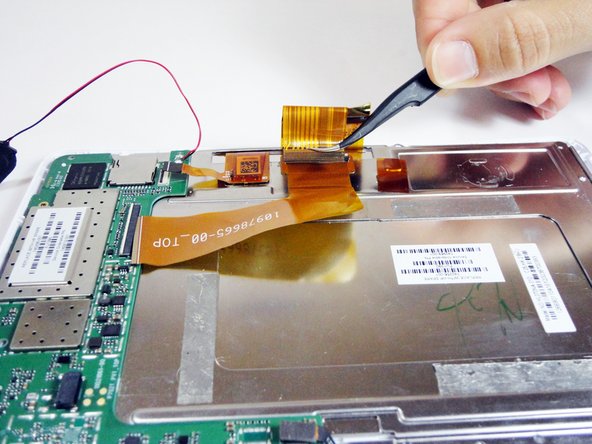
  4. HP 7 1800 Display Replacement, Remove the smaller ribbon cable: paso 4, imagen 1 de 2 HP 7 1800 Display Replacement, Remove the smaller ribbon cable: paso 4, imagen 2 de 2
    • Remove the smaller ribbon cable by gently flipping the black latch and pulling it out with tweezers.

  5. HP 7 1800 Display Replacement, Unscrew the 7 silver screws from the logic board: paso 5, imagen 1 de 1
    • Remove the following 7 screws:

    • Six 4.17mm Phillips #00 around the motherboard.

    • One 2.67mm Phillips #00 next to the front facing camera.

    • The 2.67mm screw circled in yellow is notably shorter than the other 6 screws circled in red.

  6. HP 7 1800 Display Replacement, Unplug the front facing camera from the logic board: paso 6, imagen 1 de 1
    • Gently pry the front facing camera plug up and off of the motherboard.

  7. HP 7 1800 Display Replacement, Remove the logic board: paso 7, imagen 1 de 1
    • Carefully lift the motherboard directly up.

  8. HP 7 1800 Display Replacement, Remove the ribbon cable attached to the metal plate: paso 8, imagen 1 de 2 HP 7 1800 Display Replacement, Remove the ribbon cable attached to the metal plate: paso 8, imagen 2 de 2
    • On the metal plate inside of the device, there is a ribbon cable in a loop. Flip the white tab and pull the cable out.

  9. HP 7 1800 Display Replacement, Unscrew the 7 black screws on the metal plate: paso 9, imagen 1 de 1
    • Unscrew the following black screws:

    • Seven 2.82mm Phillips #00 around the metal casing.

  10. HP 7 1800 Display Replacement, Remove the metal plate: paso 10, imagen 1 de 1
    • Gently lift the metal plate directly up.

  11. HP 7 1800 Display Replacement, Remove the display: paso 11, imagen 1 de 1
    • Gently lift the display directly up.

Conclusión

To reassemble your device, follow these instructions in reverse order.

5 personas más completaron esta guía.

TMD

Miembro Desde 01/21/15

765 Reputación

5 Guías creadas

Equipo

USF Tampa, Team 4-1, Brown Winter 2015 Miembro de USF Tampa, Team 4-1, Brown Winter 2015

USFT-BROWN-W15S4G1

4 Miembros

14 Guías creadas

2 comentarios

I have this same tablet but I cannot find a replacement screen. Do you know where I could find one?

Karen Porter - Contestar

I have the same problem

akiel panchan -

Agregar Comentario

Ver Estadísticas:

Ultimas 24 horas: 1

Ultimos 7 días: 5

Ultimos 30 días: 9

Todo El Tiempo: 1,888