Esta versión puede contener ediciones incorrectas. Cambie a la última instantánea verificada.
Qué necesitas
-
Este paso está sin traducir. Ayuda a traducirlo
-
To remove the battery, simply push the tabs towards each other.
-
-
Este paso está sin traducir. Ayuda a traducirlo
-
Remove the four screws (13.7mm) with a Phillips #0 screwdriver.
-
Be sure to lift all four rubber tabs to access screws (7.51mm) underneath.
-
-
Este paso está sin traducir. Ayuda a traducirlo
-
Use the Philips 0 screwdriver to unscrew the screws (7.51mm) that were underneath the battery.
-
-
-
Este paso está sin traducir. Ayuda a traducirlo
-
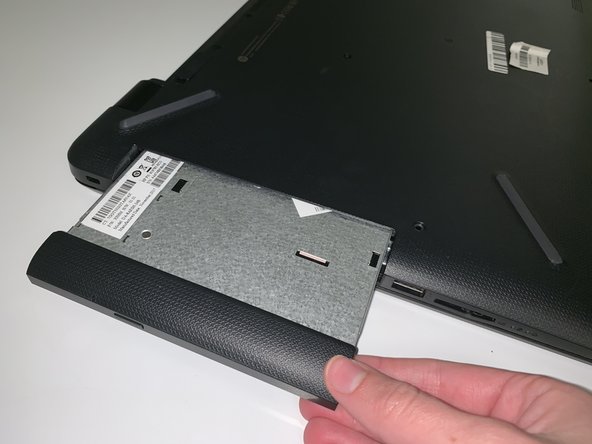
Pull outwards on the disk reader to remove from main frame.
-
-
Este paso está sin traducir. Ayuda a traducirlo
-
Remove the two screws using a Phillips #0 screwdriver.
-
-
Este paso está sin traducir. Ayuda a traducirlo
-
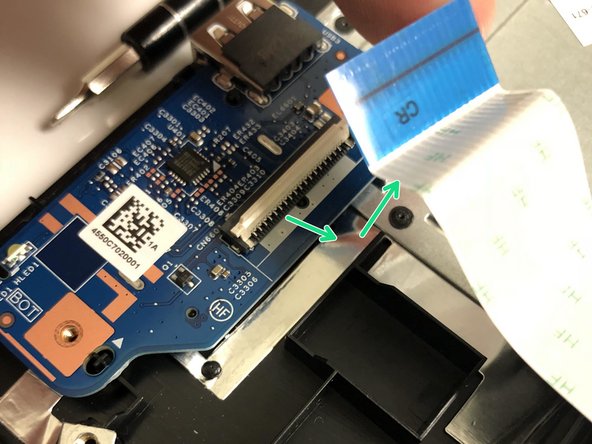
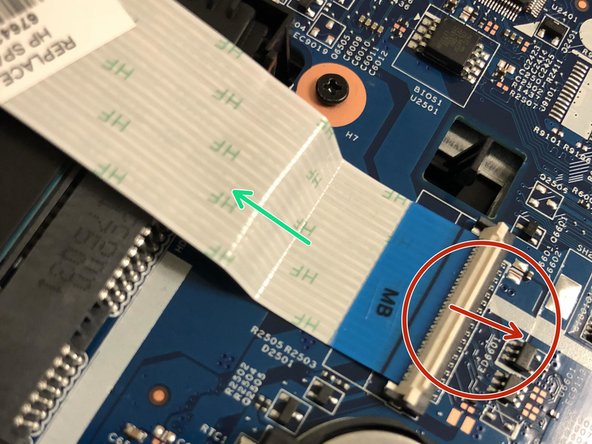
At both ends of the connector ribbon, unclip both connectors.
-
Gently remove the ribbon from the unlatched area.
-


Equipo

University of North Texas, Team S7-G2, Thompson Fall 2018 Miembro de University of North Texas, Team S7-G2, Thompson Fall 2018
UNT-THOMPSON-F18S7G2
6 Miembros
7 Guías creadas