Saltar al contenido principal

HP 17-bs049dx USB Port Replacement

Qué necesitas

  1. HP 17-bs049dx USB Port Replacement, Battery: paso 1, imagen 1 de 1
    • To remove the battery, simply push the tabs towards each other.

    • The battery will come out with force, be sure to keep anything fragile away from the laptop during this process.

  2. HP 17-bs049dx USB Port Replacement, Back Panel: paso 2, imagen 1 de 1
    • Remove the four screws (13.7mm) with a Phillips #0 screwdriver.

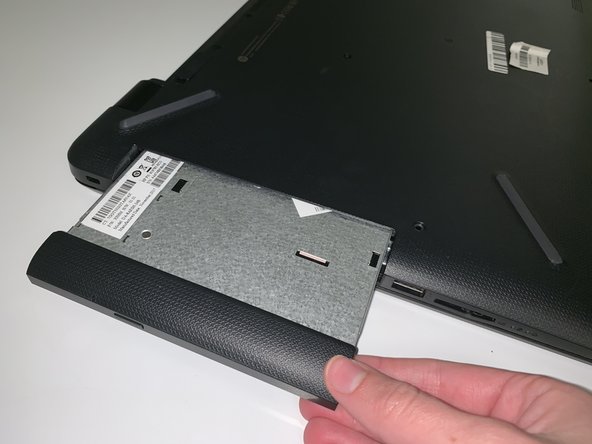
    • Be sure to lift all four rubber tabs to access screws (7.51mm) underneath.

    • Rubber tabs will require force to access screws.

  3. HP 17-bs049dx USB Port Replacement: paso 3, imagen 1 de 1
    • Use the Philips 0 screwdriver to unscrew the screws (7.51mm) that were underneath the battery.

  4. HP 17-bs049dx USB Port Replacement: paso 4, imagen 1 de 2 HP 17-bs049dx USB Port Replacement: paso 4, imagen 2 de 2
    • Pull outwards on the disk reader to remove from main frame.

    • This removal will require force.

    • All screws must be removed before removing disk reader.

  5. HP 17-bs049dx USB Port Replacement: paso 5, imagen 1 de 1
    • Lift back panel to access internal components.

    • You will need to use force to pry it open.

  6. HP 17-bs049dx USB Port Replacement, USB Port: paso 6, imagen 1 de 2 HP 17-bs049dx USB Port Replacement, USB Port: paso 6, imagen 2 de 2
    • Remove the two screws using a Phillips #0 screwdriver.

  7. HP 17-bs049dx USB Port Replacement: paso 7, imagen 1 de 3 HP 17-bs049dx USB Port Replacement: paso 7, imagen 2 de 3 HP 17-bs049dx USB Port Replacement: paso 7, imagen 3 de 3
    • At both ends of the connector ribbon, unclip both connectors.

    • Gently remove the ribbon from the unlatched area.

Conclusión

To reassemble your device, follow these instructions in reverse order.

0 comentarios

Agregar Comentario

Ver Estadísticas:

Ultimas 24 horas: 0

Ultimos 7 días: 0

Ultimos 30 días: 0

Todo El Tiempo: 234